Data Cable / Connections Data Cable Connection (OBD-II/EOBD Vehicles)
12
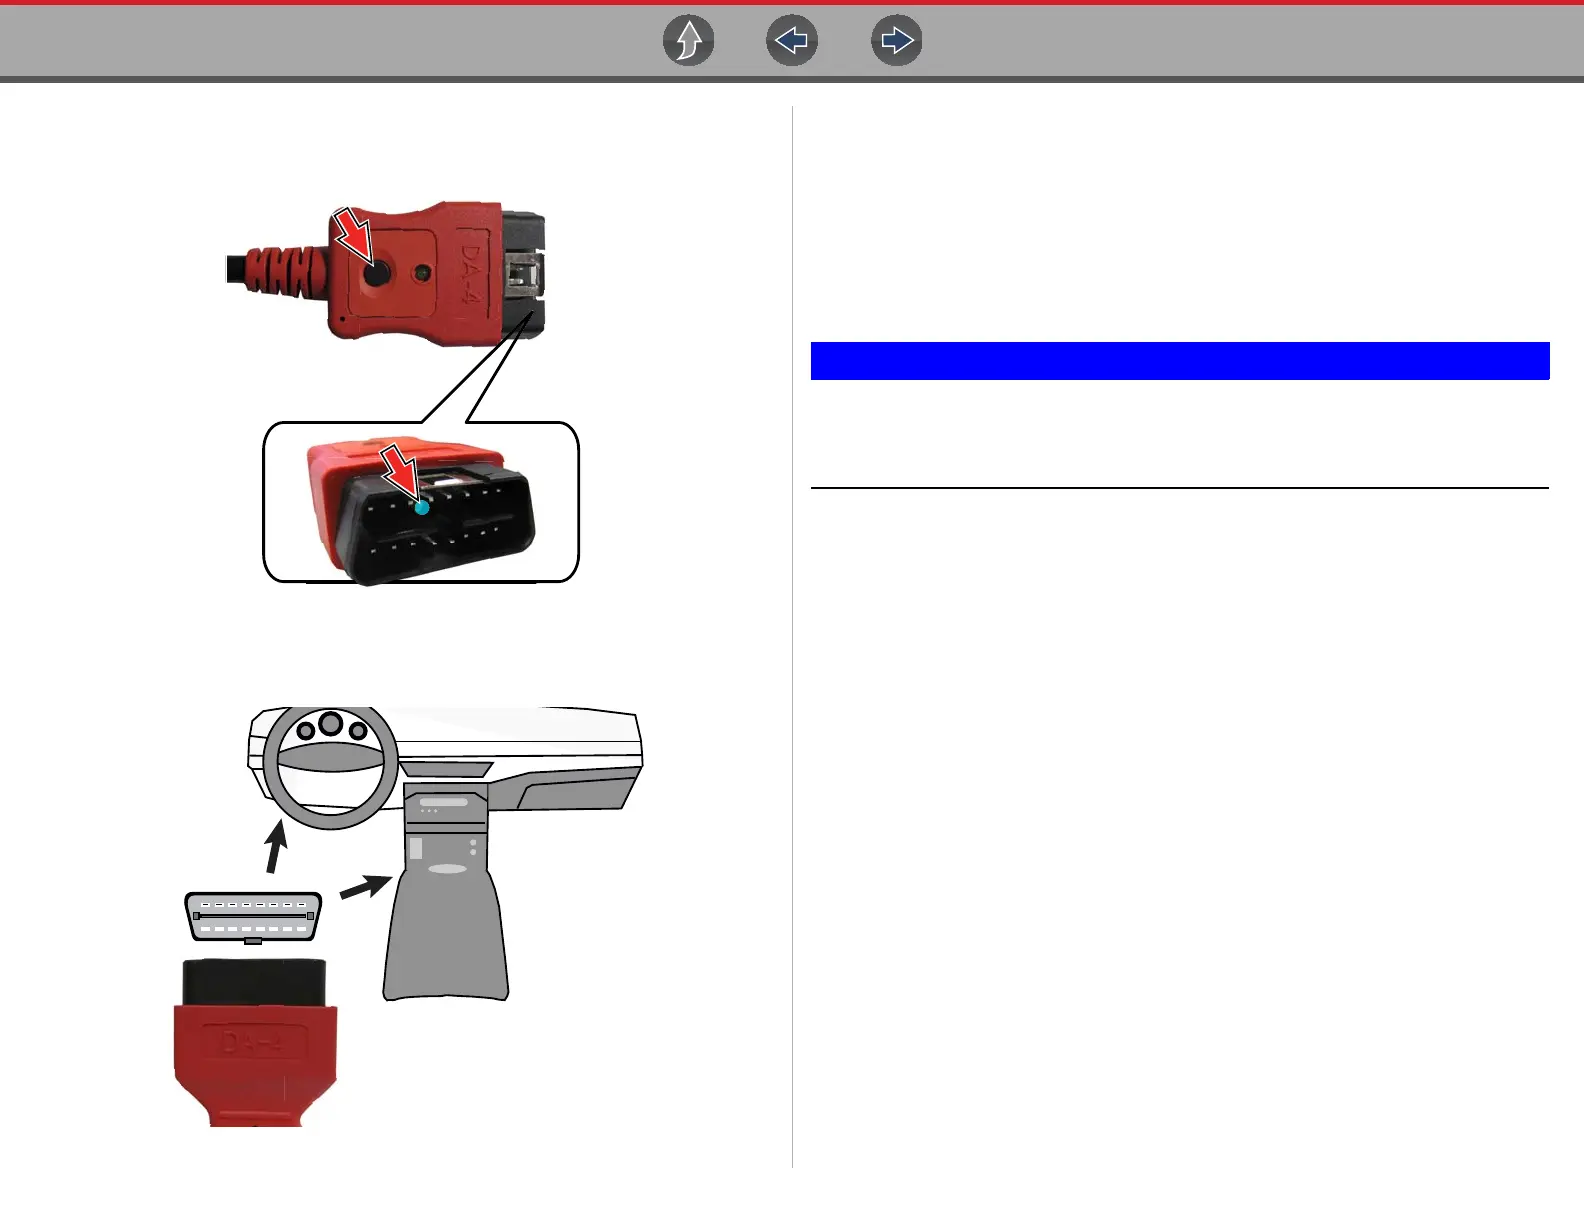
3. If needed, press the LED flashlight button switch on the end of the data cable
to turn the LED flashlight on (Figure 4-3), and locate the DLC.
Figure 4-3 DA-4 data cable LED flashlight
4. Connect the16-pin (J-1962) end of DA-4 cable (Figure 4-4) to the vehicle DLC.
Figure 4-4 DA-4 data cable (16-pin end) connection to vehicle DLC (typical DLC locations)
5. Select Continue once the data cable is connected.
The diagnostic tool establishes communication with the vehicle, then displays
a list of available tests, see Scanner on page 25 for additional information.
4.1.1 Optional OBD-II/EOBD Data Cable
A shorter 6 ft. (1.8 m) DA-4 OBD-II data cable is available as an option.
Contact your sales representative to purchase all optional accessories.
Only use original Snap-on data cables and accessories with your
diagnostic tool. Total data cable length must not exceed 114.17 inches
(2.9 meters).
21 3 4 5 6 7 8
109 11 12 13 14 15 16
DA-4
J-1962

 Loading...


