Scanner Viewing and Saving Data (PIDs)
44
z To resume data collection (after pausing):
• Select the Start icon .
The screen changes back to display data (Figure 6-33).
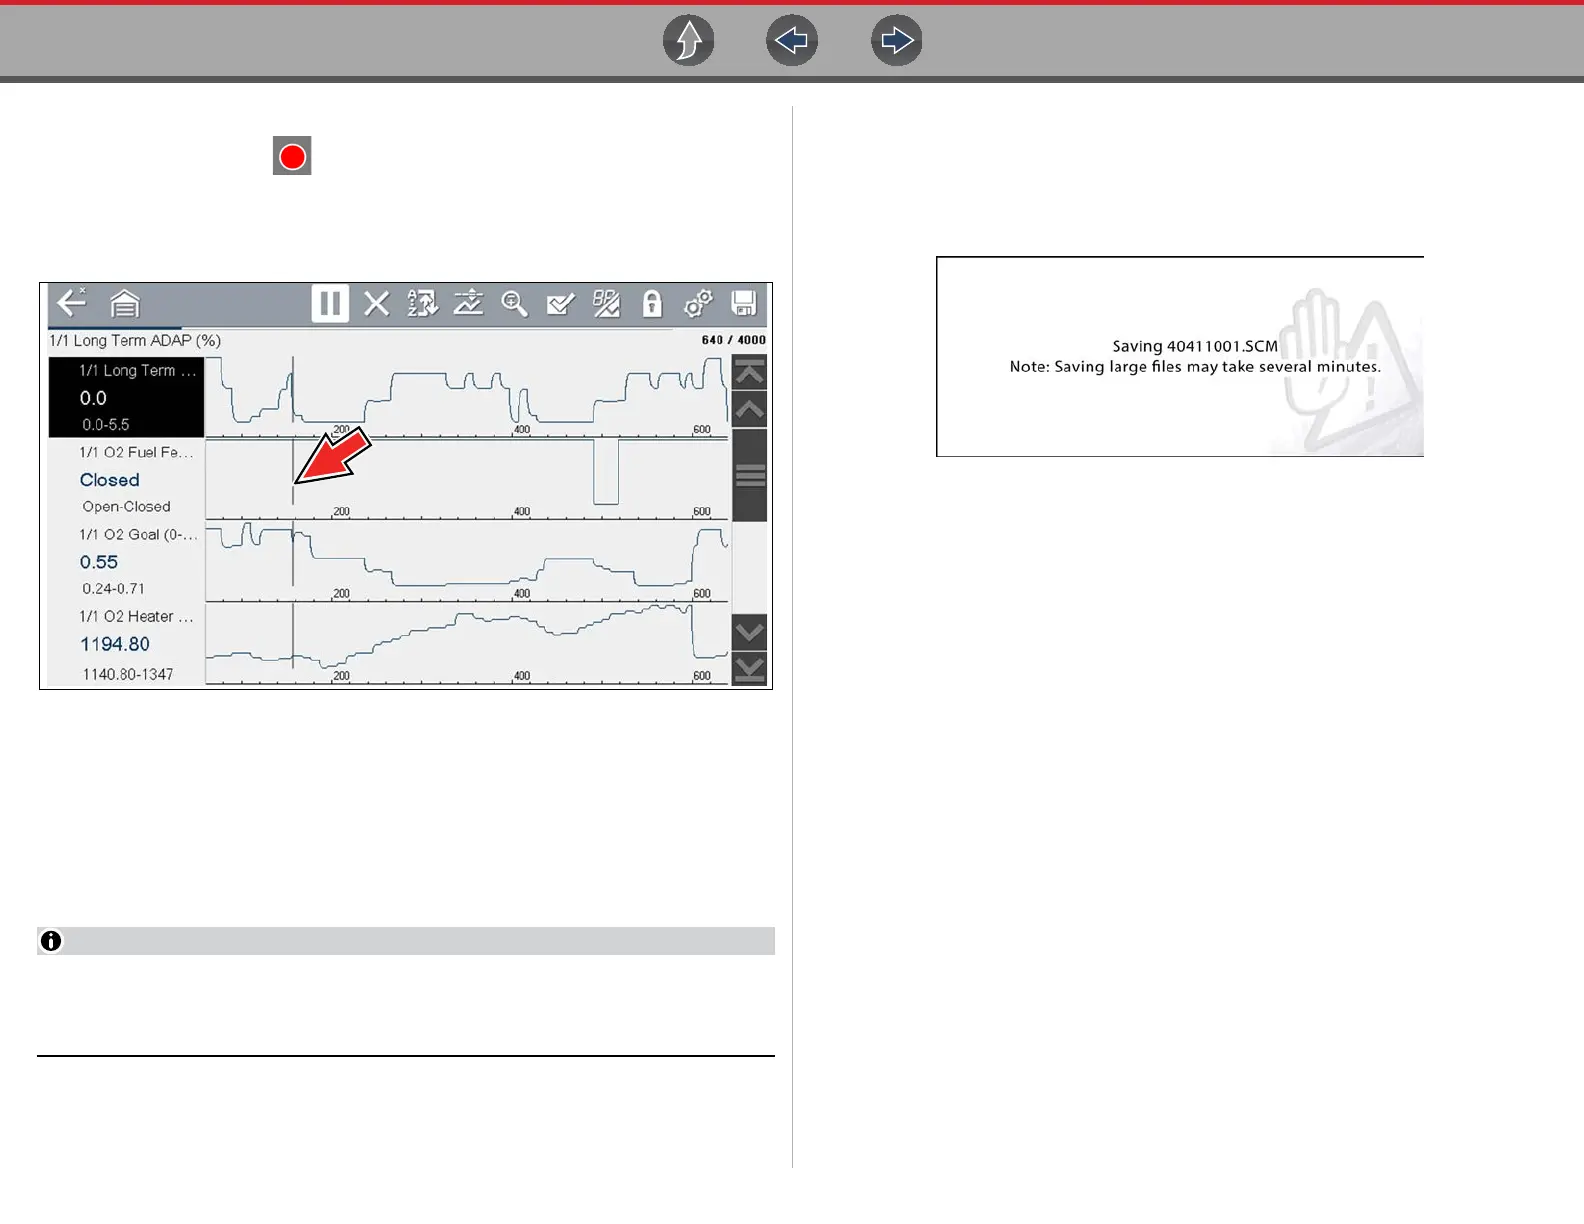
A vertical gray cursor is displayed on all PIDs, indicating where the data was
paused (Figure 6-33).
Figure 6-33
6.4.7 Saving Data Files
Saving data is useful when trying to isolate an intermittent problem or to verify a
repair. During normal operation, data from the vehicle’s ECM is continuously being
stored in buffer memory as it is displayed onscreen. Selecting Save writes stored
buffer memory to a file.
The Save icon performs the same function as “Save Movie” function choice
for the programmable Shortcut button, see Configure Shortcut Button on
page 140 for details.
z To save data:
While capturing or reviewing data, select the Save icon.
An onscreen message is displayed to indicate the data file is being saved
(Figure 6-34).
Figure 6-34 Save dialog box
z To view saved data (on the diagnostic tool):
The saved file can be viewed by selecting Previous Vehicles and Data >
View Saved Data. See View Saved Data on page 136 for basic navigation.
1. Select the desired data file (.SCM file extension).
2. Change the view type and zoom levels as needed.
3. In graph view, use the control icons to move through the data (Figure 6-35).
Toolbar control icons are described in Scanner Control Icons on page 27 and
Common Toolbar Control Icons on page 9.
The blue (vertical cursor) (Figure 6-35) indicates your position in the data and
is denoted by the current position value (Figure 6-35) in the counter display.
The cursor displays in all PIDs.

 Loading...


