OBD-II/EOBD OBD-II/EOBD Menu
84
10.2.2 OBD Direct
OBD Direct includes the following menu and submenu choices:
• OBD Diagnose
– Start Communication - initiates a test session
– Connector Information - provides DLC location details
– Manual Protocol Selection - provides choices for communication protocol
• OBD Training Mode - allows you to familiarize yourself with the capabilities of
OBD-II/EOBD while navigating through menus without being connected to a
vehicle.
Start Communication
Use the following procedure to begin an OBD-II/EOBD test session:
z To perform an OBD-II/EOBD Test:
1. Connect the data cable to the test vehicle.
2. Select Start Communications from the OBD-II/EOBD menu.
A series of messages are displayed indicating automatic detection of vehicle
type (12 or 24 V) has occurred and then the detected controllers are displayed.
The diagnostic tool establishes a communication link with the test vehicle, then
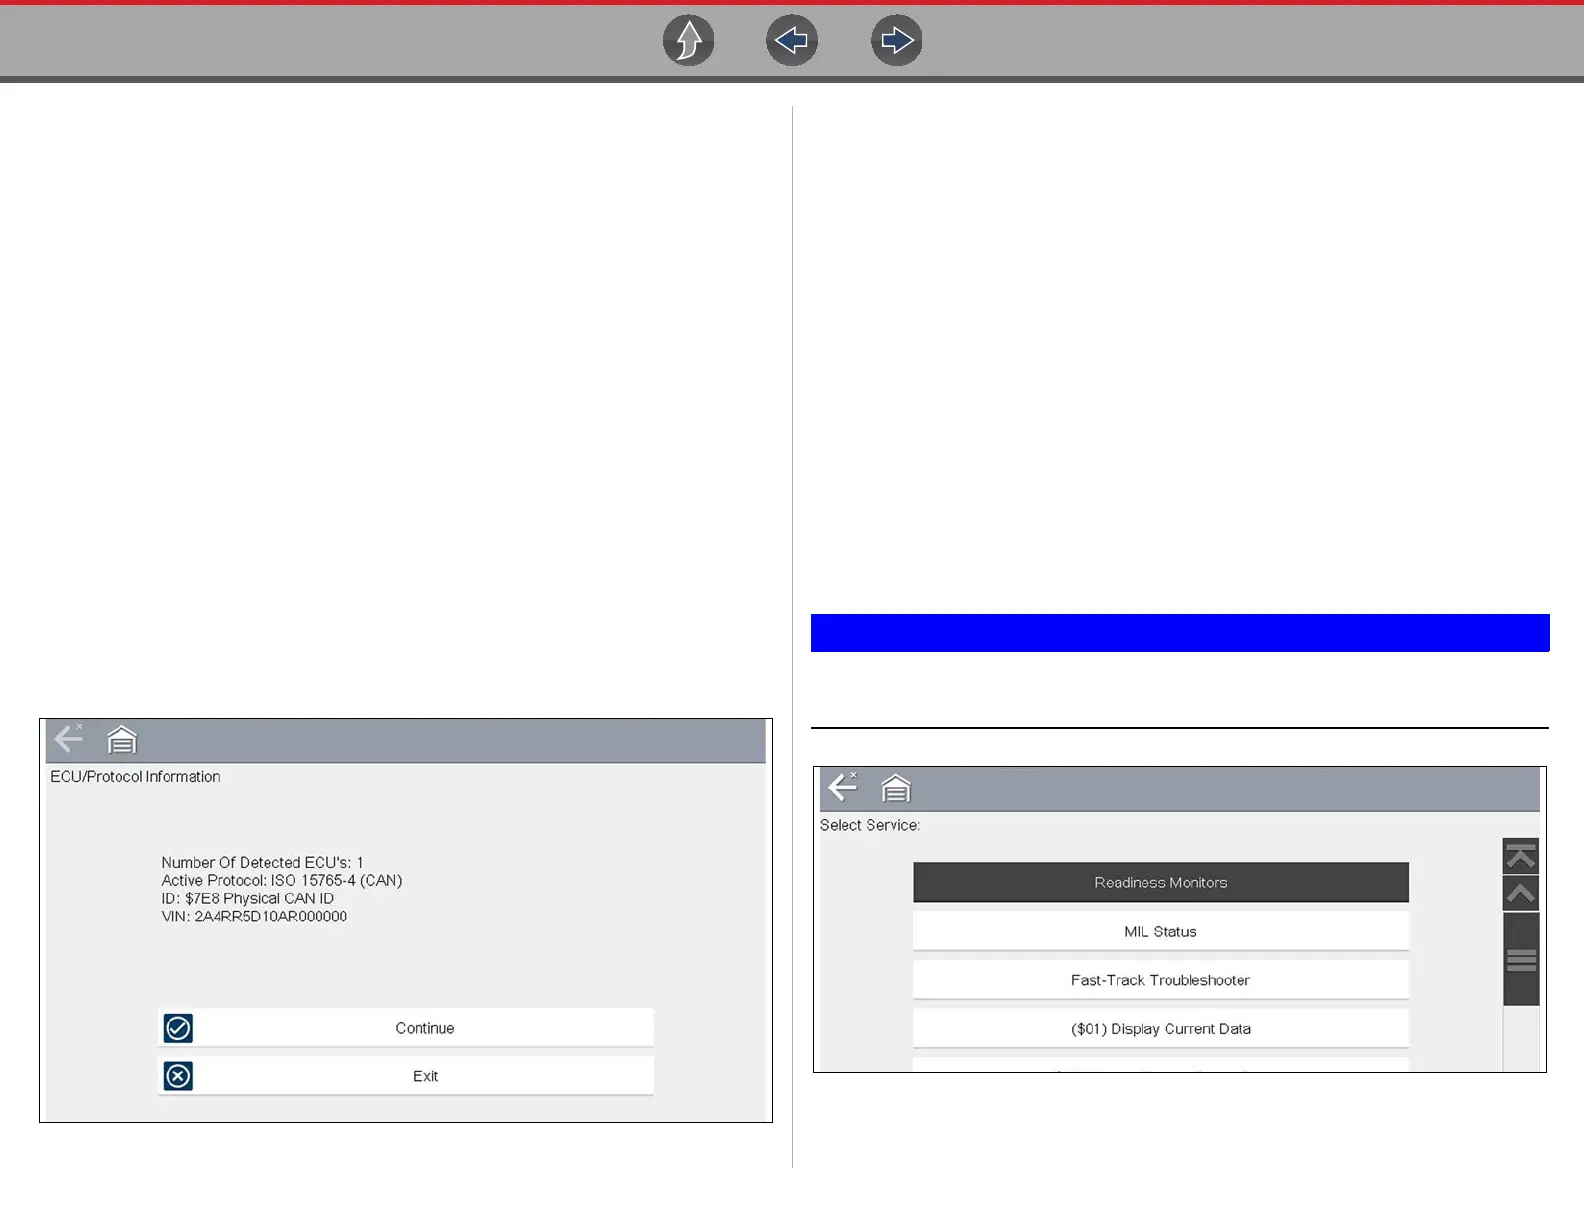
opens an information screen (Figure 10-4).
Figure 10-4 Protocol information
The information screen shows how many control modules were detected,
which ECM is communicating, and which communication protocol is being
used.
3. Select Continue.
A Select Service menu of available tests opens:
– Readiness Monitors on page 85
– MIL Status on page 85
– Fast-Track Troubleshooter on page 85
– ($01) Display Current Data on page 85
– ($02) Display Freeze Frame Data on page 85
– ($03) Display Trouble Codes on page 85
– ($04) Clear Emissions Related Data on page 85
– ($05, 06, 07) Display Test param./Results on page 86
– ($08) Request Control of On-board System on page 86
– ($09) Read Vehicle Identification on page 86
– ($09) In-use Performance Tracking on page 86
– ($0A) Emission Related DTC with Permanent Status on page 87
All service modes are not supported by all vehicles, so the available
menu selections will vary.
Figure 10-5 Service mode menu
4. Select a test to continue.

 Loading...


