M
onitor Level Display and Calibrated listening level
Further monitor calibration options are accessed via the TFT screen. The 16 boxes at the base of the screen indicate the
functions assigned to the 16 buttons in two rows of eight below the screen. Press the SSL button, followed by MISC >
SETUP and locate the following options in the list:
M
onitor Gain Display: Music (Off to 11)
Film (Off to 95dB)
Gain (Off to 0dB)
Monitor Set CAL level is: 70 - 90
Furthermore it is possible to change the Monitor Level pot’s resolution between ‘Fine’ and ‘Large’ in ‘Music’ or ‘Gain’ modes
by pushing down on the pot. The display above it will show which mode it is in. ‘Fine’ mode makes adjustments in 0.1dB
steps while ‘Large’ mode adjusts the value in 0.5dB steps.
When working in ‘Film’ mode pushing down on the Level pot will adjust the monitor volume to the user defined calibrated
level selected in the SSL > Misc > Setup menu. Normal selection here would be the international recognized 85dB but
it is possible to set a range from 70dB to 90dB. It is recommended that you use a SPL meter to calibrate your studio’s
monitoring level to match that displayed on your Monitor Level display.
The monitor gain that corresponds to +85dB SPL can be set by adjusting the main monitor level control to give an SPL of
85dB, then pressing the 85dB switch in the first CAL page within the MONITOR OPTIONS Function keys.
Note that if you make a change to this value in the Setup menu while running in Calibrated mode this change will not be
reflected until you come out of Calibrated mode and re-enter it. You can tell which mode you have switched into as it will
display either Cal for calibrated or UCal for uncalibrated. Bear in mind that switching to a calibrated level of 85dB may
cause a significant increase in listening volume so take care not to damage your hearing and of course your loudspeaker
monitoring system.
The third Monitor Gain Display option, ‘Gain’, displays the volume in decibels, with a maximum value of 0dB. All
other values are reductions of this level through to ‘OFF’.
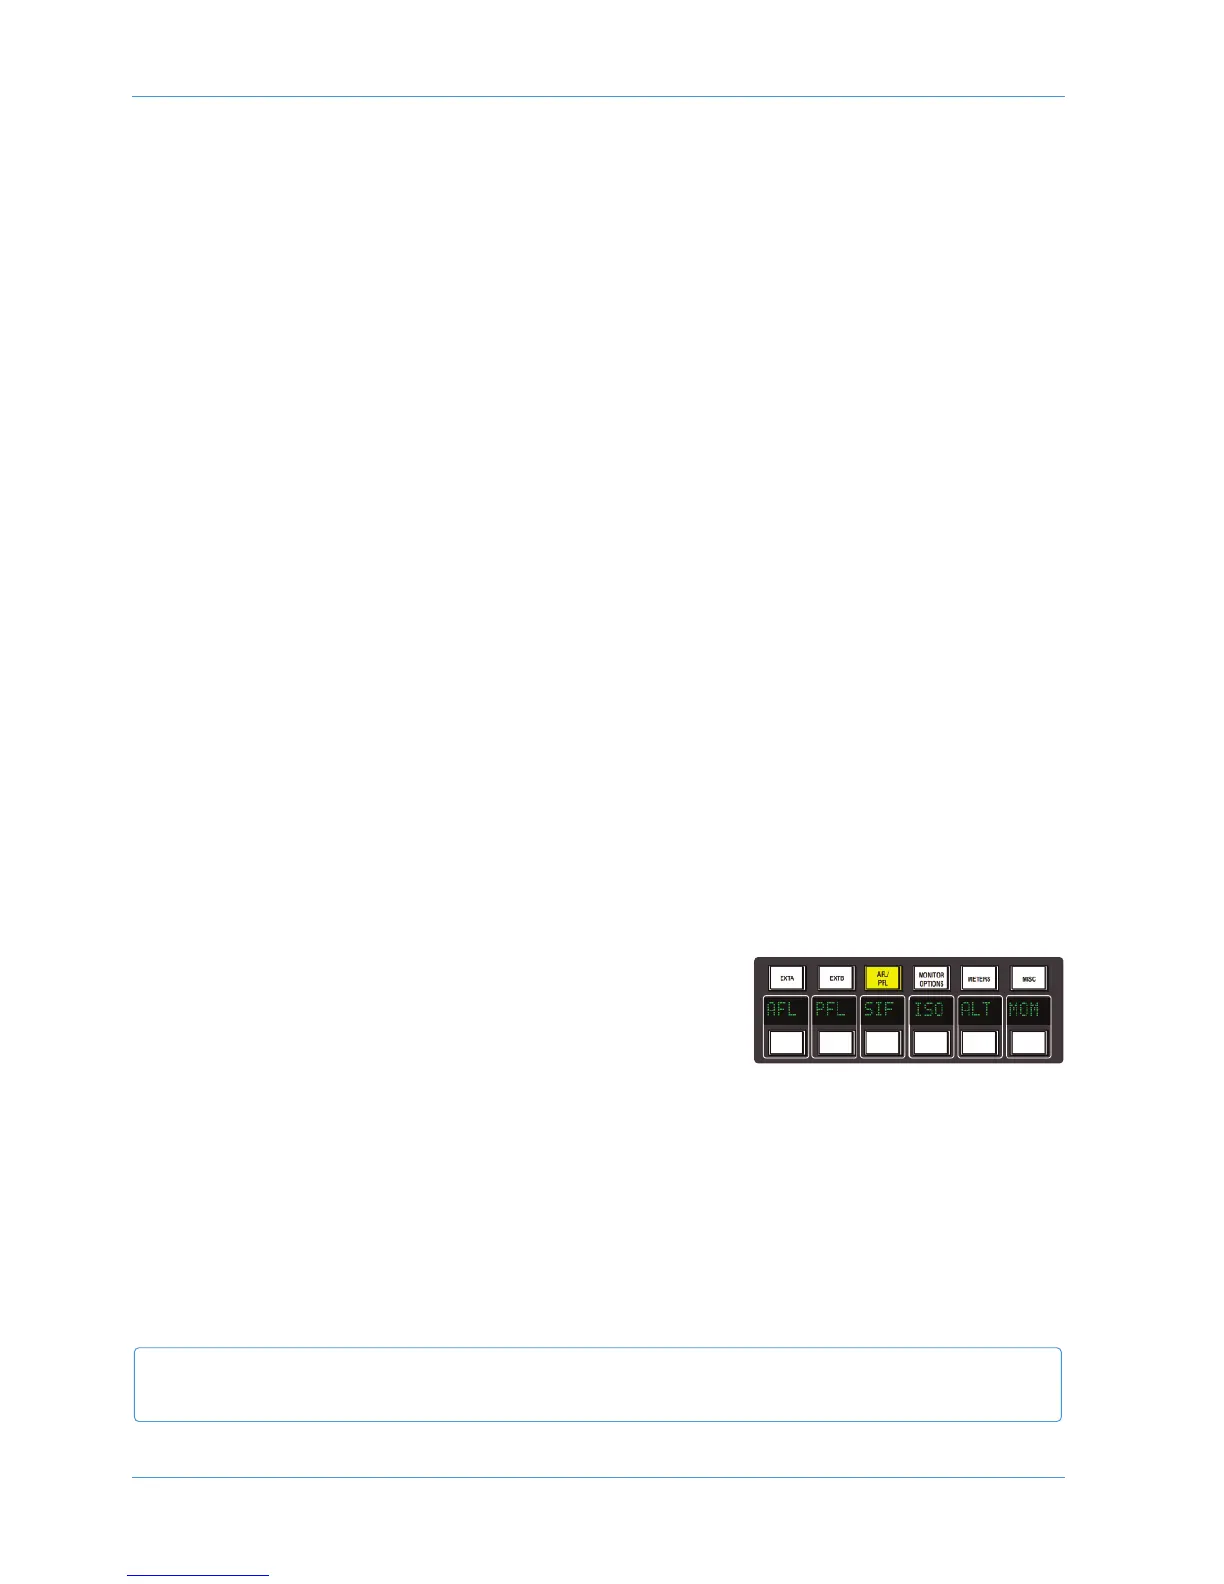
SOLO Configuration
The console’s default Solo mode is a destructive solo-in-place – soloing a channel cuts all other channels. The alternative
solo modes – AFL, PFL and Solo-in-front are selected via the Function keys. Press the AFL/PFL button above the display
to produce the following options in the lower row of softkeys:
AFL Pressing a channel solo button routes the post pan signal, via the
stereo AFL bus and the AFL level control, to the currently
selected monitor speakers.
PFL Pressing a channel solo button routes a mono pre-fade signal, via
the PFL bus and the PFL level control, to the left and right Main
monitor speakers. Optionally, PFL signals may be fed to the Mini loudspeakers – see PFM on Page 3-17.
SIF (Solo In Front) Pressing a channel solo button routes a mix of the AFL signal and the selected left and right
monitor sources to the monitor outputs. The SIF level control (see Page 3-16) adjusts the balance between
AFL signal and desk output.
ISO This allows you to solo isolate selected channels.
ALT Makes channel solo buttons intercancel with each other, so that soloing one channel will clear any other solo
selections.
MOM This option makes all the channel solo buttons momentary.
AWS 948
It is also possible to link the solo function in the two channel paths by pressing the LNSL Function Key, in the bottom
right of the Function keys when none of the upper Function keys are selected.
Analogue Operations
Page 3-20 AWS 924-948 Owner’s Manual