HUI PLUG-IN CONTROL
Plug-In Editor
AWS consoles come with a powerful Plug-in Editor located in
the console centre section. From here, plug-ins and hardware
inserts can be assigned, and plug-in parameters can be edited.
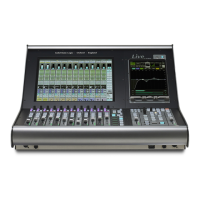
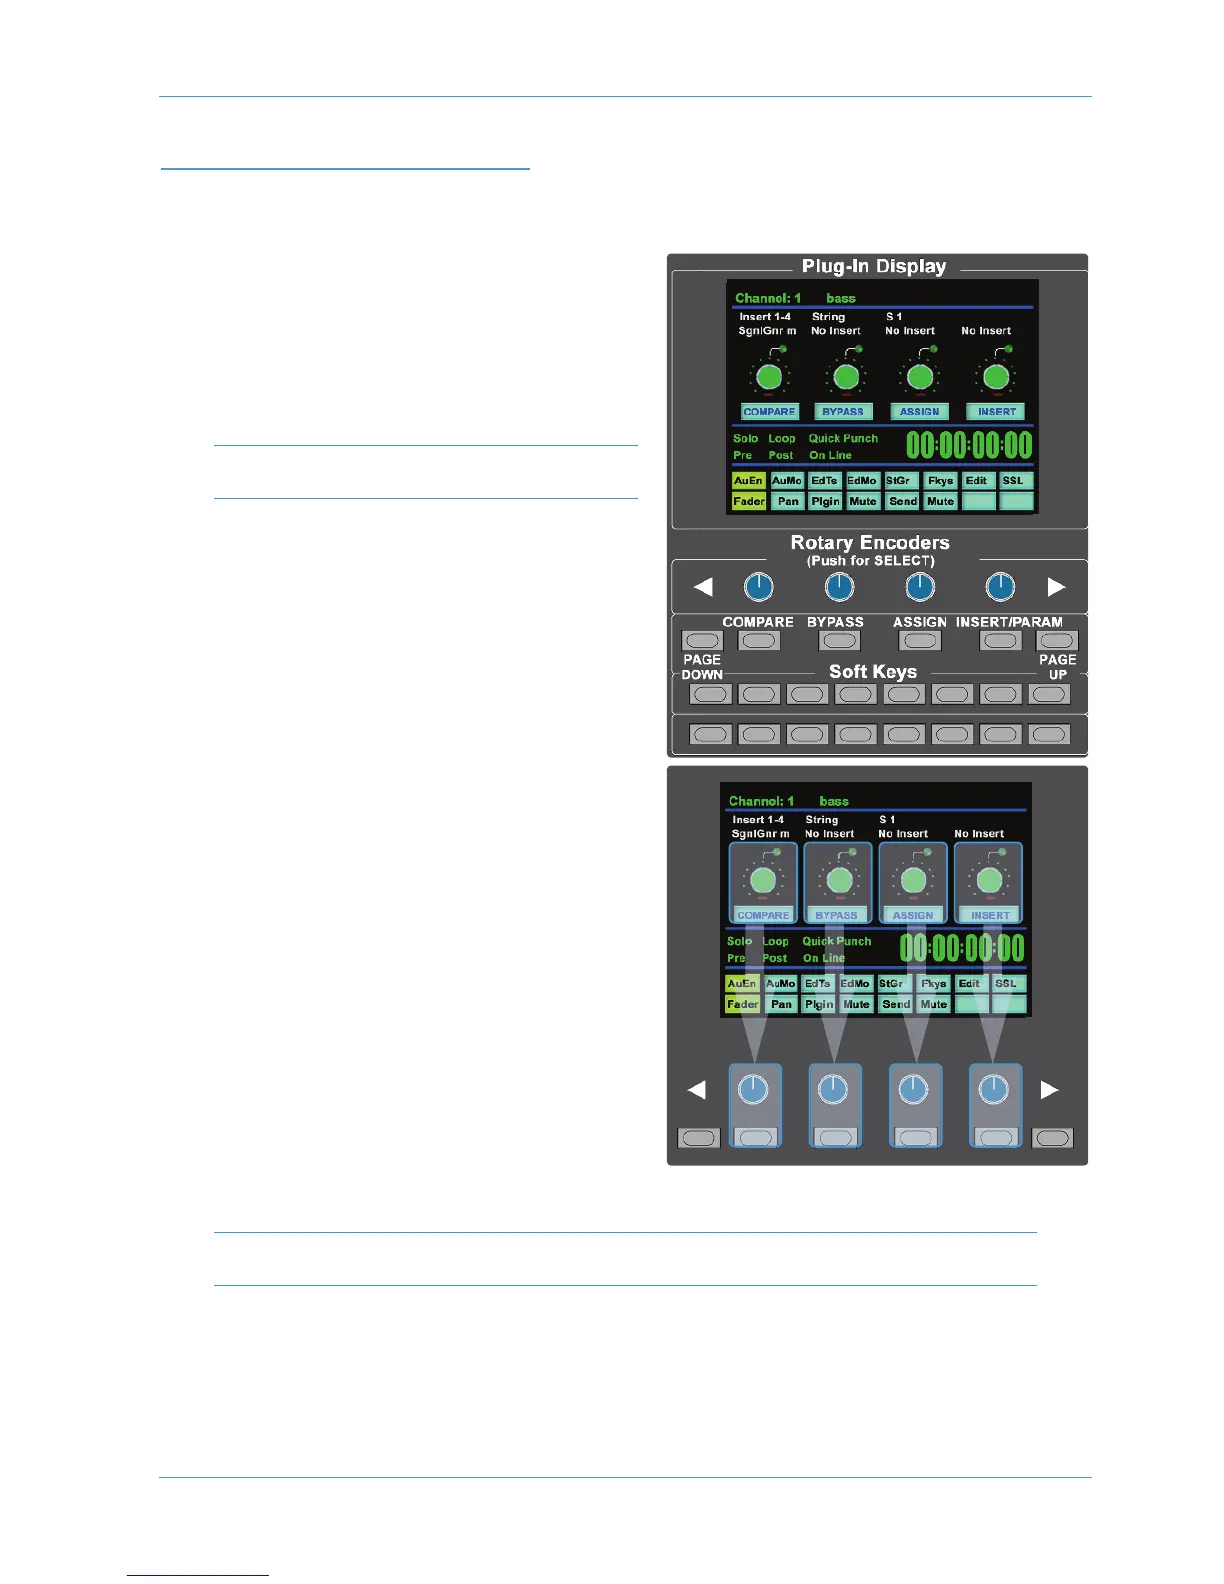
Plug-In Editor Display
The Plug-In Editor uses a high resolution TFT display, four V-
pots and four soft buttons to control the parameters of any
plug-in.
The display is also used to show the position and status of
the DAW and to provide access to a range of paged menus.
The currently selected EDIT channel name is displayed at the
top of the screen. Next are the plug-in control displays. Just
below this are the transport status displays and timecode
display.
The bottom section is used for soft key menu selection.
Plug-In Editor Controls
The controls for the display are located just below the screen
area. The four V-pots and associated soft keys map to the
corresponding controls on the display. The V-pots also have
push-push select switches which perform various functions.
The display also shows information from the DAW at the top
of the editor display.
Paging Buttons
The left/right paging buttons page through either available insert
slots in INSERT mode, or plug-in parameters in
PARAMETER mode (see following page).
Selecting DAW Channels to Edit
Select EDIT mode on the Master Control Panel then use the
channel SEL buttons to choose the channel you wish to edit.
The EDIT flag in the channel meter will light. The DAW will
highlight the selected channel and currently selected plug-in.
Press ALT to display the plug-in window.
Alternatively, select a channel by double clicking on one of the
insert points in the Mix window. Note that from V6.4 and above
it will be necessary to move channels 9-16, 17-24 into bay 1 channels 1-8.
Bank switching channels leaves the Plug-In Editor with the channel assigned to it. The channel EDIT tally will show
this.
1
1
2 3 4
2 3 4
DAW Control
AWS 924-948 Owner’s Manual Page 4-21