APPENDIX C: Alternative Connection Methods
C1 Wireless Stand-Alone
• It’s usually best to connect the SOLO while it is next to the wireless computer. Once connectivity is
established, you can then experiment to see how far from the computer the SOLO can be located.
• There are two situations to consider before getting started. If you are not sure which applies to your SOLO,
then select B and go to that section first.
A. The SOLO has never been set up wirelessly to a network.
B. The SOLO has previously been connected to a wireless network.
A. The SOLO has never been set up wirelessly to a network
• Power on the SOLO and wait for the light to come on.
• On your computer, open your list of available networks. In the list, you should see one with this type of name
format: HI_LINK_XXXX where “XXXX” can be any alphanumeric combination, such as “92BF” or “08A5”.
• Select that network and enter the following Network Key when prompted: 12345678. The IP Address for
accessing the SOLO in this mode is 192.168.16.254.
• Proceed to Section 1.08.2. Remember that your computer will not have access to the Internet or other
network devices while in Wireless Stand-alone mode.
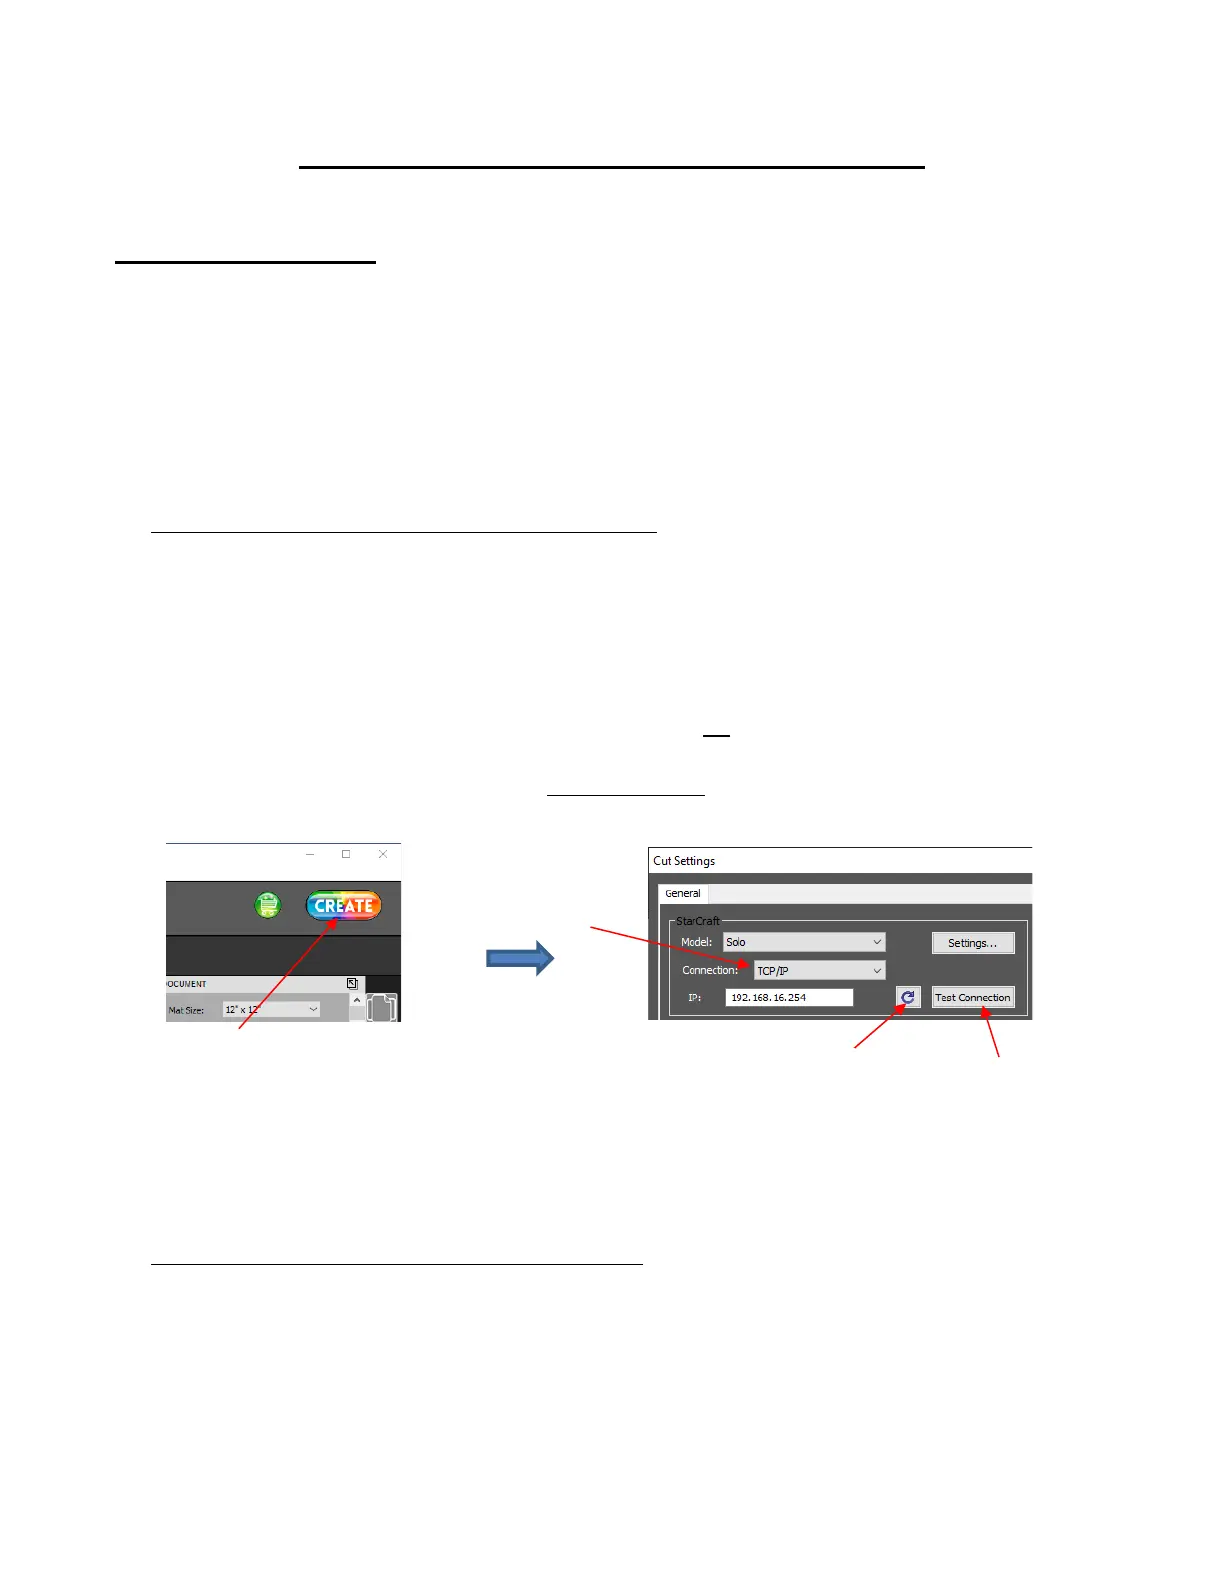
• In CREATE, click the CREATE button in the upper right corner of the screen to open the Cut Settings
window. Then perform the following steps:
• If the SOLO is successfully connected to your computer, pressing Test Conection will cause the cutting
head to do a quick left-right jog. Note that it is natural for there to be a slight delay in response when the
connection is first established after powering on.
B. The SOLO has previously been connected to a network
• On the SOLO’s control panel, select Set and then select Wifi. The Wifi screen will appear: