• When using the cutting mat, it is recommended that the material be placed in the middle of the mat. In some
situations, you might prefer to move the leftmost pinch wheel over to the far-left side so that it is beyond the
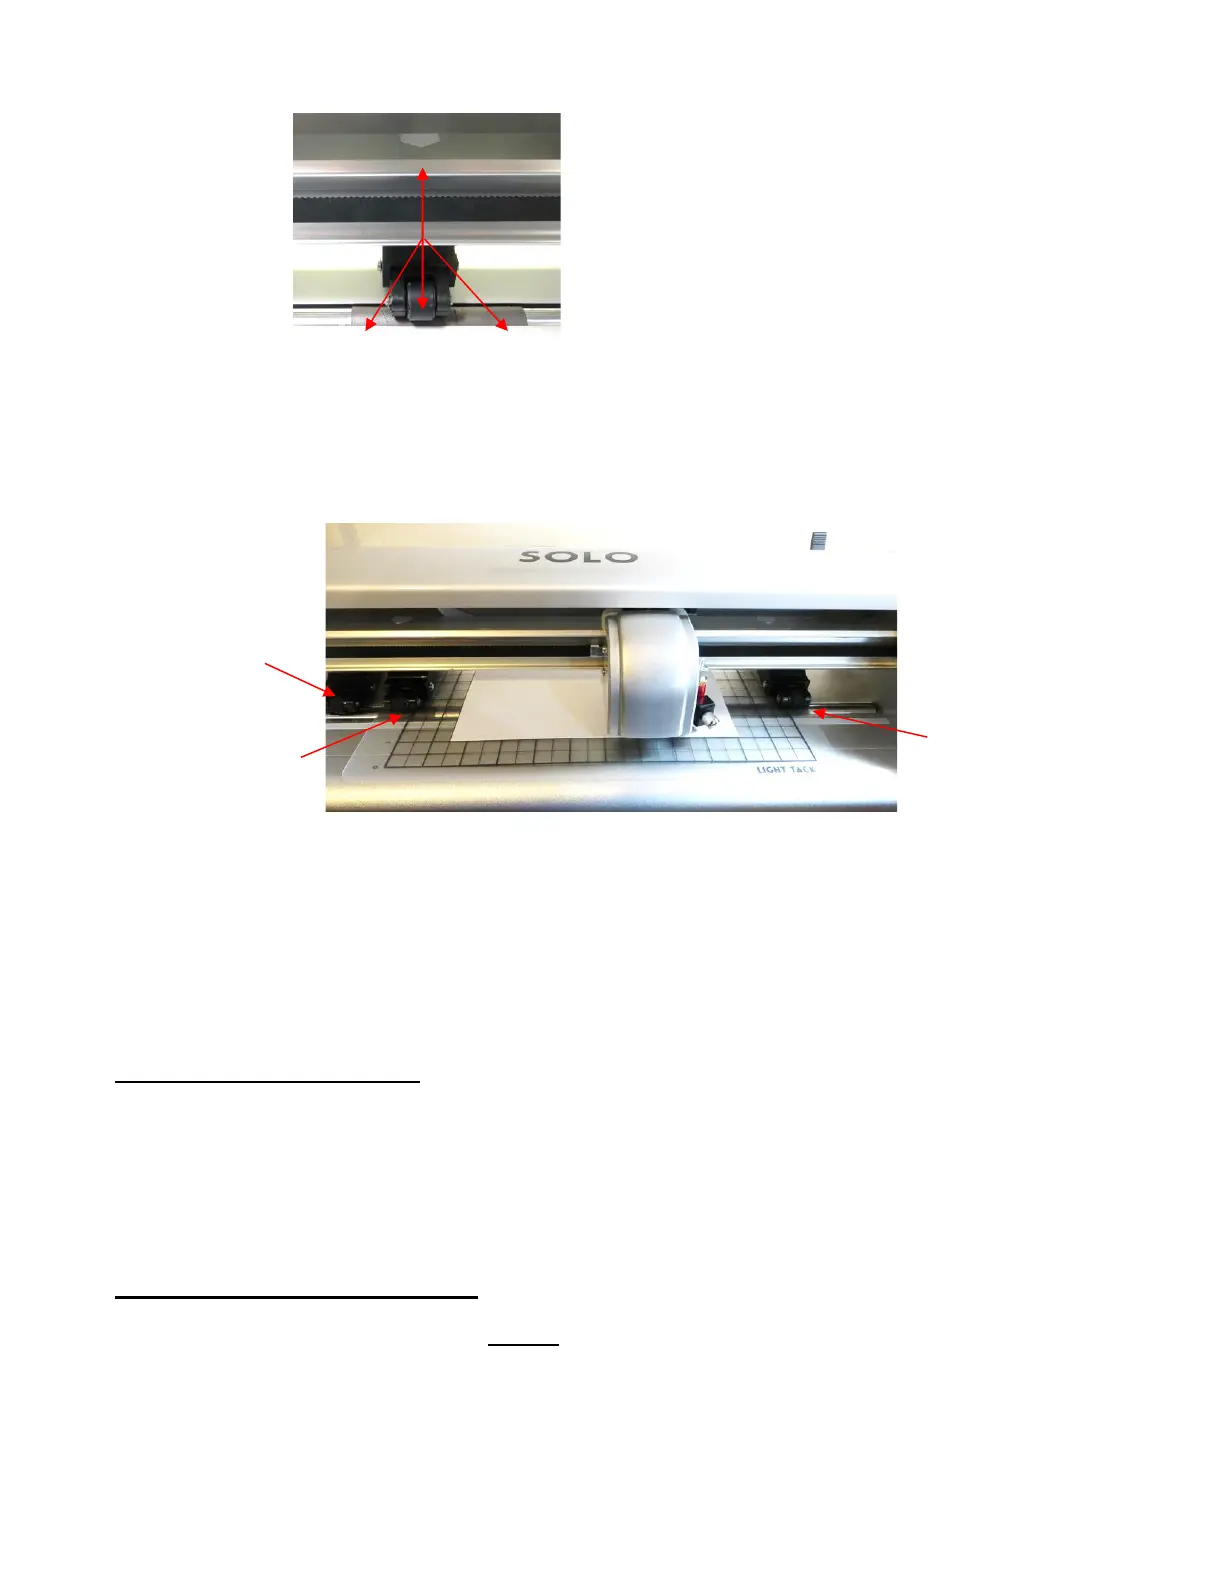
grit shaft. Then slide the middle pinch wheel to serve as the left-side grip and the right pinch wheel left in the
far-right position as shown in the following photo. This keeps the pinch wheels off the material when cutting
materials like craft foam and icing sheets. It also still provides an equal balance while the mat moves in and
out during cutting:
• Note that if your material is very wide, then it is fine to have the pinch wheels over the material. However,
you may need to be extra careful when removing any cut shapes or waste material in those locations.
•
Once the pinch rollers are in position, lower them to keep your media in place. When using the
cutting mat, you need at least two wheels near the outside edges of the mat, thus center the mat
inside the cutter (versus having it all the way to one side).
1.11 Begin with the Test Pen!
• Before cutting with the blade, start with the test pen and have the SOLO draw some shapes onto a sheet of
paper. This is important so that you can become familiar with the following:
Loading the mat or material into the SOLO
Understanding how to control where shapes will cut
1.11.1 Loading Test Pen and Paper
• You have two options when using the test pen:
Insert a sheet of copy paper (Letter or A4 in size) directly into the Solo:
Use the white arrow labels as a guide for pinch roller
placement.
Rollers can be anywhere along a gray grit shaft, as
long as they are completely over it.
 Loading...