EasyManua.ls Logo

Starcraft SOLO - Appendix B Control Panel Advanced Settings; B1 Array; B2 Show Point

Starcraft SOLO
114 pages
Print Icon
To Next Page IconTo Next Page
To Previous Page IconTo Previous Page
Loading...
97
Appendix B Control Panel Advanced Settings
The optional settings in the Advanced Settings screen are:
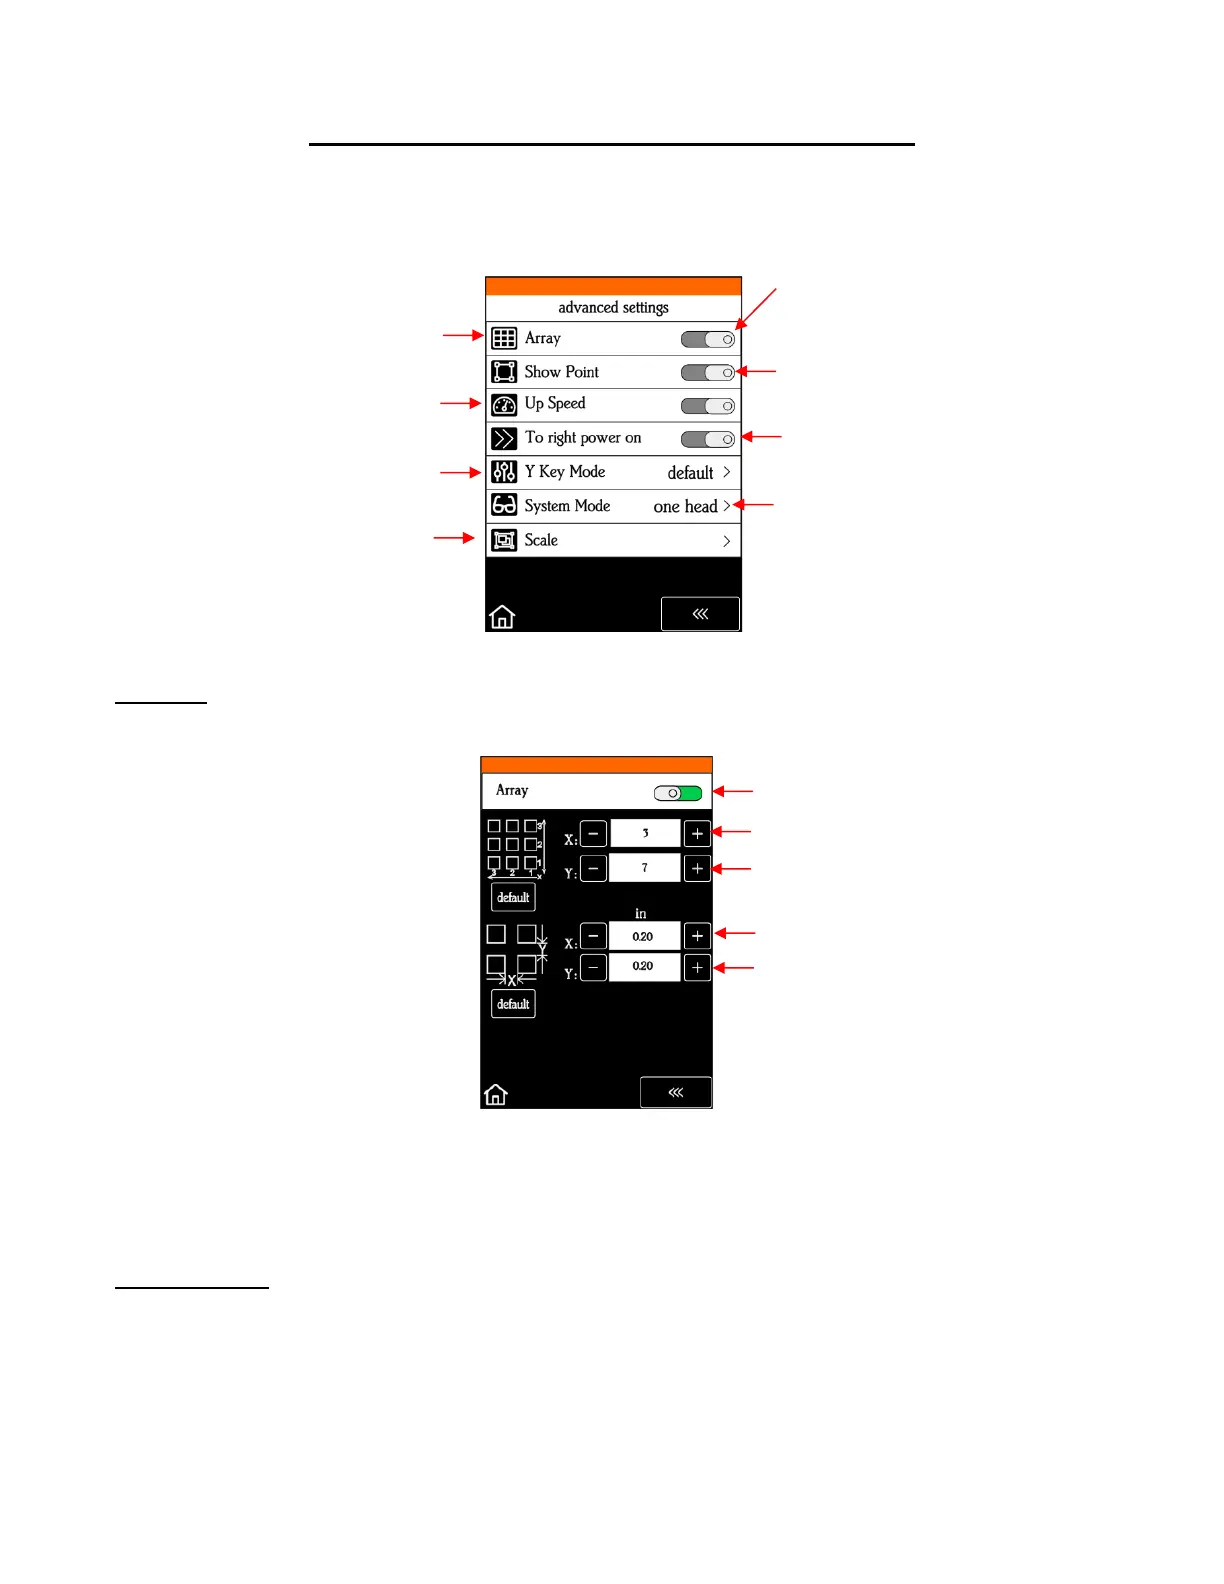
B1 Array
Tap the Array button to open the Array screen:
In the above screenshot, the shape sent to the SOLO would cut 3 across and 7 up & down, for a total of
21 shapes. The spacing between each shape would be 0.20 inches (Note: to use mm instead of inches,
switch the Units setting. Refer to Section 1.07.2).
B2 Show Point
You can set two separate origins on the SOLO. Why do that? Well, you might want to use one for where you
load the mat or material for repeated cuts and the other for where you set the blade before cutting. But
there can be other applications that might come up in the future.
When toggled on, the Main Screen displays the following:
Display (X,Y) location of cutting
head
Option to use laser engraver
and cmd function
Set up rows & columns of repeats
Turn on if you want cutting head
to move to the far right when
cutter is powered on
Separate Cut Speed from Up
Speed
Option to change directions on
up/down keys
Sizing Calibration
Tap these to activate
Tap here to turn on Array
Spacing between left-to-right repeats
Number of repeats: left to right
Number of repeats: up & down
Spacing between up-&-down repeats

Table of Contents