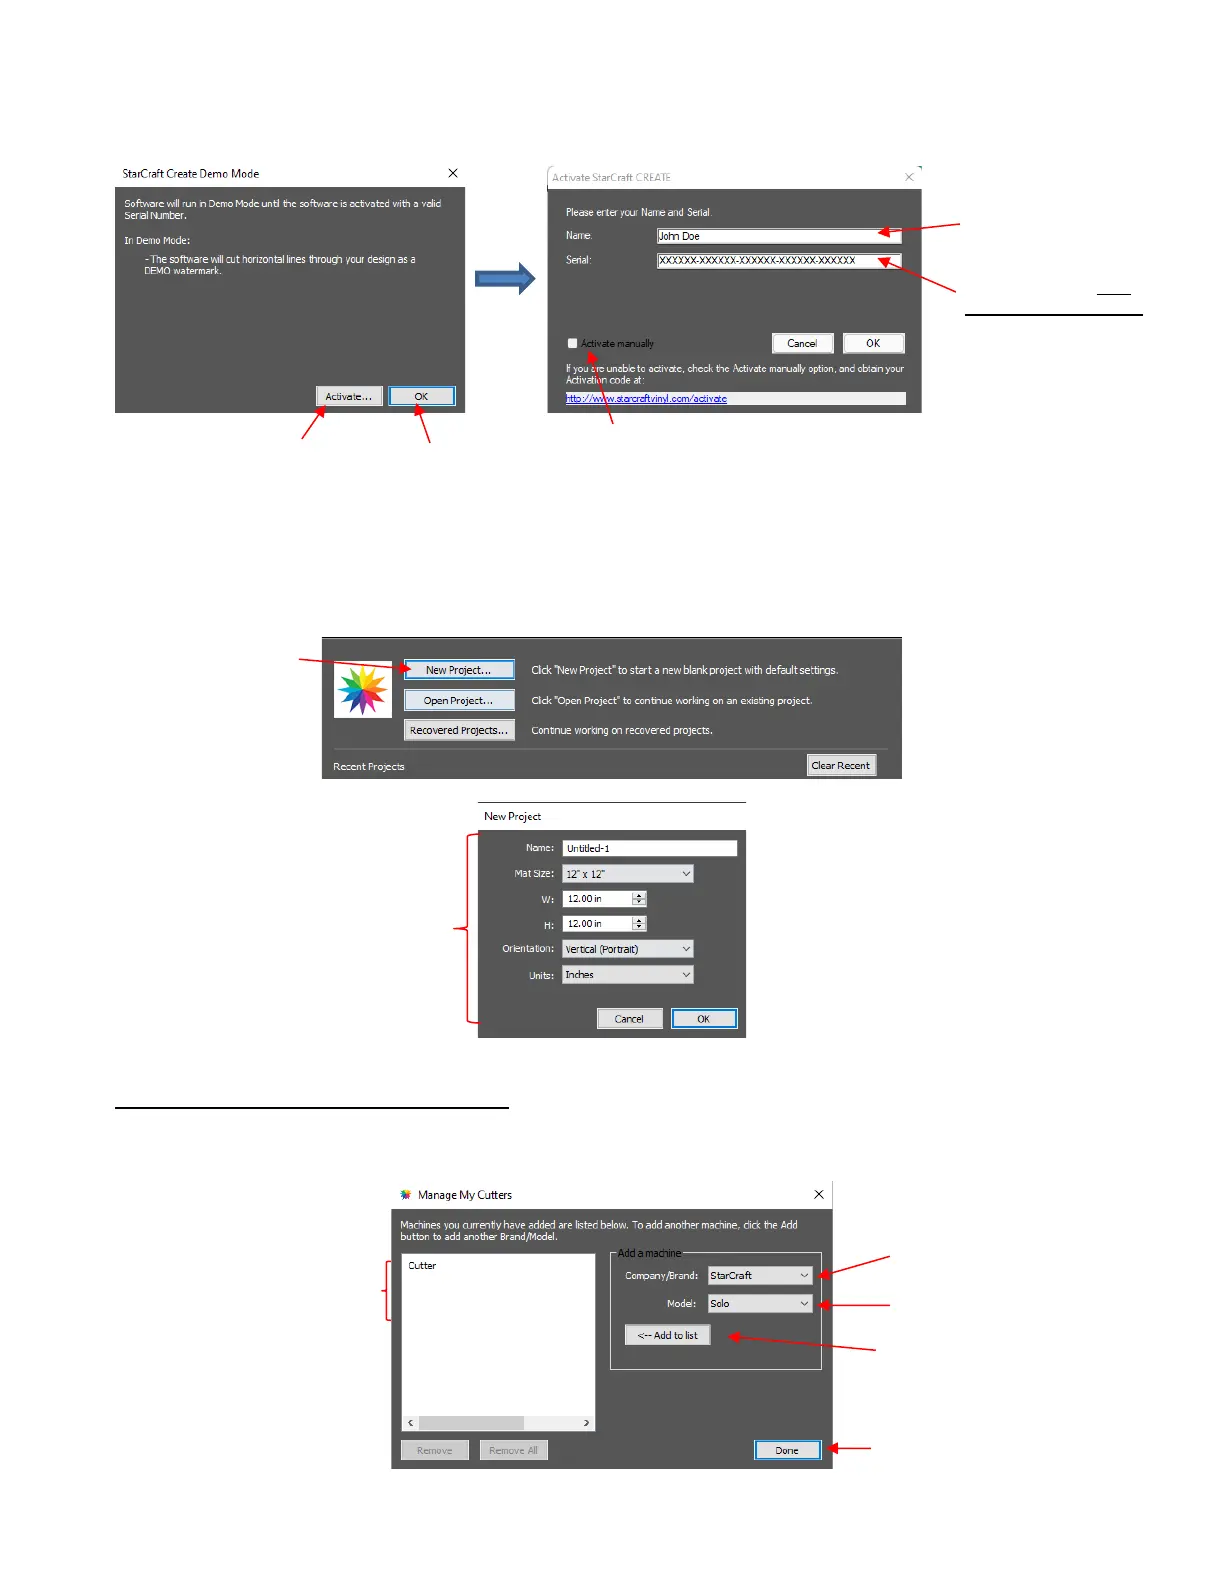
EasyManua.ls Logo

Starcraft SOLO - Installing the solo in CREATE

Starcraft SOLO
114 pages
Print Icon
To Next Page IconTo Next Page
To Previous Page IconTo Previous Page
Loading...
9
After successfully registering the software, an initial window will open where you can choose if you are
starting a new project, opening an existing project, or recovering a project after a software crash. Because
this is the first time you are opening CREATE, choose New Project and accept the defaults shown:
1.06.2 Installing the SOLO in CREATE
Go to Cutter>My Cutter>Manage Cutters and the following window will open:
Click on Done to save and close the window.
4. Click on Done
1. Select StarCraft
2. Select Solo
List of cutters
you’ve added
3. Click on Add to list
Click on New
Project
Accept whatever settings are
shown. Details about these
settings will be covered in later
sections.
Click here to
register CREATE
OR…
Click OK to
continue in trial mode
1. Enter your name
Do NOT use this function
2. Paste in the long
CREATE Serial Code
you copied from the
registration window
(NOT the number on
the bottom of your
SOLO)

Table of Contents