1.08.1 USB Connection
• Connect the USB cable to the right side of the cutter and into an available USB port on your computer. Both
PC’s and Mac’s should automatically identify the device. IMPORTANT: Make sure the USB cable will have
some slack once connected to your computer. Putting stress on a USB port on either the computer or the
SOLO can damage that port.
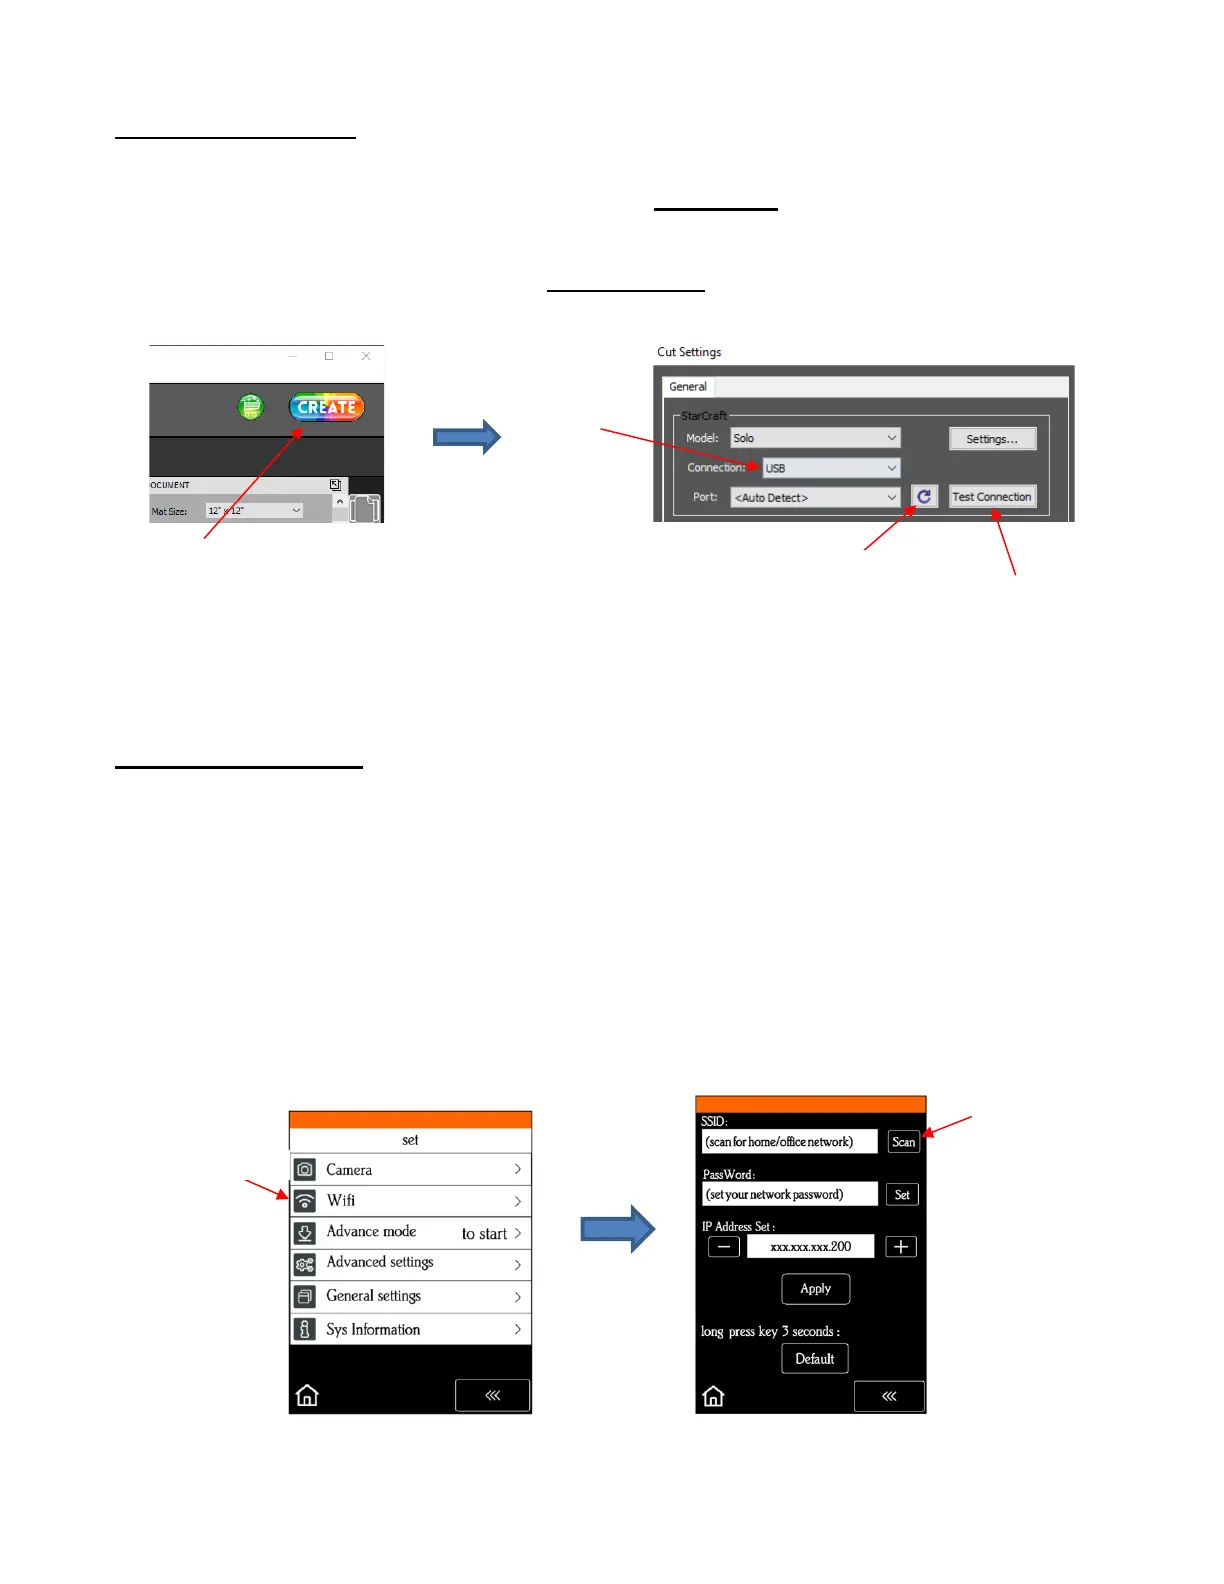
• In CREATE, click the CREATE button in the upper right corner of the screen to open the Cut Settings
window. Then perform the following steps:
• If the SOLO is successfully connected to your computer, the Test Conection will cause the cutting head to
do a quick left-right jog.
1.08.2 Wi-Fi Connection
• Note: Not all routers have the same signal strength. It’s usually best to connect the SOLO while it is in the
same room with the router. Once connectivity is established, you can then experiment to see how far from
the router the SOLO can be located.
• What you’ll need:
Name of your home/office network
The password for your network
• Carefully complete the following steps:
(1) On the SOLO’s control panel, select Set followed by Wifi. The Wifi screen will appear:
(2) Click on the Scan button and a list of all available networks will appear. Select your home/office network
and click on Apply. You will then be returned to the Wifi screen:
 Loading...