APPENDIX E Additional Print-and-Cut Applications
E1 PNC from a Flash Drive
• To perform a Print+Cut project from the control panel, first perform Steps (1) – (6) from Section 3.03.
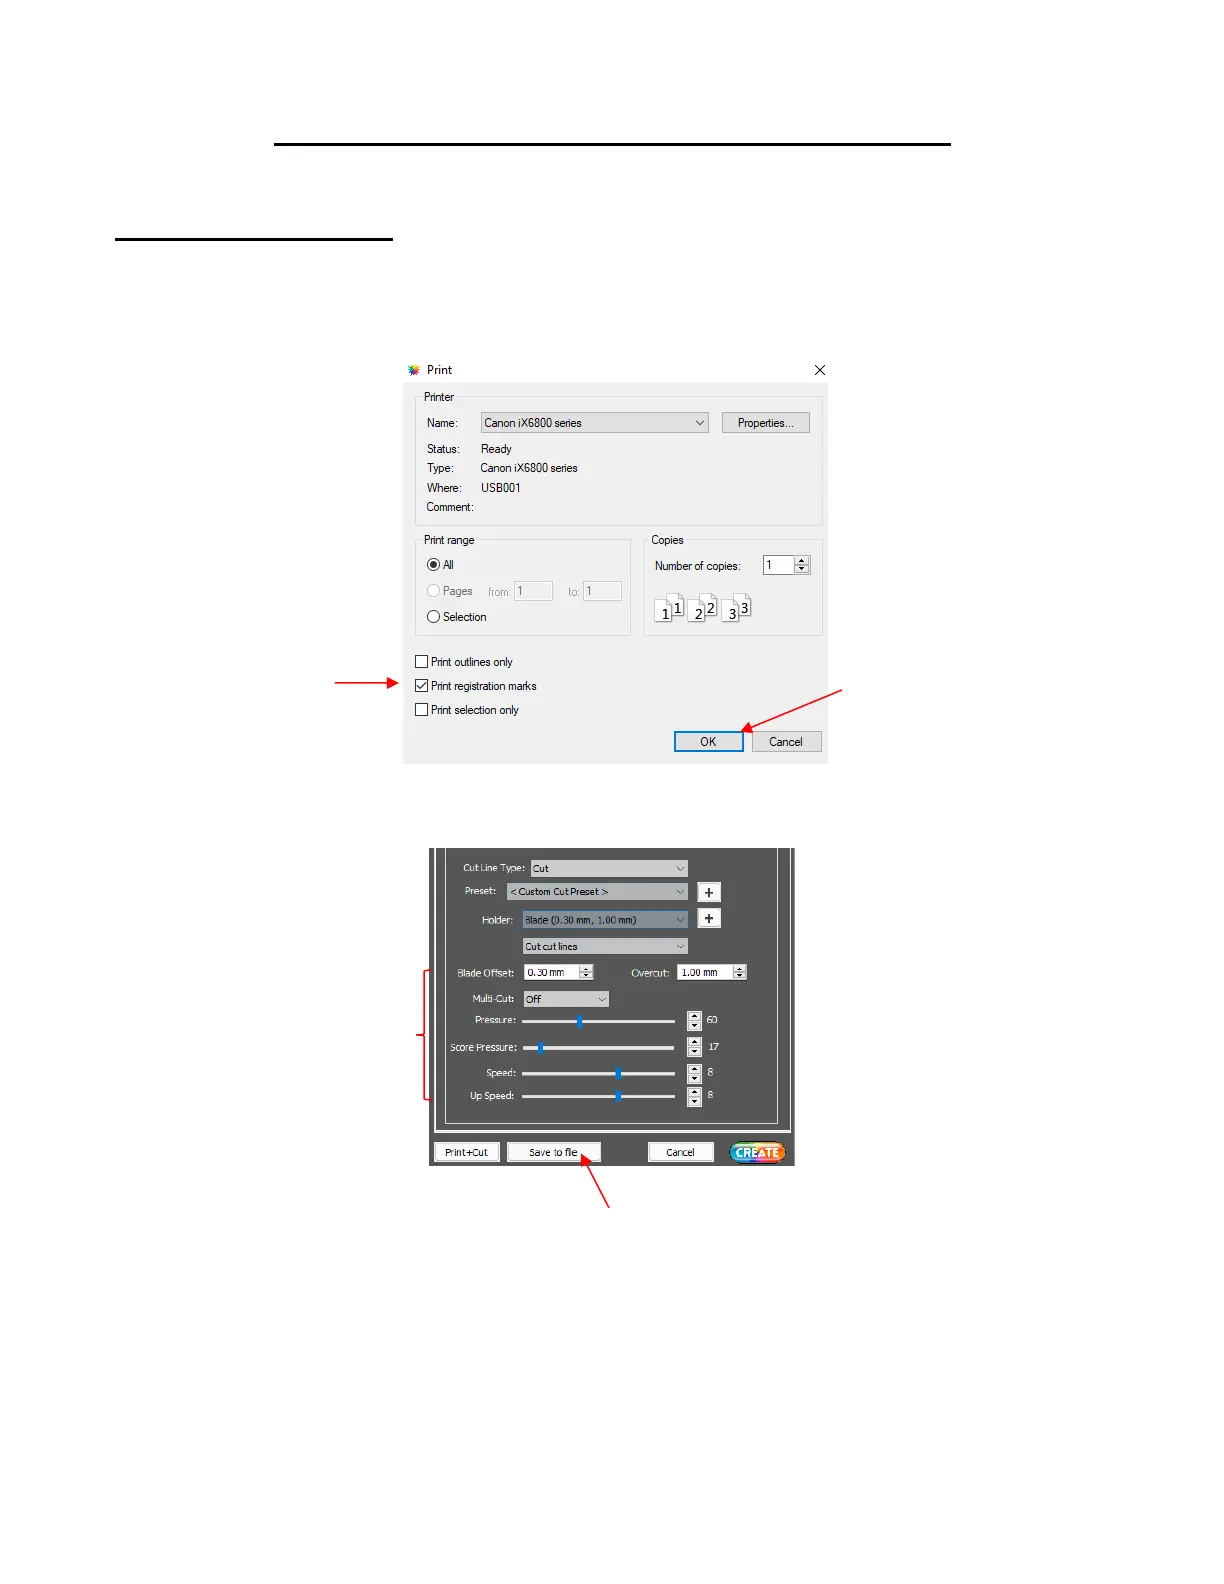
• When you are ready to print the project, go to File>Print and mark the option for Print registration marks
before clicking OK to print the project:
• Click on the CREATE icon to open the Cut Settings window. Make necessary changes and click on Save
to file:
• A window will open and you can name your file, select the location, and enable the option for Add
registration marks: