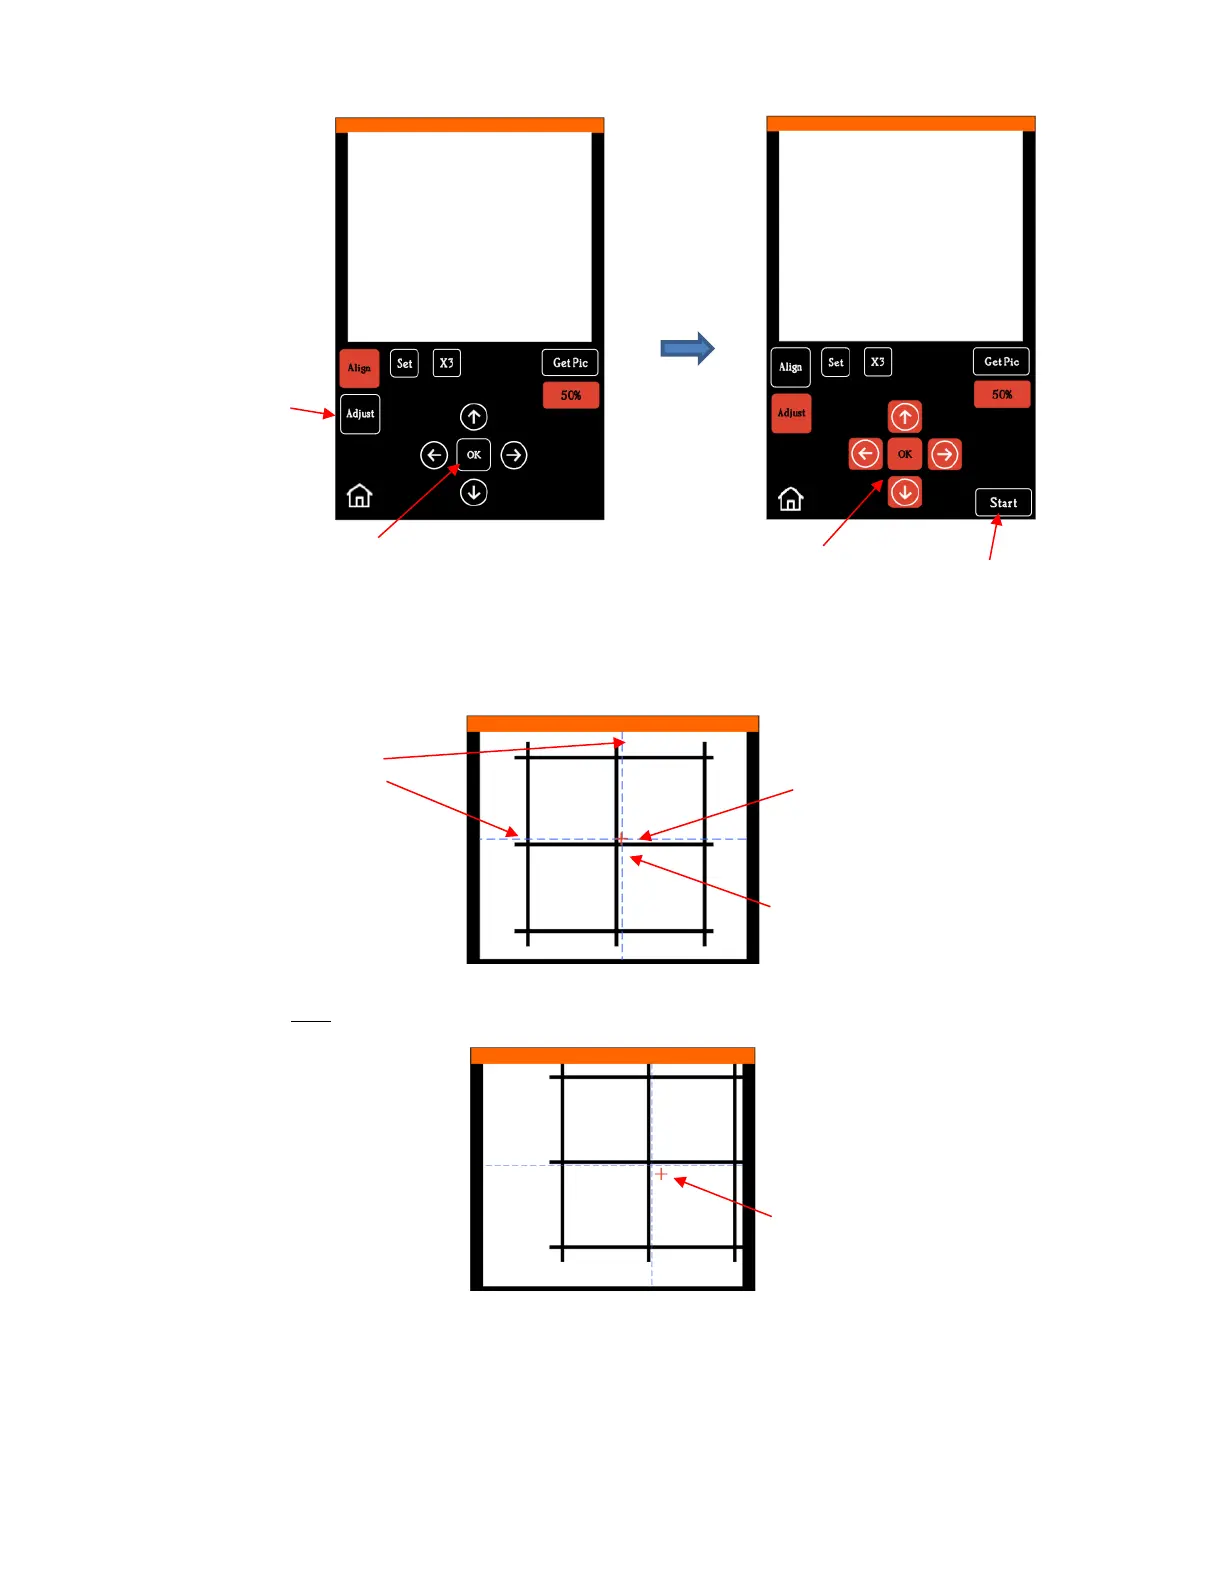
(7) Press Start. The test shape, which is a grid of 6 lines, will be drawn on the paper and the camera will move
over the test shape, take a photo, and display the photo on the control panel. You should see several items
in the photo: the test shape that was drawn with the pen, a red +, and two blue dashed lines which cross:
(8) Tap your finger near the middle of the drawn test shape on the screen. This will move the red + close to that
location.
(9) Press OK. A new photo will be taken and the camera will now take over and find the true center on its
own. You will see the red + and the blue dashed lines align in the center and the arrows (only) around
the OK button will return to their original white color: