(2) Choose where you want the origin to be set. You’ll need an “origin target” to use when the camera
takes a photo. It can be the lower right reg mark on a PNC printout, a dot you’ve marked on your
material, the corner of your material, the intersection of grid lines on the mat, etc. If you do choose
the latter, make sure there’s a way to clearly distinguish which intersection you want to use.
(3) On the SOLO’s Main Screen, use the arrows to move the center of the blade holder roughly over
the origin target. In this example, a dot will be used.
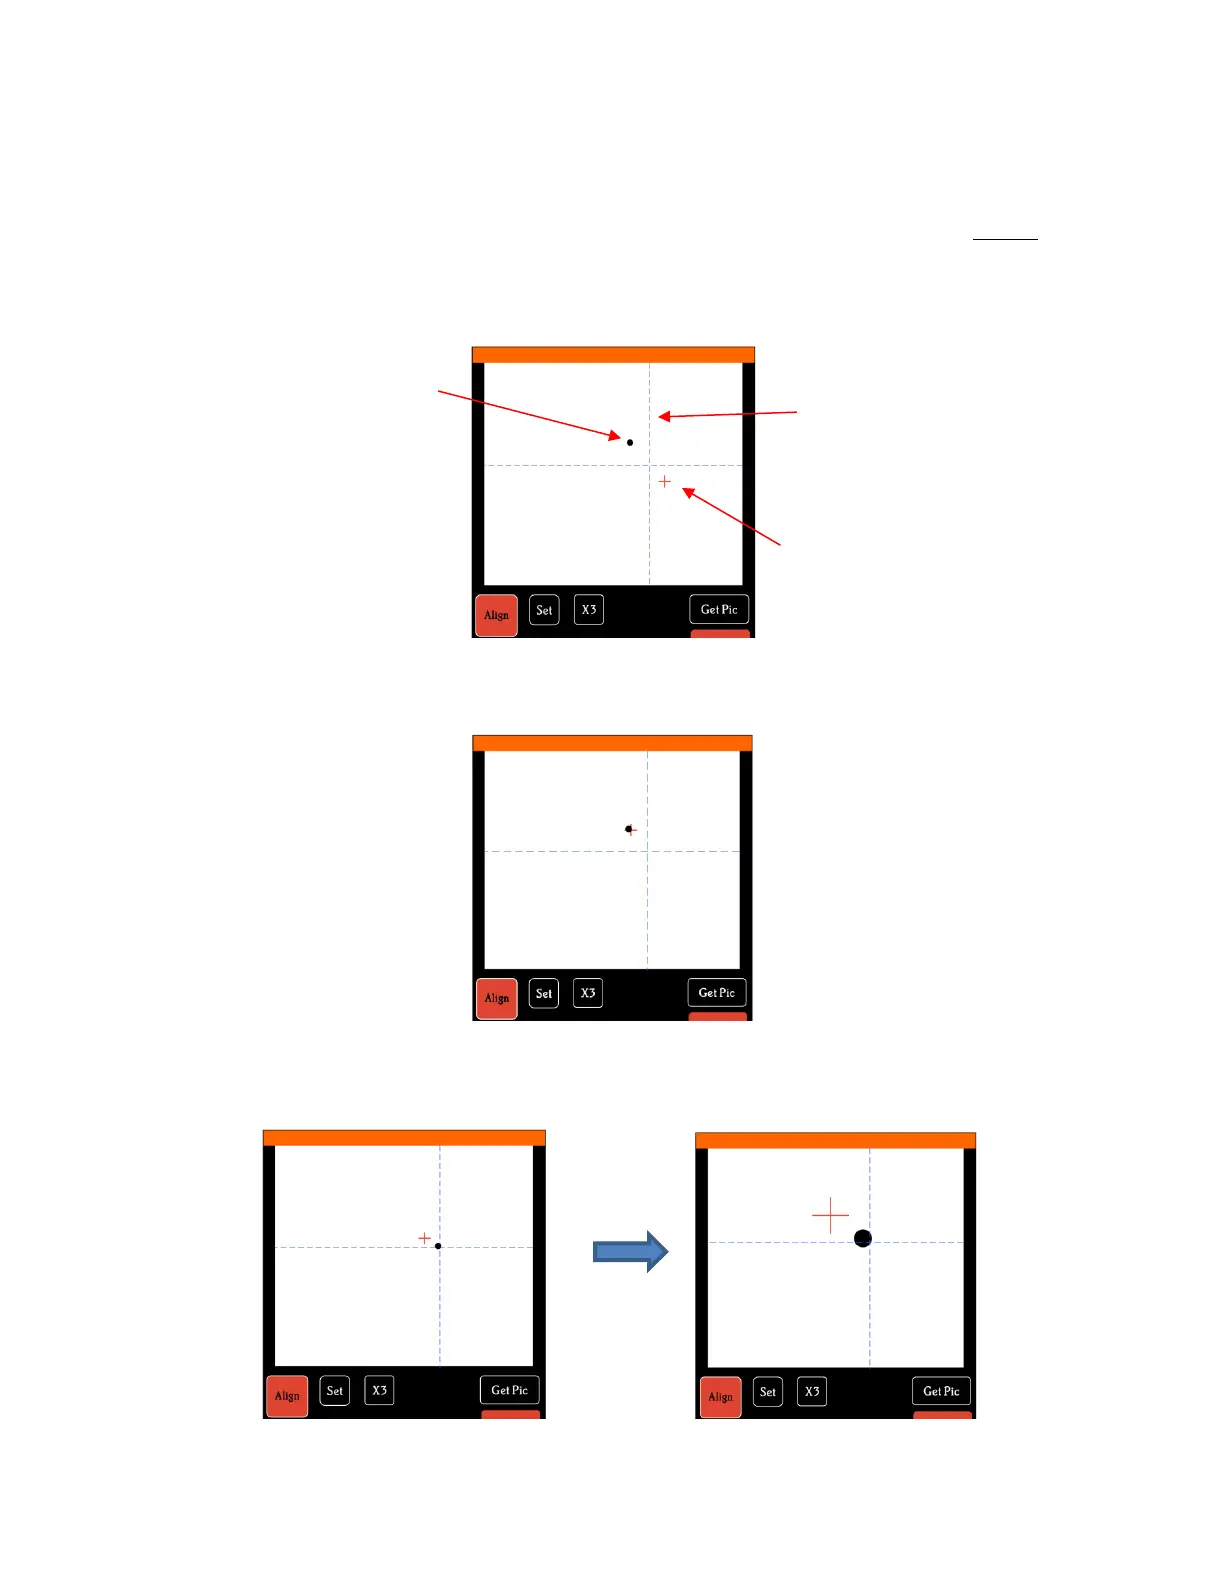
(4) Select Set and Camera. In the Camera Screen, press OK. A photo will be taken and displayed. If
needed, press X3 so that you are zoomed out and able to see the origin target (dot) in the photo:
(5) Press the center of the origin target in the photo so that the red + will be moved approximately over
it:
(6) Press OK. In the new photo, the blue dashed + should be close to the origin target. Press X3 to
zoom in:
(7) Use the arrow buttons to move the red + as close as possible to the center of the origin target: