Oscilloscope Reference Process overview
Learn about the Display. (see page 714)
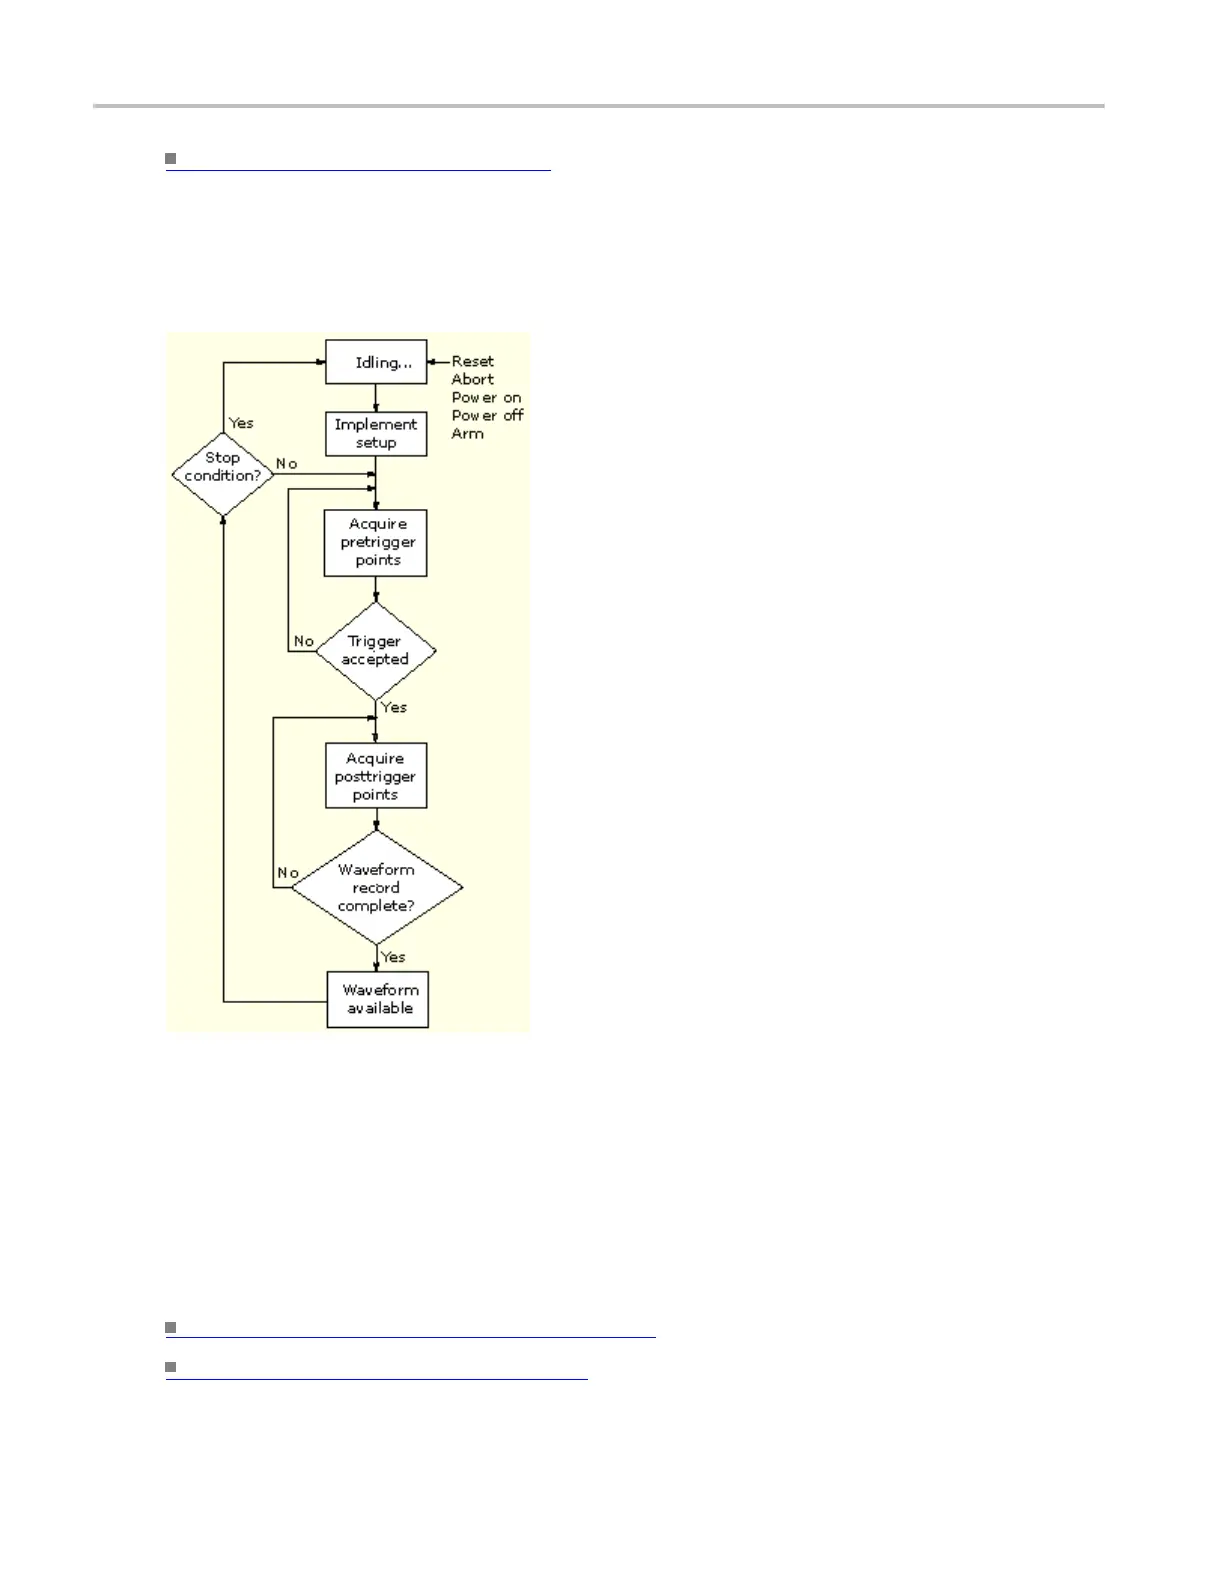
Process overview
1. The instrument starts in the i dle state; it enters this
state at power on, upon receiving most control setting
changes, or on finishing acquisition tasks.
2. Control settings are implemented as they are requested.
When you toggle the Run/Stop control to R un, the
instrument starts the hardware.
3. The instrument acquires samples until the pretrigger
portion of the waveform record (channel) being acquired
is filled.
4. The instrument then begins looking for a trigger.
Acquiring continues to take place, keeping the pretrigger
points current, until triggering criteria are met or a trigger
is forced (Auto trigger mode only). The instrument
accepts the trigger.
5. The instrument acquires samples until the posttrigger
portion of the waveform record (channel) being acquired
is filled.
6. If averaging or enveloping is on, the record becomes
part of the multi-acquisition record that these modes
produce. The process loops back to step 3 to acquire
additional records until the number of acquisitions
required for the acquisition mode currently set are
processed, and then processing continues to step 7.
7. At this point, the acquisition record is in memory and
is available to the instrument for measurement of its
parameters, display, and so on.
8. The instrument then checks for a user-specified stop
condition and either returns to its idle state or continues
at step 3, according to what it finds.
xxx
Keep in mind that this instrument samples in real time or random equivalent time; both sampling systems
provide pretrigger information by using the trigger to stop an already running acquisition. Both sampling
systems a lso sample the input after it is scaled, providing improved input protection and dynamic range.
What do you want to do next?
Learn about the Acquisition System. (see page 681)
Learn more about triggering. (see page 692)
676 DSA/DPO70000D, MSO/DPO/DSA70000C, DPO7000C, and MSO/DPO5000 Series
 Loading...


