5 First steps
0970 4020 en 01 79
5.14. Mounting the hardware
The notes in chapter "Ensure safety" must absolutely be
observed when mounting the Saveris components.
Do not mount the Saveris base and the probes at their
locations until the measuring system functions as
expected.
After mounting, perform another test run of the system;
also see "Performing the test run".
Pos: 87 /TD/Erst e Schritte/testo Saver is/07 **** Montage der Hard ware/01 Base an der Wand mon tieren @ 0\mod_1189157492 531_79.doc @ 4105
5.14.1. Mounting the Saveris base on the wall
When selecting the location for the Saveris base,
please take into account that this must be positioned
close enough to the computer used and a possible
power supply in accordance with the cabling provided.
The mounting materials (screws, anchor plugs etc.) are
not included in the delivery.
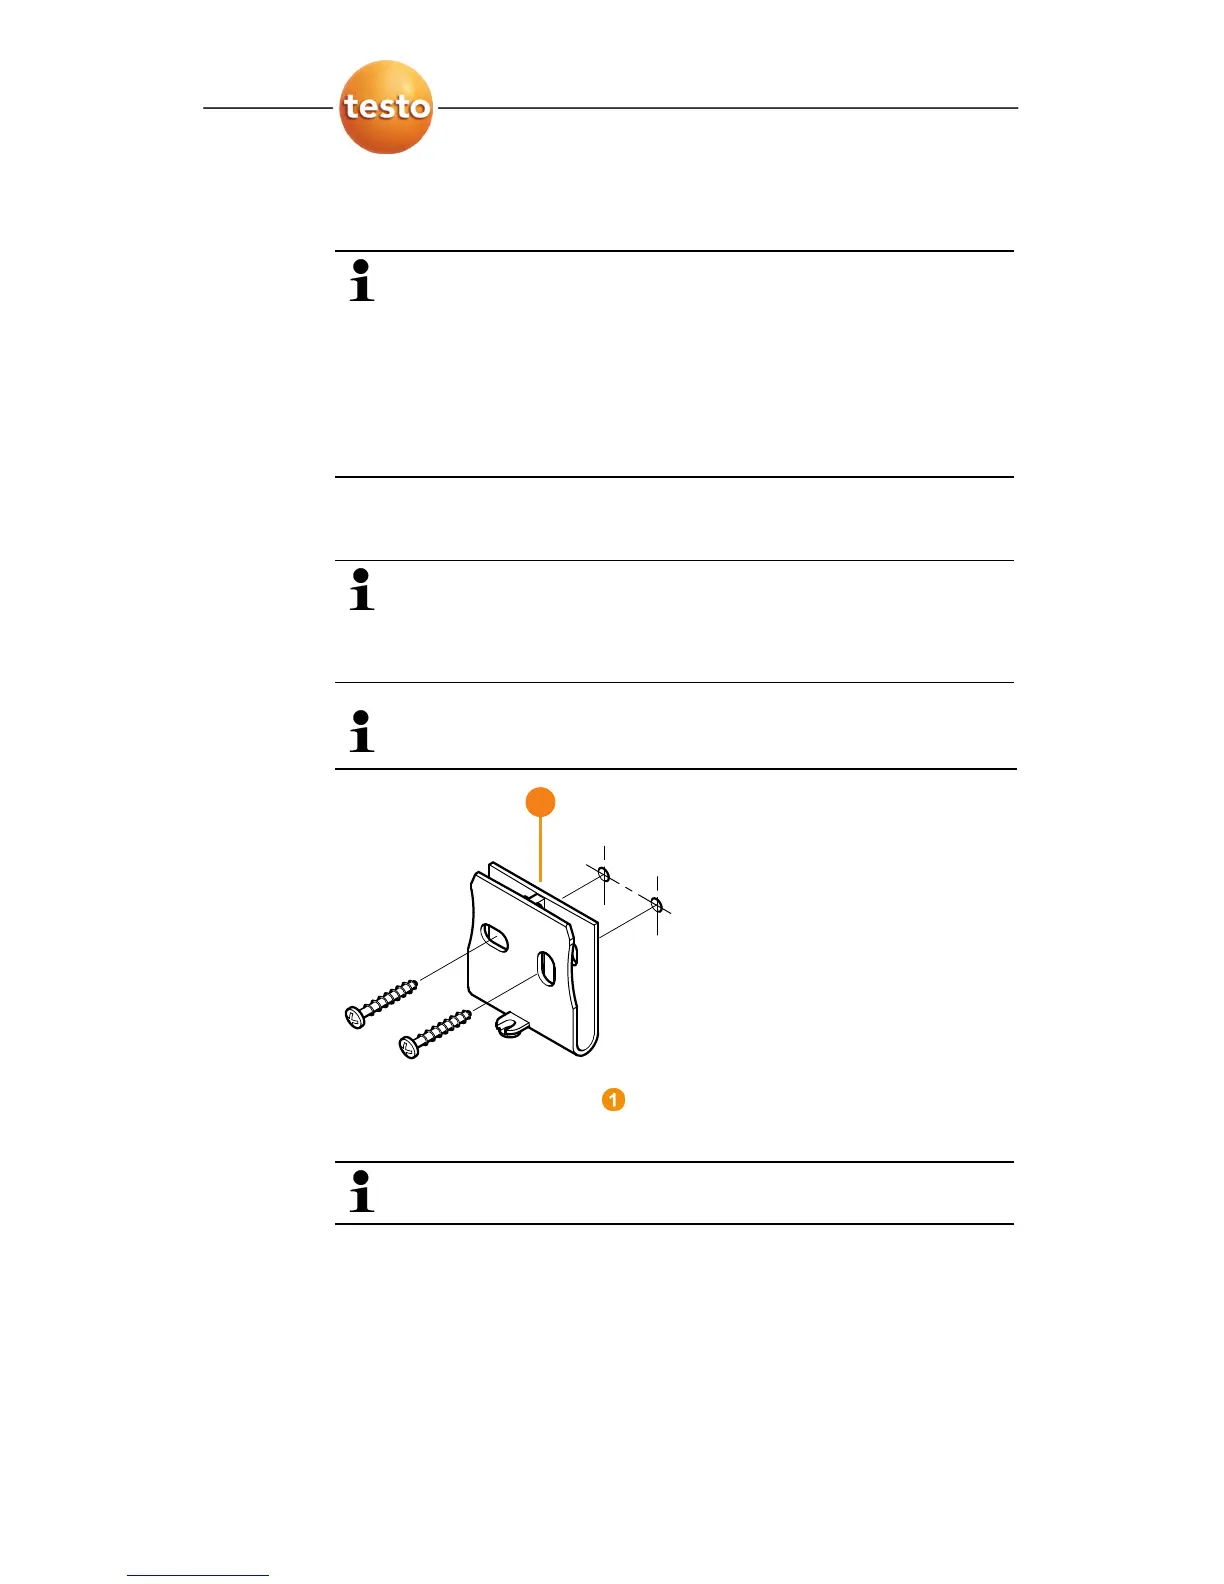
1. Position wall bracket at the desired location.
2. Using a pen, mark the locations for the fastening screws.
The distance between the fastening screws is 25 mm.
3. Prepare the fastening location for the attachment in
accordance with the material (e.g. drill hole, insert anchor
plug).
4. Fasten wall bracket using appropriate screws.
1