RemovingtheBedbarAssembly(continued)
6.Carefullyremovethebedbarassemblyfromthecuttingunit.
7.Inspecttheangebushings(item7)andrubberbushings(item6)intheside
platesforwearordamage.Removethebushingsandreplaceifnecessary.
InstallingtheBedbarAssembly
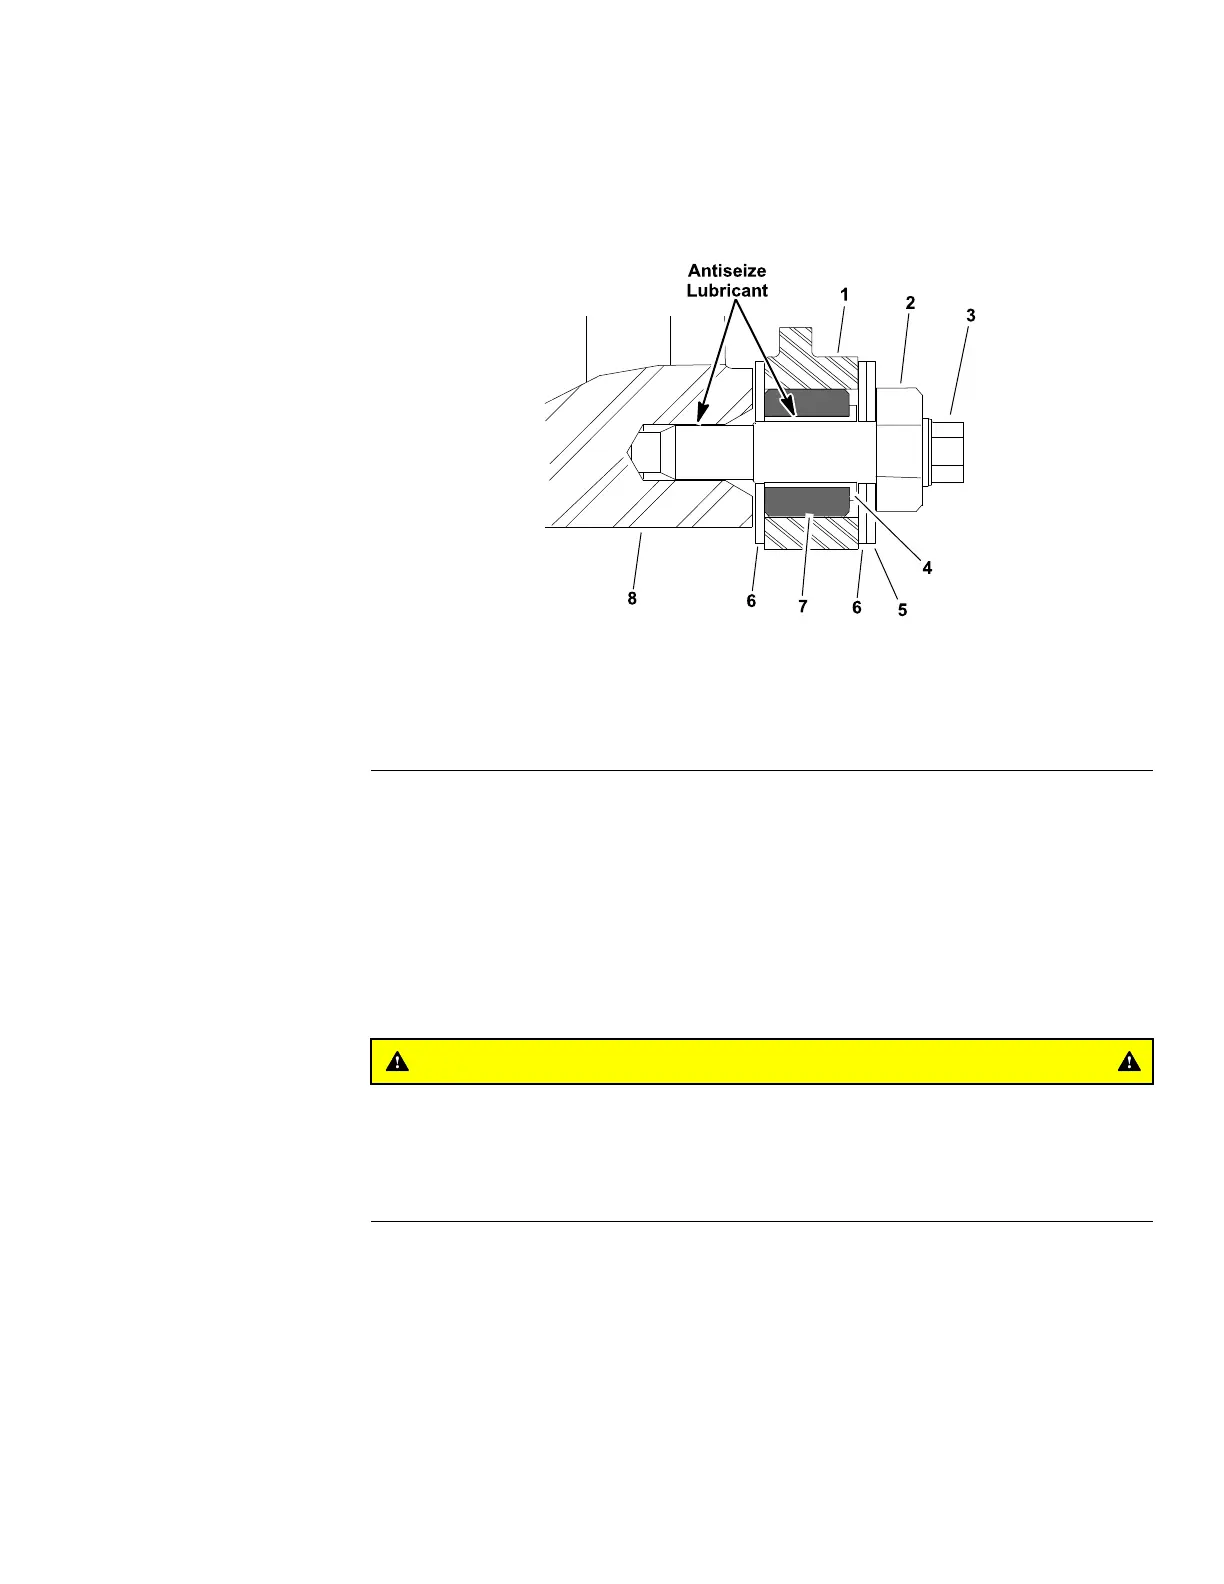
g214674
Figure332
1.Cuttingunitside
plate
3.Bedbarpivotbolt5.Metalwasher7.Rubberbushing
2.Locknut4.Flangebushing6.Plasticwasher8.Bedbar
1.Iftherubberbushingwasremovedfromeithercuttingunitsideplate,install
anewbushing.Thebushinginstalledshouldbeushwiththeinsideofthe
sideplate(Figure332).
2.Ifremoved,installtheangebushingswiththeangefacingoutward.Apply
anti-seizelubricanttotheinsideoftheangebushing.
3.Applyanti-seizelubricanttothebedbarthreadsandtheshoulderareaof
eachbedbarpivotbolt.
4.Slideametalwasherandaplasticwasherontoeachbedbarpivotbolt.
CAUTION
Contactwiththereel,bedknife,orothercuttingunitpartscanresult
inpersonalinjury.
Useheavygloveswhenhandlingthebedbar.
5.Positionthebedbarintothecuttingunit.Ensurethatthetopofeachbedbar
armisbetweenthewasherandthebedbaradjusterscrewange.
6.Positionaplasticwasherbetweenthebedbarandeachcuttingunitside
plate(Figure332).
7.Installthebedbarpivotboltassemblies:
A.Pusheachbedbarpivotboltthroughthesideplateandintothebedbar
enoughtoholdthebedbarinposition.
Reelmaster
®
5410/5510/5610Series
Page9–21
CuttingUnit:ServiceandRepairs
15216SLRevC
 Loading...

