Groundsmaster 4100--D/4110--D Page 6 -- 11 Axles, Planetaries and Brakes
Removal (Fig. 7)
1. Park machine on a level surface,lowercuttingdeck,
stop engine, engage parking brake and remove key
from the ignition switch.
2. Drainoilfromplanetarywheeldrive/brakeassembly.
CAUTION
When removing front wheel, use correct jacks
andsupports.Make suremachine isparkedona
solid, level surface such as a concrete floor.
Prior to raising machine, remove any attach-
ments that may interfere with the safe and prop-
erraisingofthemachine.Alwayschockorblock
wheels. Use jack stands to support the raised
machine. If the machine is not properly sup-
portedbyjackstands,the machinemaymoveor
fall, which may result in personal injury.
3. Chockr earwheelsandjackupfrontofmachine(see
JackingInstructionsinChapter1--Safety).Supportma-
chine with suitable jack stands.
4. Tilt the cutting deck upright to allow front wheel re-
moval (see Operator’s Manual).
5. Remove front wheel assembly.
6. Remove four (4) flange head screws that secure
brake assembly to planetary assembly (see Brake As-
sembly Removal in this Chapter).
7. Support hydraulic wheel motor to prevent it from fal-
ling.Remove two (2) cap screws thatsecurewheelmo-
tor to planetary assembly.
8. Supportplanetaryassemblytopreventitfromfalling.
Loosen and remove flange head screws that secure
planetary assembly to frame. Remove planetary as-
sembly from machine.
Installation (Fig. 7)
1. Inspectgasketbetweenbrakeandplanetaryassem-
blies. Replace as needed.
2. Position planetary assembly to machine. Install
flange head screws that secure planetary assembly to
frame. Torque screws from 75 to 85 ft--lb (101 to 115
N--m).
3. Secure brake assembly to planetary assembly with
four(4)flangeheadscrews(seeBrakeAssemblyInstal-
lationinthisChapter).Torquescrewsfrom75to85ft--lb
(101 to 115 N--m).
4. Securehydraulicwheelmotortoplanetaryassembly
withtwo(2)capscrews.Torquescrewsfrom75to85ft--
lb (101 to 115 N--m).
5. Install front wheel assembly.
WARNING
Failure to maintain proper lug nut torque could
resultinfailureorlossofwheelandmayresultin
personal injury.
6. Lower machine from jack stands. Torque wheel lug
nuts from 85 to 100 ft--lb (115 to 135 N--m).
7. Pivot the cutting deck down (see Operator’s Manu-
al).
8. Make sure drain plug is installed in bottom of brake
assembly (Fig. 8). Fill planetary wheel drive/brake as-
sembly with SAE 85W--140 gear lube. Capacity is
approximately 16 fl. oz. (0.47 l) per wheel.
9. Check for proper brake operation.
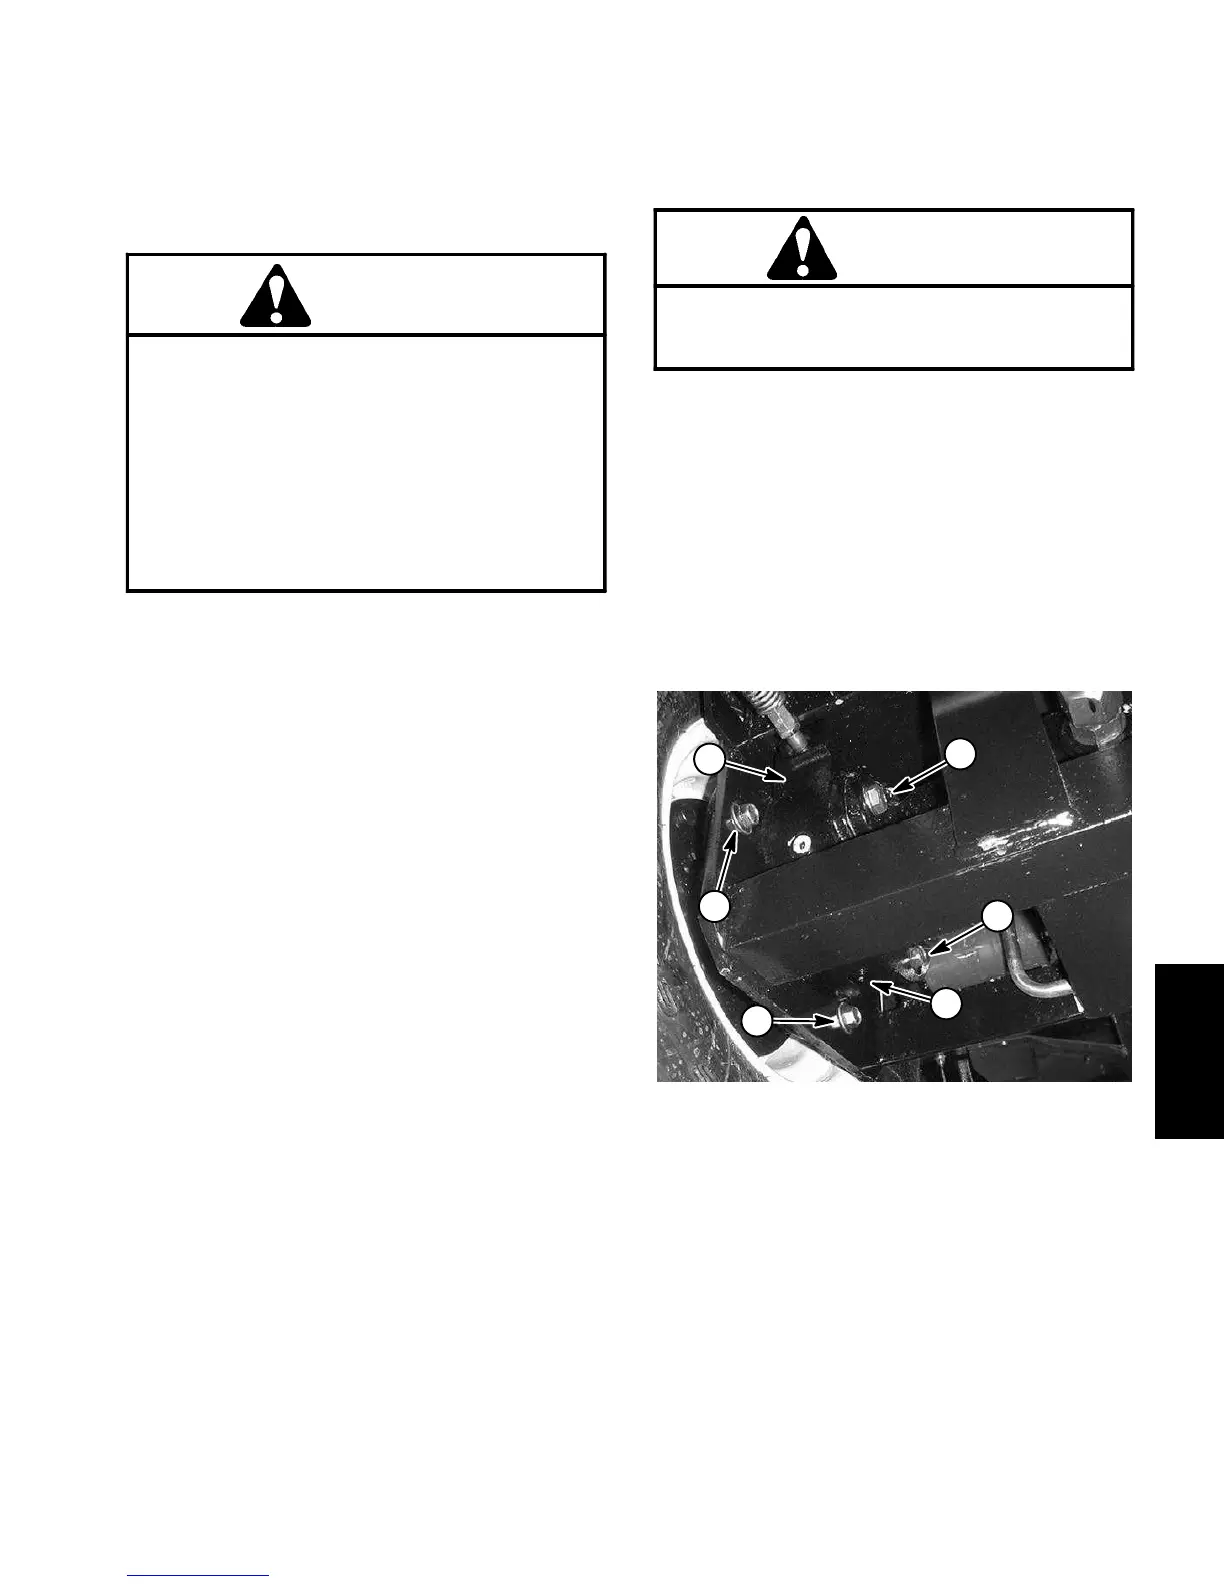
1. Brake housing
2. Wheel motor cap screw
3. Brake flange screw
4. Planetary flange screw
5. Brake drain plug
Figure 8
1
2
3
5
4
4
Axles, Planetaries
and Brakes
 Loading...


