e-STUDIO2020C/2330C/2820C/2830C/3520C/3530C/4520C © 2008 - 2011 TOSHIBA TEC CORPORATION All rights reserved
FIRMWARE UPDATING
8 - 46
(11) Set the DIP-SW4 on the hole punch control PC board to OFF.
When the number of blinks is other than “6” (which indicates that the adjustment value is “0”) at
the section “[A]Checking the hole punch position”, follow the steps of “5.1 Stopping Position
Adjustment” in the MJ-6101 Service Manual to adjust the value to the one that has been set
before the update.
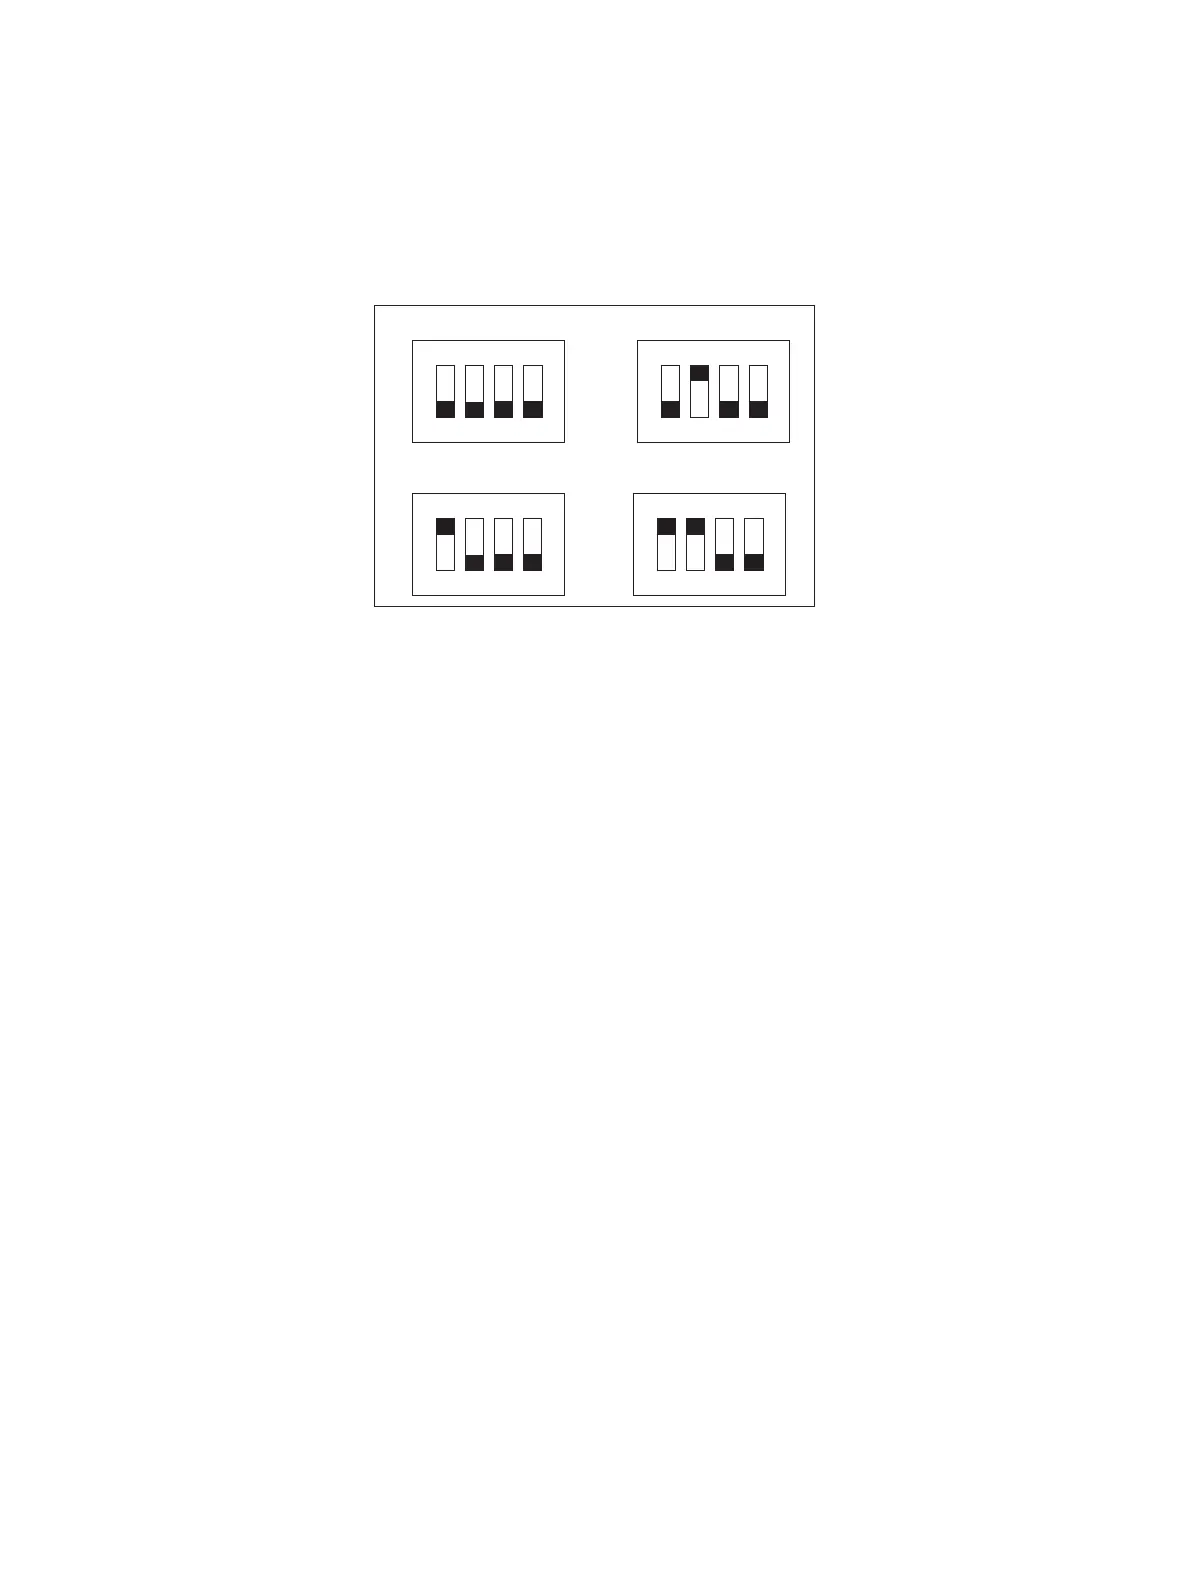
(12) Change the settings of the DIP-SW1 and -SW2 on the hole punch control PC board according to
the model as shown in the figure below.
Fig. 8-44
(13) Install the rear cover of the hole punch unit.
(14) Install the rear lower cover of the hole punch unit.
(15) Install the finisher board access cover.
[C] Confirmation of the updated data
After the updating is completed, check each data version in Setting Mode (08) to confirm that the data
were overwritten properly.
P.8-56 "8.4 Confirmation of the updated data"
ON
1 2 3 4
ON
1 2 3 4
ON
1 2 3 4
ON
1 2 3 4
MJ-6101E MJ-6101N
MJ-6101F MJ-6101S
 Loading...


