Home
Wacker Neuson
Excavators
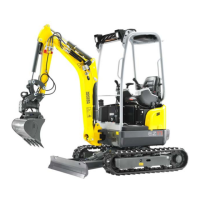
EZ17
Wacker Neuson EZ17 User Manual
5
of 1
of 1 rating
256 pages
Give review
Manual
Specs
To Next Page
To Next Page
To Previous Page
To Previous Page
Loading...
OM EZ17 us 1.
0 * ez17i400.fm
4-7
4
Fastening the
retracting
seat belt
1.
Insert buckle latch
A
into seat belt buckle
B
with an audible click.
Unfastenin
g the retract
ing seat be
lt
1.
Press the red pu
shbutton switch
D
on seat belt buckle
B
until the
buckle latch comes out.
➥
Seat belt
C
is
automatically retracted.
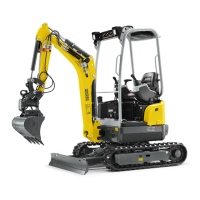
Fig. 50
A
B
Fig. 51
D
B
C
54
56
Table of Contents
Default Chapter
3
Table of Contents
3
EC Declaration of Conformity (Yanmar 3TNV76-SNSE12
5
Declaration of Conformity Without CE Mark on Type Label (Yanmar 3TNV76-SNSE12
6
1 Foreword
7
Operator's Manual
7
Explanation of Symbols and Abbreviations
8
Abbreviations
9
Conversion Table
10
Warranty and Liability
11
2 Safety Information
13
Safety Symbols Found in this Manual
13
Designated Use
14
Warranty
14
Preparing to Use the Machine
15
Conditions for Use
15
Operator Training and Knowledge
15
Modifications and Spare Parts
16
Applications with Lifting Gear
16
Instructions on Fastening Loads
16
General Instructions
17
Operator/Machine Owner Responsibility
18
Repair Person Qualifications
18
Safety Instructions Regarding Operation
18
Operator and Technician Qualifications and Basic Responsibilities
18
Starting and Stopping
19
Job Site Awareness
19
Danger Zone Awareness
20
Operating the Machine
20
Carrying Passengers
20
Mechanical Integrity
20
Traveling
21
Safety Criteria
21
Conditions for Safe Operation
21
Applications with Lifting Gear
21
Attachments
22
General Information Regarding Attachments
22
Installation Notes
22
Transport and Towing
23
Safety Guidelines for Maintenance
23
General Maintenance Notes
23
Personal Safety Measures
23
Preparing for Maintenance and Repair Work
24
Performing Maintenance and Repairs
24
Special Hazards
25
Tracks
26
Electric Energy
26
Hydraulics
27
Noise
27
Gas, Dust, Steam, Smoke
27
Safety Guidelines While Using Internal Combustion Engines
28
Running the Engine
28
Fueling the Engine
28
When Fueling the Engine
28
3 Introduction
29
Machine Overview
29
Overview of Models and Trade Names
30
Brief Description of the Machine
30
Shock Cartridges (Option)
30
Zero Tail
30
Canopy
31
Definition of Fops/Front Guard Levels
31
Notices and Regulations on Use
32
Fields of Application and Use of Attachments
33
EZ17 Without Quickhitch
33
EZ17 with Hydraulic Easy Lock Quickhitch
33
Labels
35
Type Labels
35
Serial Number
35
Canopy Number
36
Engine Number
36
Hydraulic Quickhitch
36
Powertilt with Hydraulic Quickhitch
37
FOPS Type Label
37
Warning Labels
38
4 Putting into Operation
49
Cab/Control Stand
49
Safety Instructions Regarding Entry and Exit
49
Rear Tarp (Option)
50
Unrolling/Rolling up the Rear Tarp
51
Seat Adjustment
52
Weight Adjustment
52
To Adjust to a Lower Weight
52
To Adjust to a Higher Weight
52
Horizontal Adjustment
53
Backrest Adjustment
53
Backrest Inclination to the Rear
53
Backrest Inclination to the Front
53
Adjusting the Retracting Seat Belt
54
Fastening the Retracting Seat Belt
55
Unfastening the Retracting Seat Belt
55
Adjusting the Rearview Mirrors (Option)
56
Adjusting the Mirrors
57
Control Lever Base
58
Control Lever Base Raised
58
Control Lever Base Lowered
58
Functional Check of Control Lever Base
58
Armrest
59
Fire Extinguisher
59
Protective Structures
60
Responsibility for Machine Equipped with Protective Structures
60
Protective FOPS Structure/Small Screen – Level I (Option)
61
Shatter Protection (Option)
63
Work Range
64
Checking the Screw Connections of the Canopy
65
Socket
66
Control Element Overview
67
Display Element and Switches
70
Switch Panel on Left-Hand Control Lever Base
70
Indicator Lights and Warning Lights (Overview)
72
Display Element
72
Fuel Level Indicator
73
Coolant Temperature
73
Hour Meter/Maintenance Meter
73
Maintenance Meter (Service Hours up to Next Servicing)
73
Preparatory Work
74
Information before Putting the Machine into Operation
74
Requirements and Notices for the Operating Personnel
74
Check Lists
75
Start-Up Checklist
75
Operation Checklist
76
Parking Checklist
76
Traveling on Public Roads
77
Starting and Stopping the Engine
78
Preparations for Starting the Engine
78
Starter
78
Start the Engine
79
Warm-Up Phase of Machine
79
Jump-Starting the Engine
80
Low-Load Operation
82
Stopping the Engine
82
5 Operation
83
Steering System
83
Accelerator Actuation
83
Manual Throttle
83
Brakes
84
Hydraulic Brake
84
Mechanical Brake
84
Machine Travel
85
Travel Position
85
Start and Stop Machine Travel
85
Operating Temperature Range
85
Traveling on Slopes
86
Preparations for Traveling on Slopes
87
Traveling Uphill
87
Traveling Downhill
87
Lateral Angle of Inclination
88
Parking the Machine
89
Parking the Machine on Slopes
89
Differential Lock
90
Lights/Signaling System
90
Working Lights
90
Horn
91
Rotating Beacon (Option)
91
Travel Alarm (Option)
92
Wiper/Wash System
93
Heating, Ventilation and Air Conditioning System
93
Work Hydraulics
94
Overview of Pedals and Control Levers
94
Travel Levers
96
Rotating the Upper Carriage
97
Rotating the Upper Carriage to the Right
98
Hydraulic Swivel Unit Brake
98
ISO/SAE Controls (Option)
99
Stabilizer Blade
100
Changing the Width of the Stabilizer Blade
101
Reducing the Width of the Stabilizer Blade
101
Increasing the Width of the Stabilizer Blade
102
Telescopic Travel Gear
103
Proportional Controls (Option)
105
Hammer Operation (Option)
106
Working with a Hydraulic Hammer
107
Hammer Pedal – aux I (Option)
107
Switching on Hammer Operation
107
Additional Control Circuit – aux I (Option)
108
Operating the Additional Control Circuit
108
Swiveling the Boom
108
Lifting Gear Applications
109
Additional Control Circuits
111
3Rd Control Circuit – aux II (Option)
111
Powertilt – aux III (Option)
112
Actuating the Powertilt Unit
112
Rotating the Powertilt Unit to the Left
113
Rotating the Powertilt Unit to the Right
113
Hydraulic Easy Lock Quickhitch
114
Picking up an Attachment
114
Setting down an Attachment
116
Grab Control Circuit (Option)
117
Left-Hand Side Grab Operation
117
Right-Hand Side Grab Operation
117
Connecting and Disconnecting Hydraulic Couplings
118
Hydraulic Connections
118
Picking up
119
Attachments
119
Setting down
120
Releasing the Pressure in the Work Hydraulics
121
Retrofitting a Bucket
122
If Pin C Is Stuck
122
Work Operation
123
Inadmissible Work Procedures
123
Working with Swivel Force
123
Working with Traveling Force
123
Working with the Falling Force by Lowering the Machine
124
Fully Lowering the Stabilizer Blade
124
Working on Slopes
124
Protecting the Stabilizer Blade against Shocks
124
General Notices Regarding Work Operation
125
Drive Operation
125
Drive Operation in High Speed
125
Operation in Water
125
Working with the Standard Bucket
126
Bucket Position When Digging
126
Working Alongside Trenches
126
Loading Material
127
Grading
127
Emergency Lowering
128
Additional Equipment/Options
129
Safe Load Indicator (Option)
129
Functional Check of the Pressure Switch of the Safe Load Indicator
129
Switching on the Safe Load Indicator
130
Switching off the Safe Load Indicator
130
Hydraulic Hose Burst Valve
131
Stabilizer Blade Hydraulic Cylinder
131
Hydraulic Hose Burst Valve “Basic”
131
Hydraulic Hose Burst Valve “Advanced”
131
Travel Interlock
133
Coding a New Key
133
Deleting Coded Keys
133
Shovel Bucket Operation
134
Trailer Operation
134
Decommissioning and Putting the Machine Back into Operation
135
Decommissioning the Machine Temporarily
135
Putting the Machine Back into Operation
136
Final Decommissioning of Machine
137
Disposal
137
6 Transport
139
Towing the Machine
139
Notices Regarding Towing
139
Loading the Machine
141
Traveling Onto the Transport Vehicle
141
Traveling Onto Transport Vehicles
141
Upper Carriage Lock
142
Unlocking the Upper Carriage
142
Locking the Upper Carriage
142
Lifting the Machine
143
Transporting the Machine
145
Tying down
145
Maintenance
147
Important Information on Maintenance
147
Responsibilities and Prerequisites
147
Important Safety Instructions on Maintenance on or with the Machine
147
Maintenance Overview
148
Maintenance Plan
148
Lubrication Plan
152
Maintenance Label
154
Explanation of Symbols on the Maintenance Label
155
Fluids and Lubricants
156
Oil Types for Diesel Engine (Depending on Temperature)
157
Oil Types for Hydraulic System (Depending on Temperature)
158
Information Regarding Operation with Biodegradable Oil
159
Maintenance Accesses
160
Engine Cover
160
Right-Hand Cover
161
Left-Hand Cover
162
Raising the Seat
163
Battery Cover
163
Removing/Installing the Canopy
164
Cleaning and Maintenance
167
Information Regarding Cleaning and Maintenance
167
Cleaning with Washing Solvents
167
Cleaning with Compressed Air
167
Use of Solvents
168
Cleaning Inside the Machine
168
Cleaning Outside the Machine
168
Cleaning the Engine Compartment
168
Cleaning the Seat Belt
169
Cleaning the Shatter Protection
169
Screw Connections
169
Lubrication Work
170
Preparing Lubrication
170
Live Ring (Ball Bearing)
171
Fuel System
173
Information Regarding the Fuel System
173
Diesel Fuel Specification
173
Handling Diesel Fuel
173
Refueling
174
Stationary Fuel Pumps
174
Refueling from Barrels
174
Bleeding the Fuel System
175
Checking the Water Separator
175
Water Separator
175
Emptying the Water Separator
176
Checking the Fuel Filter
176
Fuel Filter
176
Emptying the Fuel Filter
177
Engine Lubrication System
178
Information Regarding the Engine Lubrication System
178
Checking the Engine Oil Level
178
Adding Engine Oil
179
Cooling System
180
Information Regarding the Cooling System
180
Checking the Coolant Level
180
Adding Coolant
181
Cleaning the Radiator
182
Air Filter
183
Information Regarding the Air Filter
183
Dirt Indicator
183
Replacing the Air Filter
184
Checking the Air Intake
185
V-Belt
186
Checking V-Belt Condition and Tension
186
Hydraulic System
187
Information Regarding the Hydraulic System
187
Checking the Hydraulic Oil Level
188
Checking the Hydraulic System for Leaks and General Condition
190
Electrical System
191
Information Regarding the Electrical System
191
Fuses and Relays
192
Battery Charge Condition
192
Charging the Battery
192
Replacing the Battery
192
Tires/Tracks
194
Information Regarding the Tracks
194
Checking Track Tension
194
Correcting Track Tension
195
Tightening the Tracks
195
Reducing Tension
196
Maintenance of Attachments
197
Maintenance of Options
197
Information Regarding Maintenance of Attachments
197
Joint Rod (Lifting Eye) and Load Hook
197
Troubleshooting
199
Diesel Engine Malfunctions
199
Malfunctions of the Traveling Drive
200
Malfunctions of the Hydraulic System
200
Malfunctions of the Electrical System
201
Specifications
203
Electrical Components
206
Fuses
206
Relays
206
Tightening Torques
208
General Tightening Torques
208
Coolant
209
Compound Table
209
Noise Emissions
209
Vibration
210
Machine Weight
213
Weight of Attachments
213
Excavator Forces
213
Ground Clearance/Ground Pressure
213
Payload/Stability
214
Safety Instructions – Lift Capacity Table
214
Lift Capacity Table EZ17
217
Lift Capacity Table EZ17 (Long Stick)
217
Lift Capacity Table EZ17 with Extra Weight (Short Stick)
218
Lift Capacity Table EZ17 with Extra Weight (Long Stick)
218
Safety Instructions – Stability Table
219
Stability Table EZ17
221
Canopy, Without Extra Weight
221
Canopy, with Extra Weight
221
Dimensions
222
Overview EZ17
222
Safety Alerts
230
Signal Words
230
Symbol
230
One-Call First
231
Dig
231
A Word to the User/Operator
231
Follow a Safety Program
232
Know the Rules
233
Know the Equipment
234
Prepare for Safe Operation
235
Check the Machine
235
Check Attachment and Coupler Installation
236
Quick-Coupling Device Safety
237
Clean up
237
Check the Work Area
238
Use Caution When Fueling
238
Mount and Dismount Properly
239
Start Safely
239
Starting the Engine
239
Starting Aids
240
Run an Operating Check
240
After Starting the Engine
240
Test All Controls
241
Operate Safely
241
Traveling on the Worksite
242
Safety Precautions
243
Load Lifting
243
Utilities – Overhead and Underground
244
Locate All Underground Utilities
244
Trenching Safety Precautions
245
Slope and Uneven Terrain Operation
245
Hazardous Conditions
246
Operation in Flammable/Explosive Atmosphere
247
Towing
247
Parking
247
Shut down Safely
248
Machine Shutdown
248
Safe Dismounting
248
Loading and Unloading for Transport
248
Maintain Equipment
249
Protect Yourself
249
Perform Maintenance Safely
249
Prepare the Work Area
250
Prepare the Machine
250
Use Approved Ventilation
250
Common Maintenance Safety Practices
251
Cooling System Hazards
251
Hydraulic System Hazards
251
Electrical System Hazards
252
Avoid Battery Explosion
252
Track Maintenance and Adjustment
253
Final Word to the User
254
5
Based on 1 rating
Ask a question
Give review
Questions and Answers:
Need help?
Do you have a question about the Wacker Neuson EZ17 and is the answer not in the manual?
Ask a question
Wacker Neuson EZ17 Specifications
General
Brand
Wacker Neuson
Model
EZ17
Category
Excavators
Language
English
Related product manuals
Wacker Neuson EZ38
254 pages
Wacker Neuson EZ36
302 pages
Wacker Neuson ET18
298 pages
Wacker Neuson ET20
298 pages
Wacker Neuson ET24
298 pages
Wacker Neuson ET35
302 pages
Wacker Neuson E13-01
252 pages
Wacker Neuson E05-05
292 pages
Wacker Neuson E16-02
302 pages
Wacker Neuson 803
228 pages
Wacker Neuson 1404
188 pages
Wacker Neuson 3503
280 pages