Operation
30 800009-01 Rev. J www.wegener.com
3.6 Front Panel Additional Unit Setup
Some of the iPump 6400 front panel settings are important, but not essential to the unit’s
initial setup including:
!"Date/Time Setup
!"Unit Label Setup
!"HTTP Proxy settings
!"Return Path Setup
Navigation to
Date/Time
Setup Screen
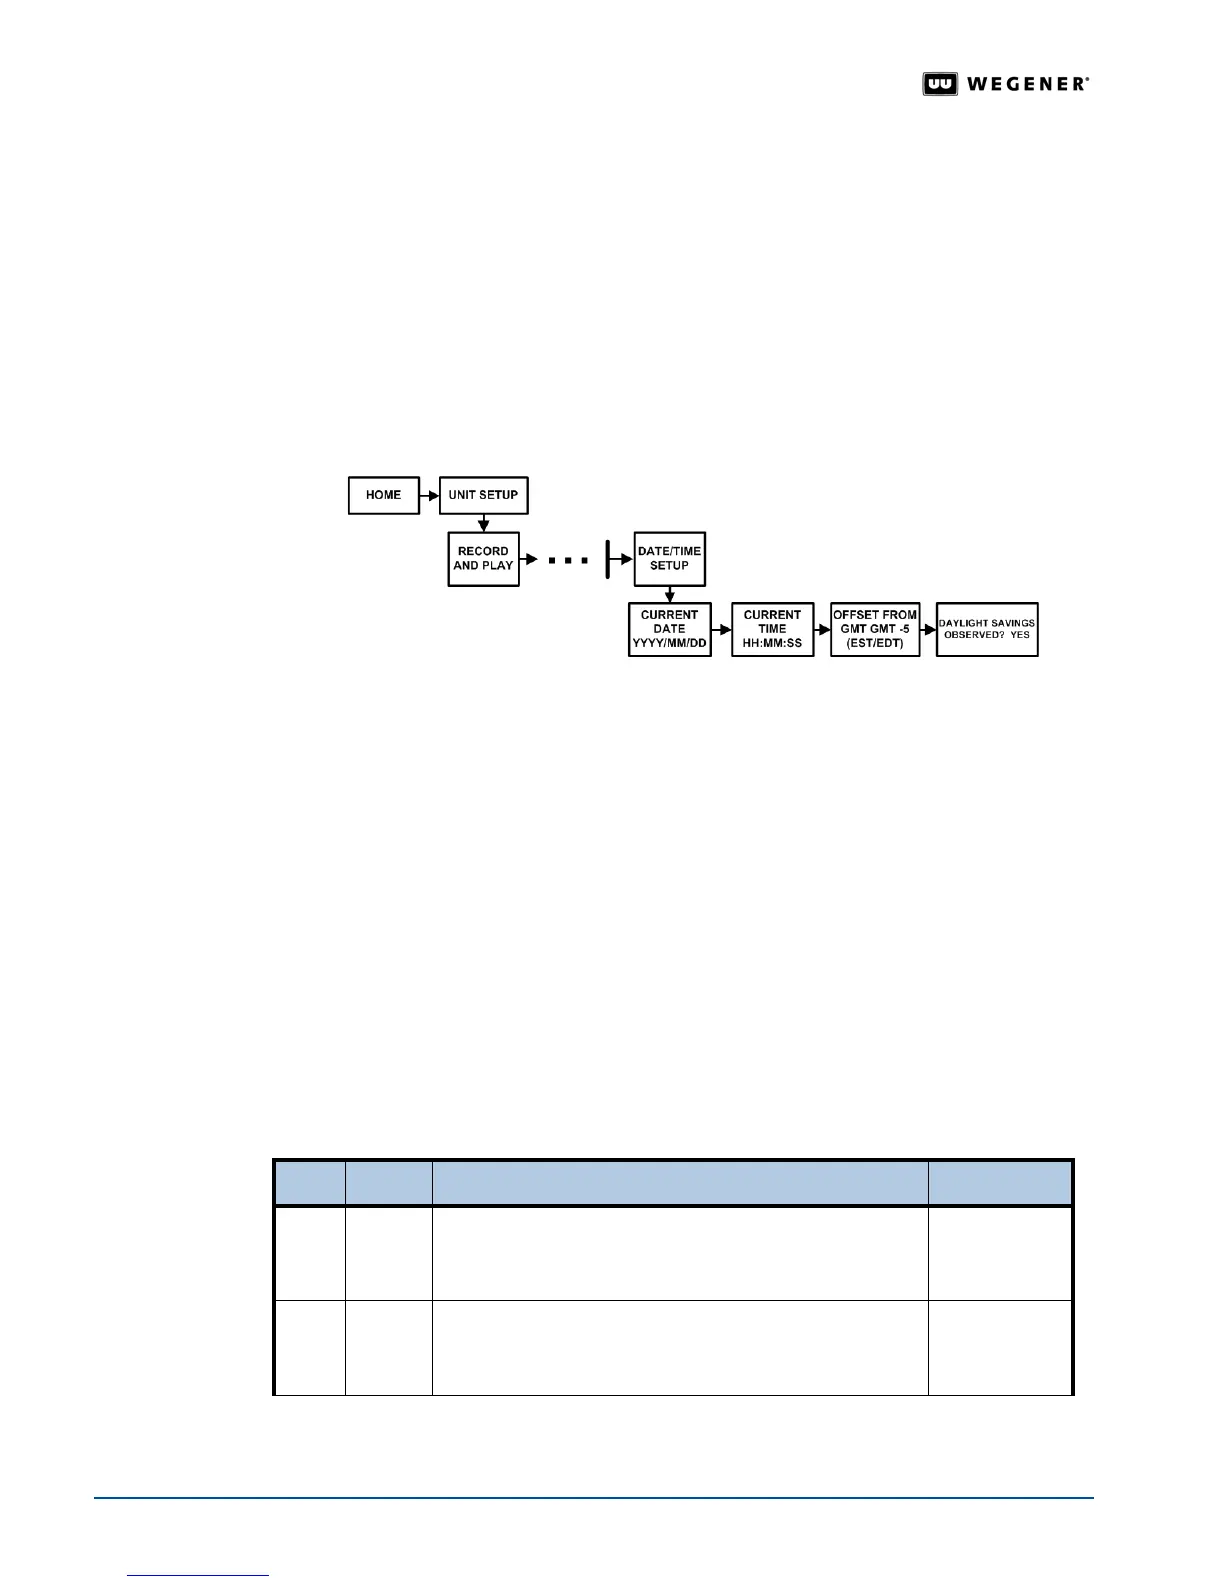
Set up the date and time for the iPump 6400 during the initial setup. Use the front panel
navigation buttons to go to the
Date/Time screen as shown in Figure 3.14.
Figure 3.14: LCD Menu navigation to Date/Time Setup screen
Date/Time
Setup
When operating under the Compel network, date and time settings are overwritten by
Compel. However, Time zone and Daylight Savings Time settings remain under local
control and should be set by the user.
From the
Date/Time screen, you can set or adjust the:
!"current date
!"current time
!"offset from GMT (Greenwich Mean Time)
!"DST (Daylight Savings Time) observance
Note: Date/Time Setup may also be performed from the web browser. See Date / Time
Setup
on page 41.
Table 3.8 on page 30 details the procedure for adjusting the Date/Time settings.
Table 3.8: Procedure for setting Date/Time parameters
Begin from the
Date/Time Setup screen.To change the screens, see Editable Data Fields on
page 20
and Selectable Fields on page 21.
Step Press Displayed/Field Details Screen Type
1.
ENTER CURRENT DATE
YYYY / MM / DD
Enter Current Date in year/month/day format.
Editable
2. #
CURRENT TIME
HH: MM: SS
Enter Current Time in hours:minutes:seconds format.
Editable