www.wegener.com 800009-01 Rev. J 31
iPump 6400 User’s Manual
Navigation to
Unit Label
Setup Screen
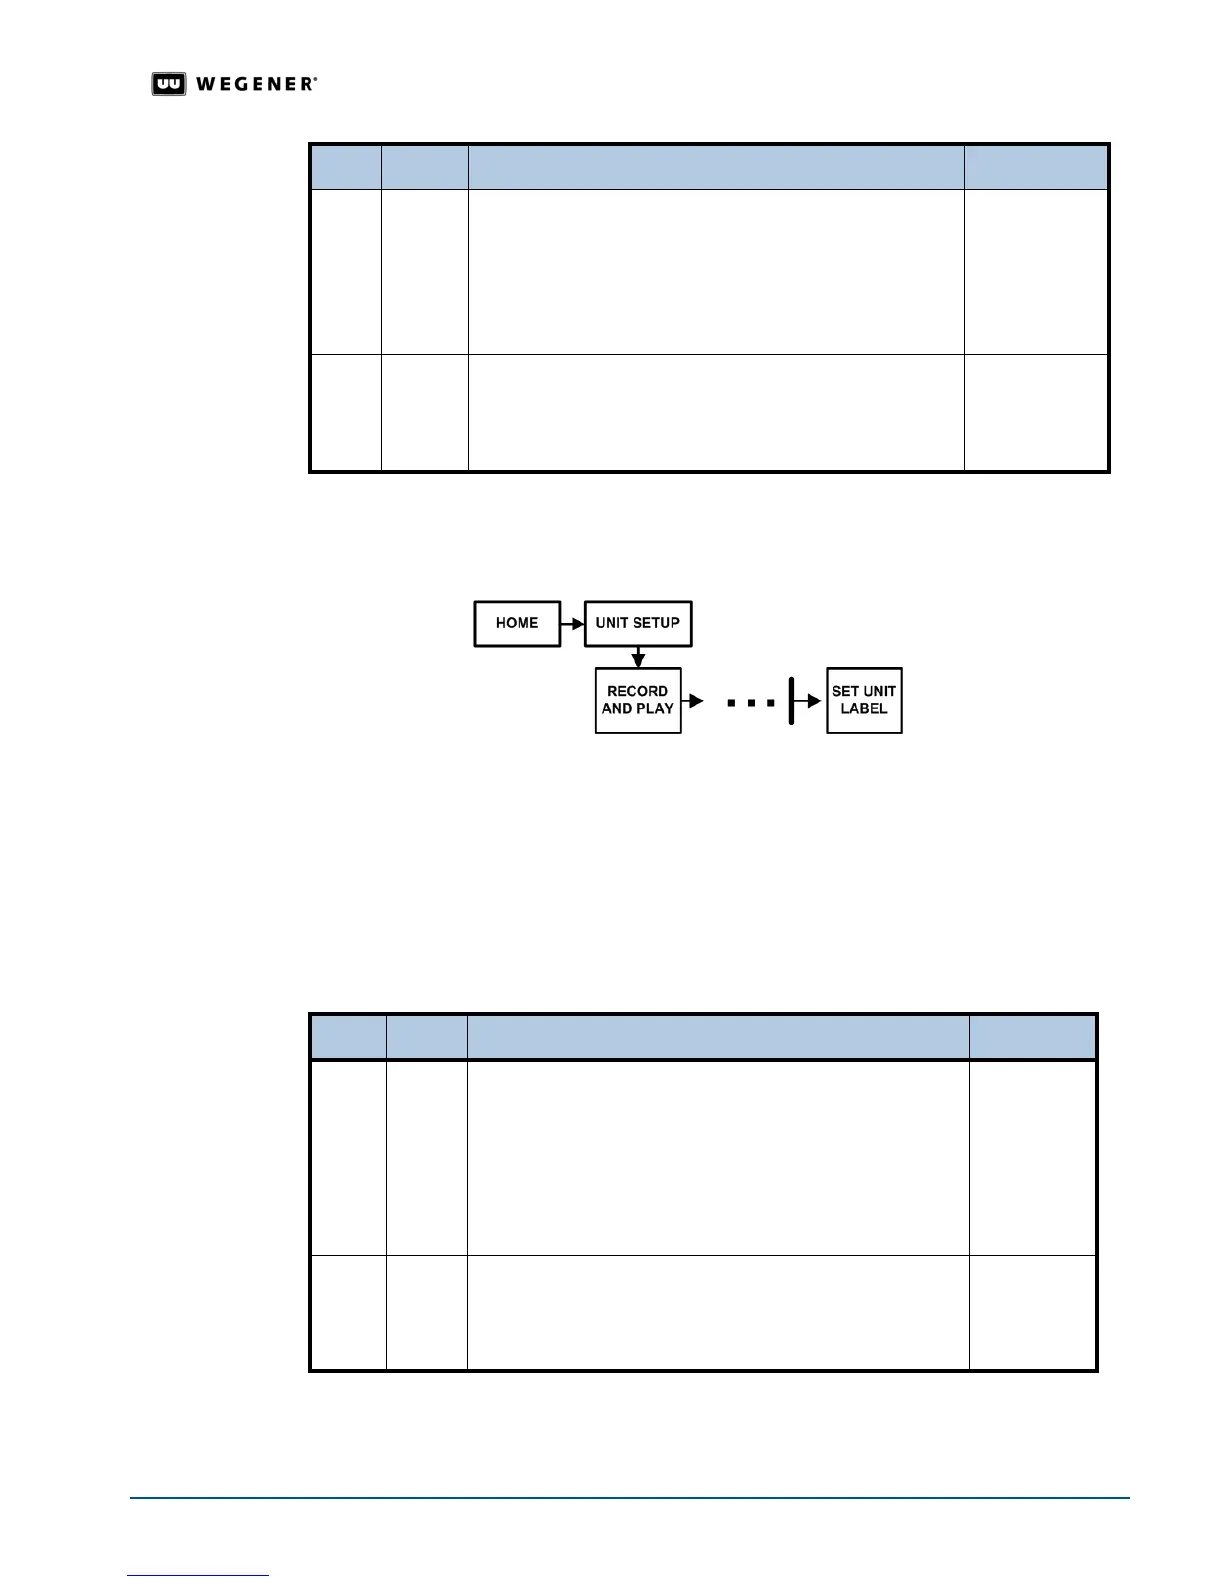
Assign a name to the iPump 6400 during the initial setup. Use the front panel navigation
buttons to go to the
Unit Label screen as shown in Figure 3.15.
Figure 3.15: LCD menu navigation to Set Unit Label screen
Unit Label
Setup
Set the Unit Label, the name assigned to the iPump 6400, during the initial setup. Table 3.9
details the label-entering procedure.
Note: Refer to
User Input Screens on page 20 for information on updating the editable
and selectable screens.
Table 3.9: Procedure for entering iPump 6400 Unit Label
Begin from the
SET UNIT LABEL screen. To change the screens, see Editable Data Fields
on page 20 and Selectable Fields on page 21.
3. #
OFFSET FROM GMT
GMT - 5 EST / EDT
Select the appropriate offset from Greenwich Mean Time.
Offset selections range from GMT -12 to GMT +11. (U.S.
Eastern Std. Time is at GMT -5; U.S. PacificStd. Time is at
GMT -8.)
Selectable
4. #
DAYLIGHT SAVING TIME
OBSERVED? YES
Select Yes if Daylight Saving Time is observed in your
area or
No if it is not.
Selectable
Step Press Displayed/Field Details Screen Type
Step Press Displayed/Field Details Screen Type
1.
ENTER U. LABEL A B C D E F G H I
J K L M N O P Q R
Note: Additional characters including numerals,
decimal, space, and hyphen appear as you move
downward through the available characters.
Select additional characters until the Unit Label is displayed
completely at the bottom left of the LCD.
Editable
2.
ESC DONE? <YES> <NO - ESC>
_________________
Press ENTER to confirm the unit label or ESC to return to
the UNIT LABEL screen.
Selectable