Operation
32 800009-01 Rev. J www.wegener.com
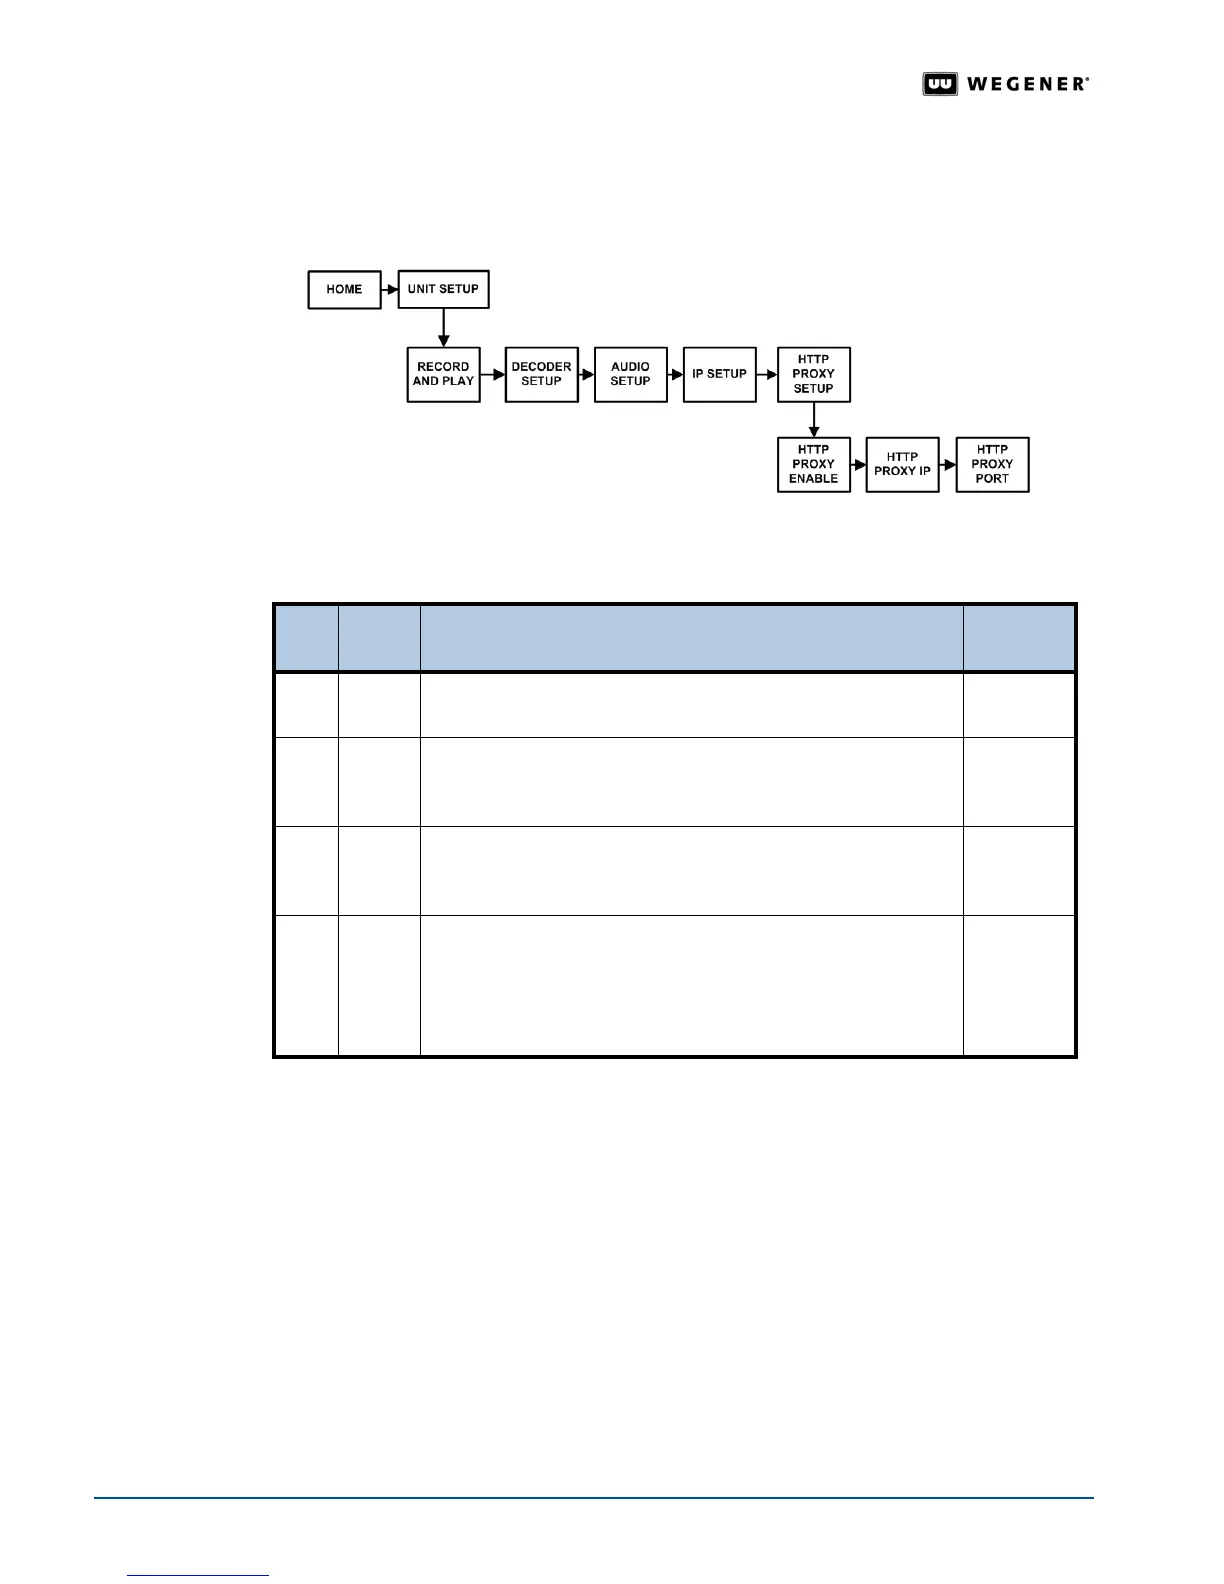
Navigation to
HTTP Proxy
screens
Contact your local network administrator for the correct settings. Set the address for the
HTTP Proxy IP and HTTP Proxy Port. Use the front panel navigation buttons to go to the
HTTP Proxy screens as shown in Figure 3.16.
Figure 3.16: LCD menu navigation to HTTP Proxy screens
HTTP Proxy IP
and Port
Setup
Table 3.10: Procedure for adjusting HTTP Proxy settings
Begin from the
HTTP Proxy Setup screen.
Navigation to
Return Path
screen
The Return Path is the communications return channel used for delivering status and reporting
information to the network control system.
If your local network uses a proxy server, you may
need to set the IP addresses for the Return Path main server and the backup server. Use
the front panel navigation buttons to go to the
Return Path screen as shown in Figure 3.17.
Step Press Displayed / Field Details
Screen
Type
1.
ENTER
HTTP PROXY ENABLE
Select to enable or disable HTTP Proxy.
Selectable
2. #
HTTP PROXY IP
000.000.000.000
Select numbers until the Proxy IP address is complete.
Editable
3. #
HTTP PROXY PORT
00000
Select numbers until the Proxy Port Number is complete.
Editable
4. #
SAVE ALL CHANGES?
YES <ENTER> NO <ESC>
Press ENTER to save all the HTTP Proxy Setup changes or
press
ESC to cancel the changes. The iPump 6400 returns you
to the
HTTP Proxy Setup screen.
Selectable