www.wegener.com 800009-01 Rev. J vii
iPump 6400 User’s Manual
LIST OF FIGURES
Figure 1.1: iPump 6400 routing ....................................................................................3
Figure 2.1: Proper rack installation for iPump 6400 ..................................................12
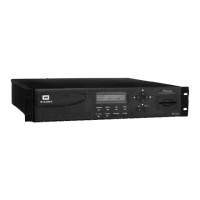
Figure 2.2: iPump 6400 rear-panel connector locations ............................................13
Figure 2.3: Digital output decoder connector layout ...................................................15
Figure 2.4: Balanced analog and AES/EBU digital audio connector ..........................16
Figure 2.5: Connectors for the Pro Audio Decoder ...................................................17
Figure 2.6: Typical RF multiswitch .............................................................................17
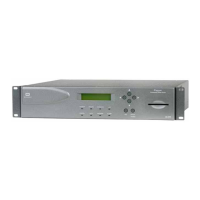
Figure 3.1: iPump 6400 front panel ............................................................................19
Figure 3.2: iPump 6400 front panel push buttons ......................................................20
Figure 3.3: Editable data field ..................................................................................20
Figure 3.4: Editable filename field .............................................................................21
Figure 3.5: Selectable field .......................................................................................21
Figure 3.6: iPump 6400 front panel LED indicators. ..................................................21
Figure 3.7: iPump 6400 web browser control setup process ...................................24
Figure 3.8: iPump 6400 web browser Status tab ......................................................25
Figure 3.9: iPump 6400 LCD menu structure ............................................................26
Figure 3.10: LCD menu navigation to Transport In Setup screen ...............................27
Figure 3.11: Menu navigation to set Transport In Current Channel ............................28
Figure 3.12: Menu navigation to set LNB type ............................................................29
Figure 3.13: Menu navigation to set LNB DC power ...................................................29
Figure 3.14: LCD Menu navigation to Date/Time Setup screen ...................................30
Figure 3.15: LCD menu navigation to Set Unit Label screen .......................................31
Figure 3.16: LCD menu navigation to HTTP Proxy screens ........................................32
Figure 3.17: LCD menu navigation to Return Path screen ..........................................33
Figure 3.18: LCD menu navigation to Modem screen ..................................................34
Figure 3.19: LCD menu navigation to Genlock screen ................................................35
Figure 3.20: LCD menu navigation to SMB screen ......................................................35
Figure 3.21: iPump 6400 web browser Setup tab .....................................................37
Figure 3.22: iPump 6400 web browser Status tab ......................................................44
Figure 3.23: iPump 6400 web browser Rec/Play tab ...................................................47
Figure 3.24: iPump 6400 web browser Files tab ..........................................................50
Figure 3.25: iPump 6400 web browser Streams tab ....................................................51
Figure 3.26: iPump 6400 web browser Schedule tab ..................................................52
Figure 3.27: iPump 6400 web browser Playlist tab ....................................................53