Maintenance2751−2/A1
Winterthur Gas & Diesel Ltd.
4/ 8
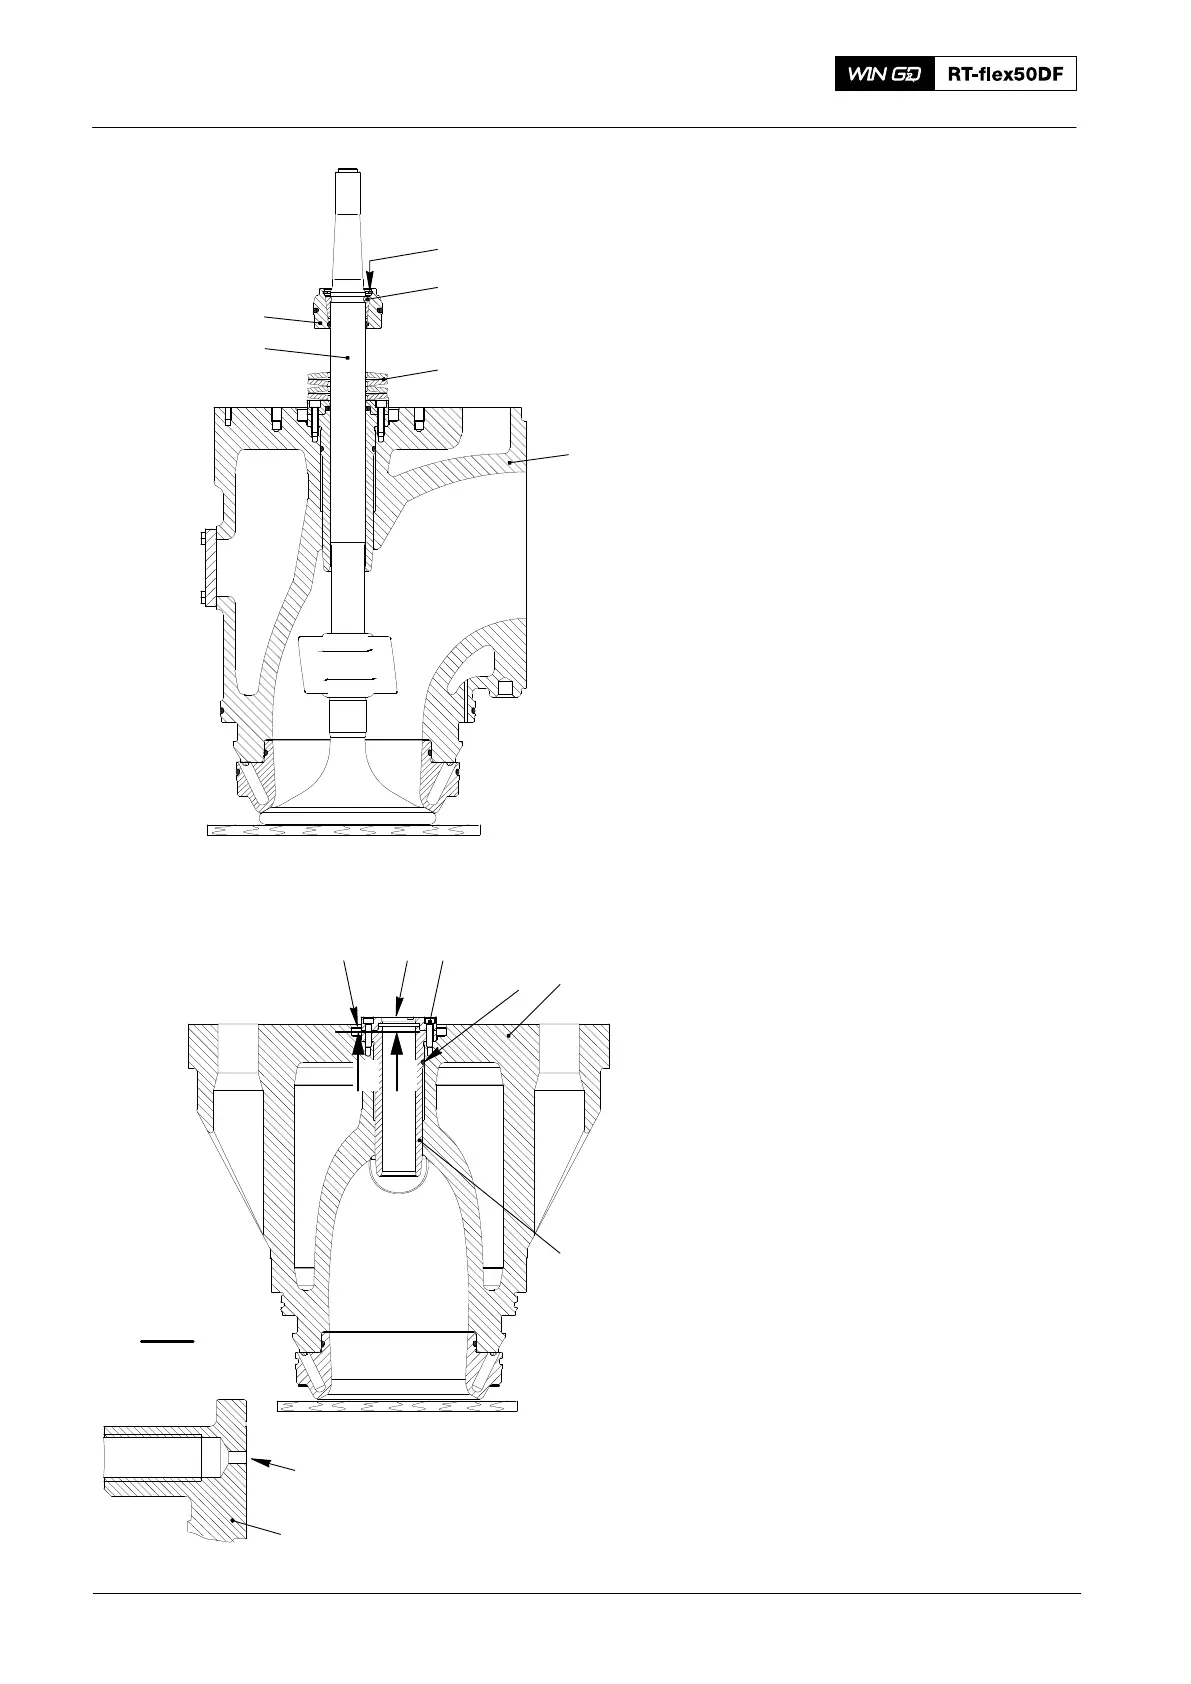
2.2 Valve Spindle − Remove
1) Remove the circlip (1, Fig. 5).
2) Push the piston (6) down.
3) Remove the two parts of the valve
cotter (2).
4) Remove the piston (6) from the valve
spindle (5).
5) Remove the cup springs (3).
When you do step 6) below, make sure
that the valve spindle (5) does not move.
6) Operate the engine room crane and the
applicable lifting equipment to lift the
valve cage (4) away from the valve
spindle (5).
7) Lower the valve cage (4) on to its side.
2.3 Guide Bush − Remove
1) Remove the four screws (2, Fig. 6).
2) Remove the spacer (1).
3) Remove and discard the rod seal
ring (7).
4) Use two jack-screws or M10 threaded
rods to remove the guide bush (5).
5) Measure the inner diameter of the
guide bush.
6) Compare the value with that given in
0330−1, Clearance Table Exhaust
Valve.
3. Assemble
3.1 Guide Bush − Install
1) Clean the bores (6) in the valve
cage (4).
2) Clean the valve bush (5).
3) Replace the O-ring (3).
4) Put oil on the guide bush (5).
5) Put the guide bush (5) in the valve
cage (4).
6) Use two jack-screws or M10 threaded
rods to push the guide bush (5) into the
valve cage (4).
2016
Exhaust Valve: Disassemble and Assemble
WCH02863
Fig. 5
2
3
1
4
5
6
WCH02863
I I
I - I
Fig. 6
2
7
1
4
3
5
5
6