Maintenance
5562−1/A1
Winterthur Gas & Diesel Ltd.
3/ 5
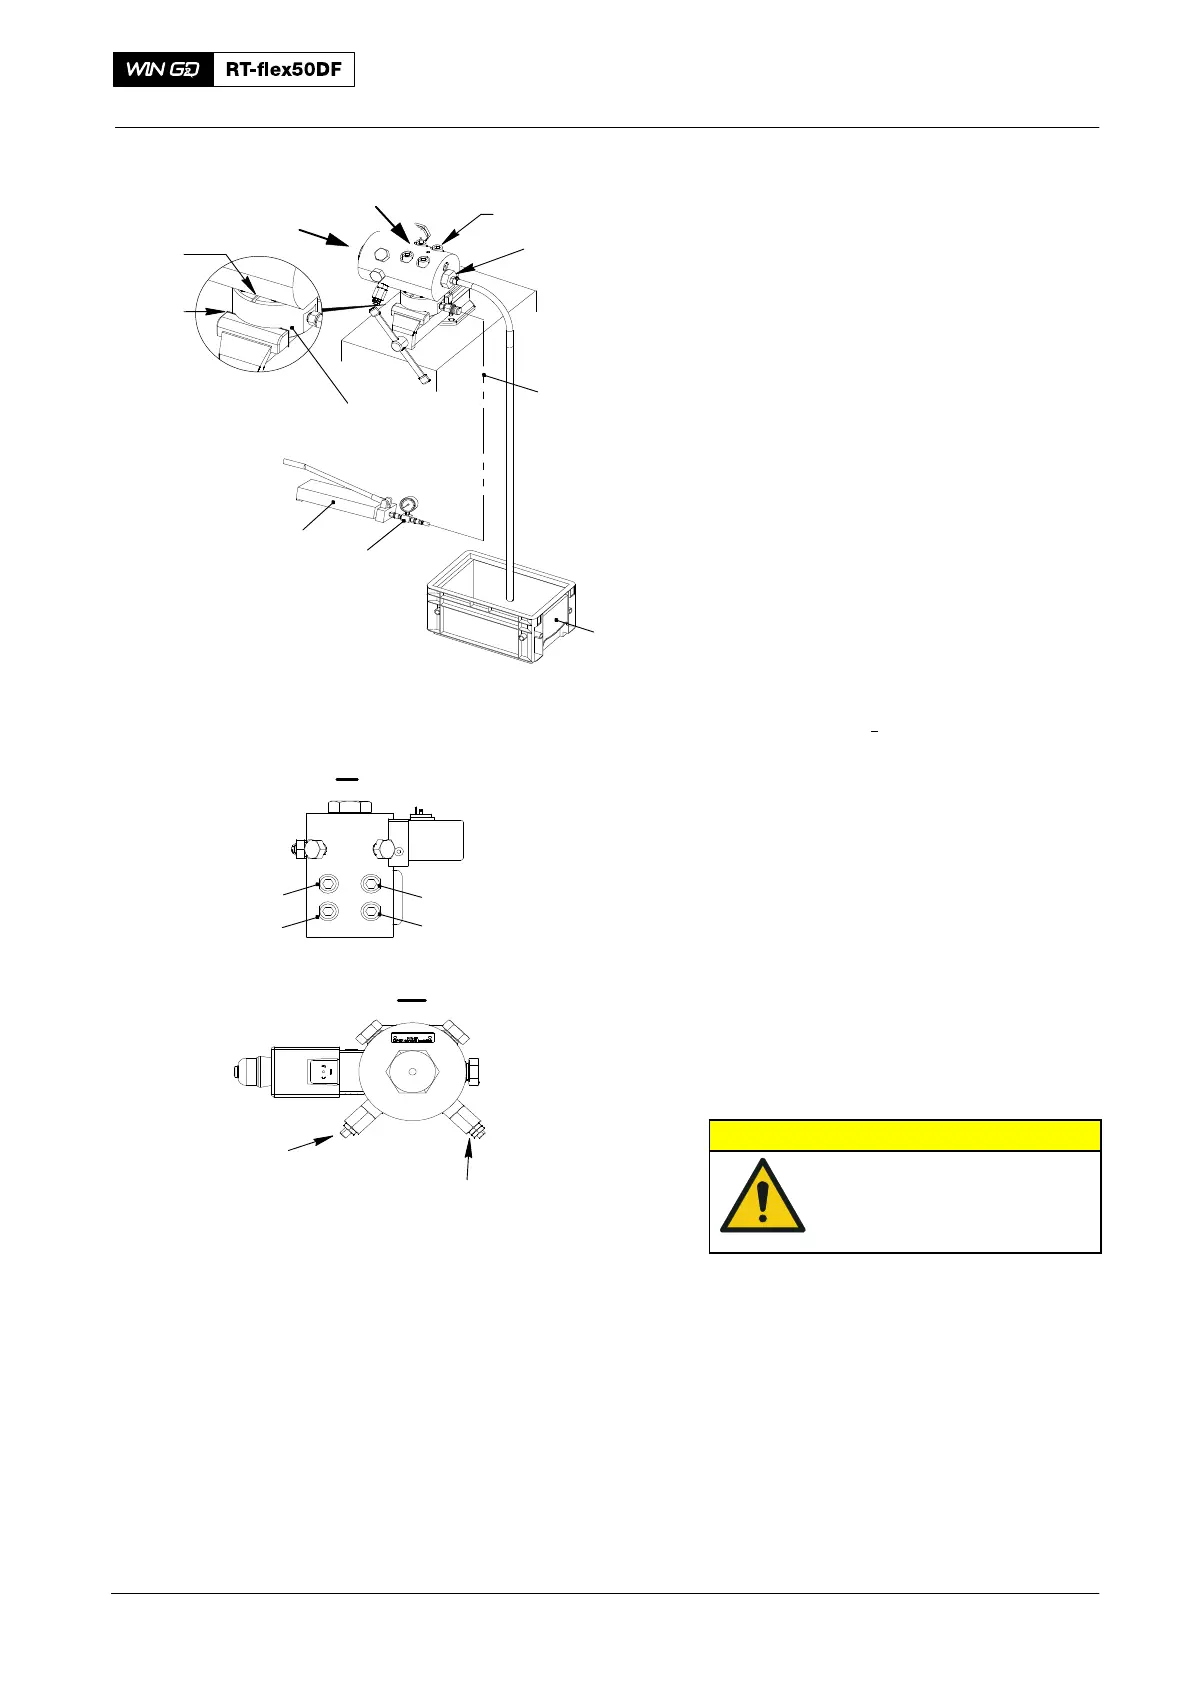
4. PCV Check
4.1 Preparation
1) Put the protection (4, Fig. 2) around the
PCV test block (94556).
2) Put the test block (94556) in a bench
vice.
3) Make sure that the sealing surfaces of
the PCV and the test block (94556) are
clean and have no damage.
4) Put the PCV in position on the test
block (94556).
5) Put oil on the threads of the four
screws (1).
6) Put the four screws (1) in position in the
PCV.
7) Tighten the screws (1) in the sequence
given in View I
as follows:
a) Tighten the screws with your
hand.
b) Torque the screws to 80 Nm.
c) Torque the screws to 190 Nm.
8) Attach the flexible tube (94556C) (part
of the test block 94556) to the PCV
outlet (2). Put the other end of the
flexible tube into an applicable
container (3).
9) Connect the HP oil pump (94931),
hydraulic distributor/pressure gauge
(94934A) and HP hose (94935) to the
test block (94556).
CAUTION
Damage Hazard: Do not
adjust the safety valve.
Damage to the PCV can
occur.
10) Identify each of the two pressure
control set screws.
11) On the setpoint adjustment valve
(SAV) (6), loosen the locknut.
12) Loosen fully the SAV (6) to minimum.
Fuel Pressure Control Valve: Removal, Check, Installation
2016
WCH02281
94935
94931
4
5
94556
94934A
I
II
Fig. 2
a
d
c
b
Safety Valve
DO NOT
ADJUST
I
II
1
3
2
6