Maintenance1112−1/A1
Winterthur Gas & Diesel Ltd.
2/ 4
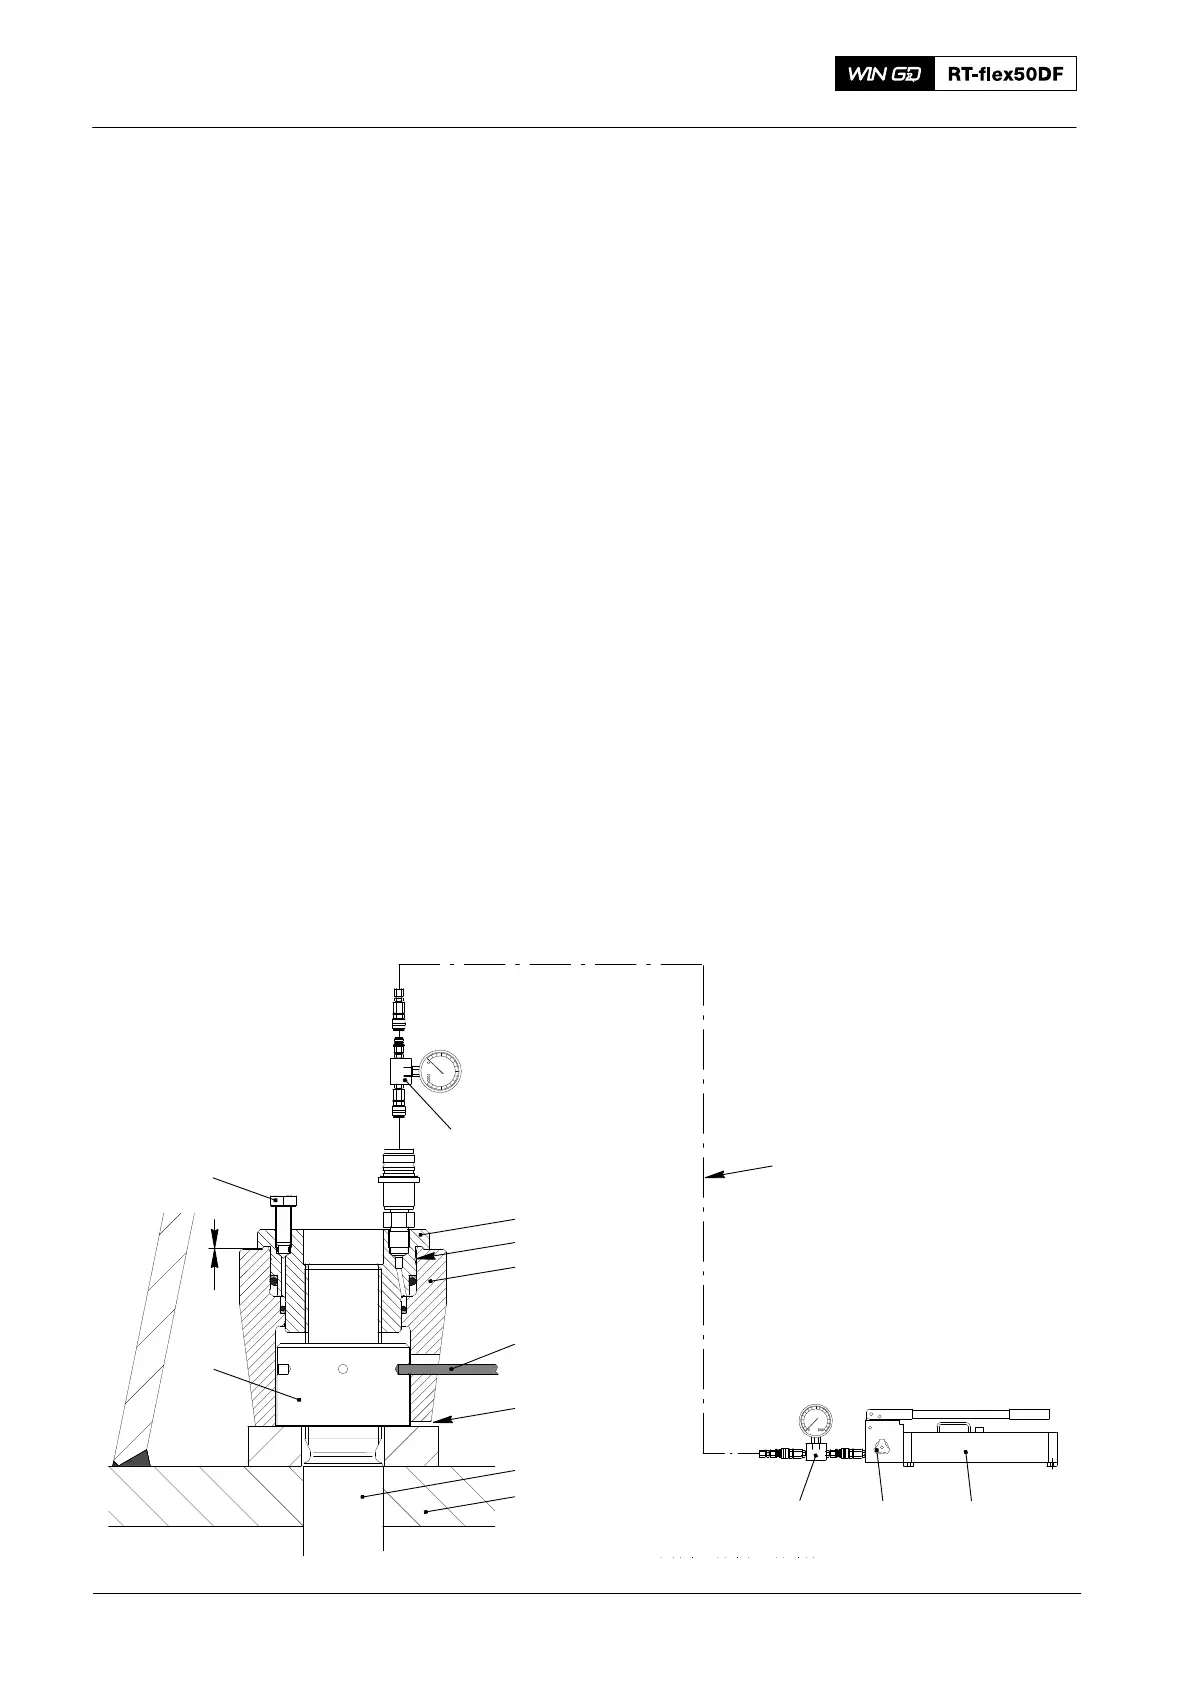
2. Tension Check
1) Clean the threads of the foundation bolts (5, Fig. 4) and the seating surfaces.
2) Apply Molykote G paste to the threads of the foundation bolts, or installed
studs (5).
3) Put the pre-tensioner (94145) in position on the foundation bolt (5)
4) Open the vent screw (8).
5) Turn the pre-tensioner (94145) fully down. Make sure that there is little, or no
clearance at (X).
6) Connect the pre-tensioner (94145) to HP oil pump (94931). Refer to 9403−2.
7) Close the relief valve (9) and operate the HP oil pump until oil that has no air
flows from the vent screw (8).
8) Close the vent screw (8).
9) Apply a pressure of 1500 bar to the foundation bolt (5). Keep the pressure
constant.
Note: Do not move the piston (1) of the pre-tensioner (94145) above the red
groove (2).
10) Use a feeler gauge to do a check for clearance through the slot (4) between the
nut (7) and the bedplate (6).
11) If there is a clearance, do step a) to step c). If there is no clearance, continue
from step 12)
a) Make sure that the pressure on the foundation is 1500 bar.
b) Use the round bar (3) to tighten the round nut (7).
c) Do step 10) again.
12) Open the relief valve (9) to release the pressure to zero.
13) Remove the pre-tensioner (94145).
Note: If all foundation bolts are loose and must be tightened again, do the
procedure given in paragraph 4.
3
4
5
94934A
1
X
94931
9
94934A
012.949/05
94145
6
7
2
8
94935
Fig. 4
2016
Bedplate and Thrust Bearing