Maintenance3303−1/A1
Winterthur Gas & Diesel Ltd.
4/ 5
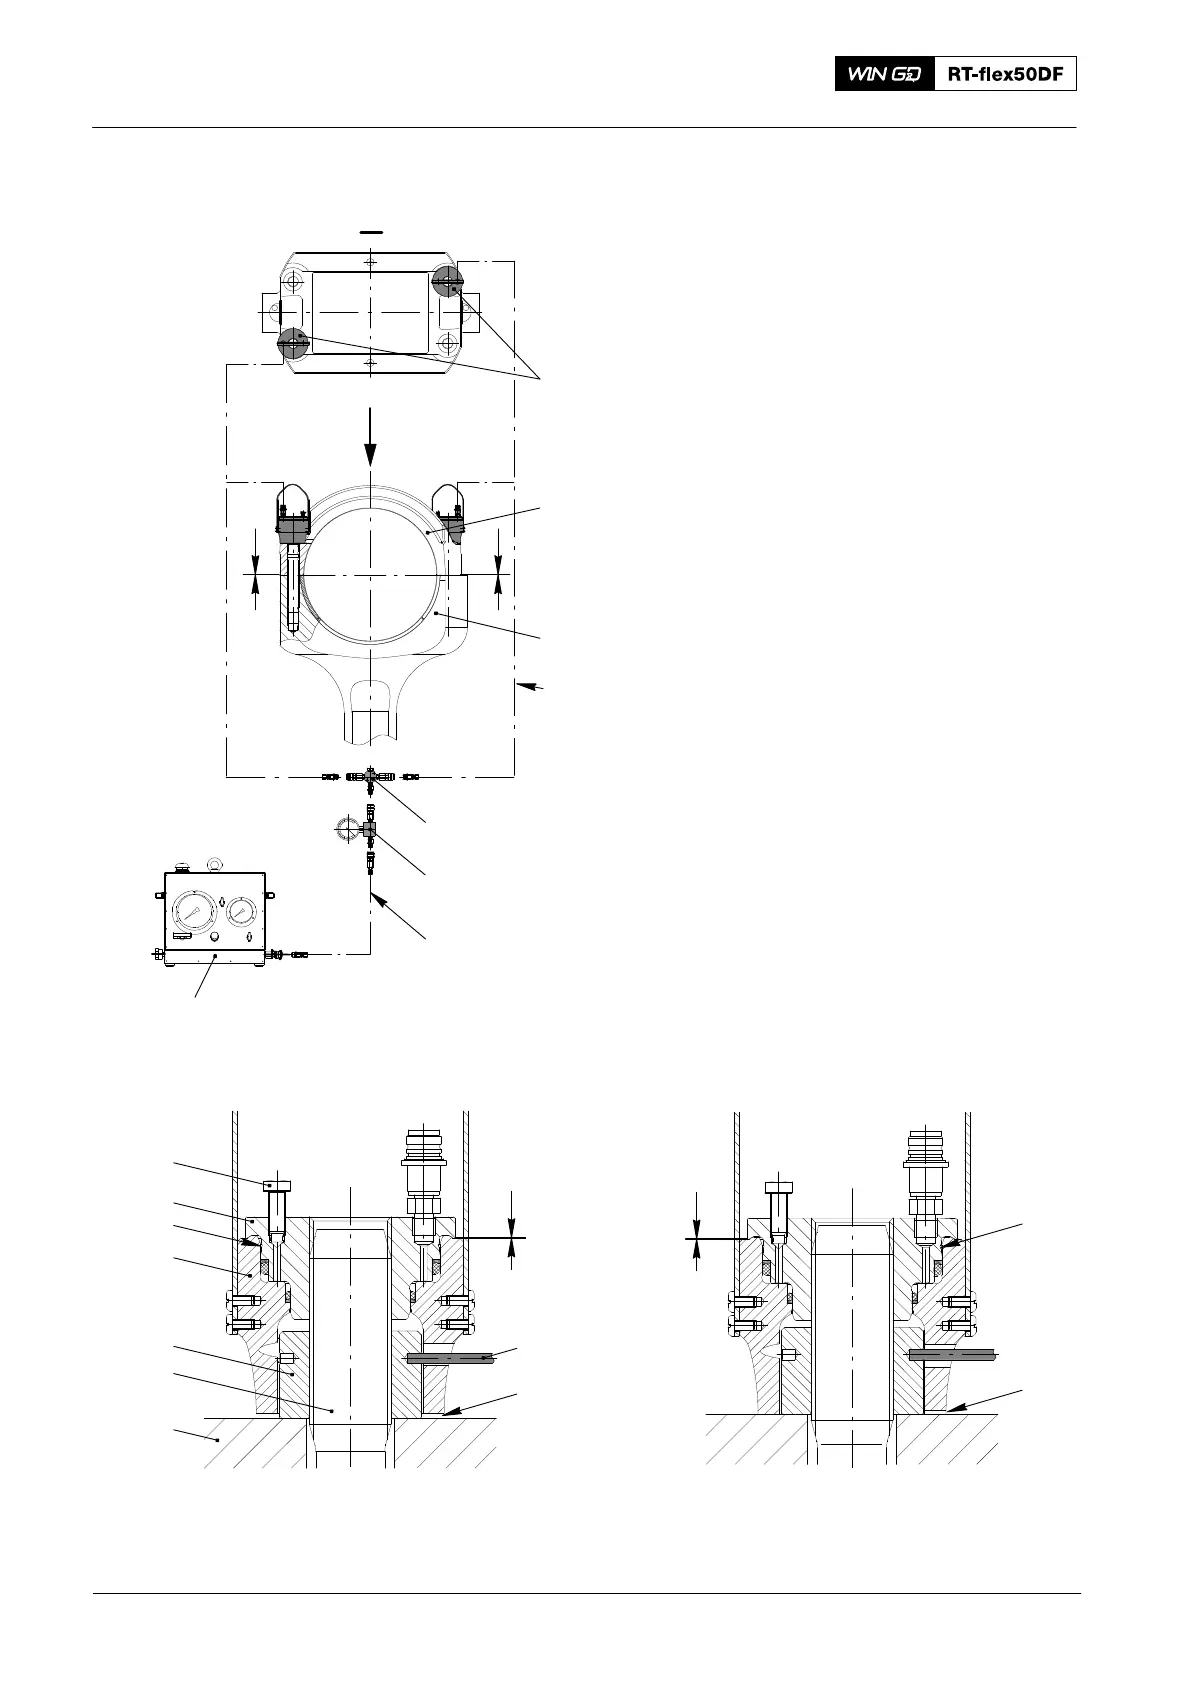
4. Loosening the stud of
top end bearing
Note: For loosening the studs always
follow the sequence shown in Fig.
4 i.e. a+a and b+b.
1) Clean the threads of studs 1 and the
area around the nuts 2.
2) Put the pre-tensioning jacks 94315
diagonally on the studs as shown in
Fig. 4, and completely screw them on
with opened vent screw 7 until there is
only little or no clearance at ’x’ (Fig. 5).
3) Turn back the pre-tensioning jacks by
about ½ turn (gap ’SA’ in Fig. 5).
4) Connect the pre-tensioning jacks to
hydraulic unit 94942 as shown in Fig. 4.
5) Actuate the hydraulic unit until
bubble-free oil flows out through the
vent screws. Close vent screws.
6) Actuate the hydraulic unit up to about
1530 bar and keep pressure constant.
Pistons 8 of the pre-tensioning jacks
must never exceed the red limiting
grooves ’BN’ (Fig. 5).
7) Use the round bar ’RS’ and screw back
the nuts 2 by one turn.
8) Release the pressure to ’0’ at the
hydraulic unit and then remove
pre-tensioning jacks.
9) Do the same procedure for the second
pair of the connecting rod studs.
PRE-TENSIONING JACK
PLACED FOR TENSIONING
009.756/02
x
KO
BN
Fig. 5
PRE-TENSIONING JACK
PLACED FOR LOOSENING
009.755/02
3
1
2
9
8
BN
7
x
SA
RS
Fig. 6
2016
Loosening and Tensioning the Connecting Rod Studs
94315
94934
94934A
94935
I
I
y
y
3
3
94935
a
b
b
a
013.431/05
94942
Fig. 4