03/2003
6-16
8850/ 510DP
GP 8
General Procedures
b. Press Exit to accept the setting.
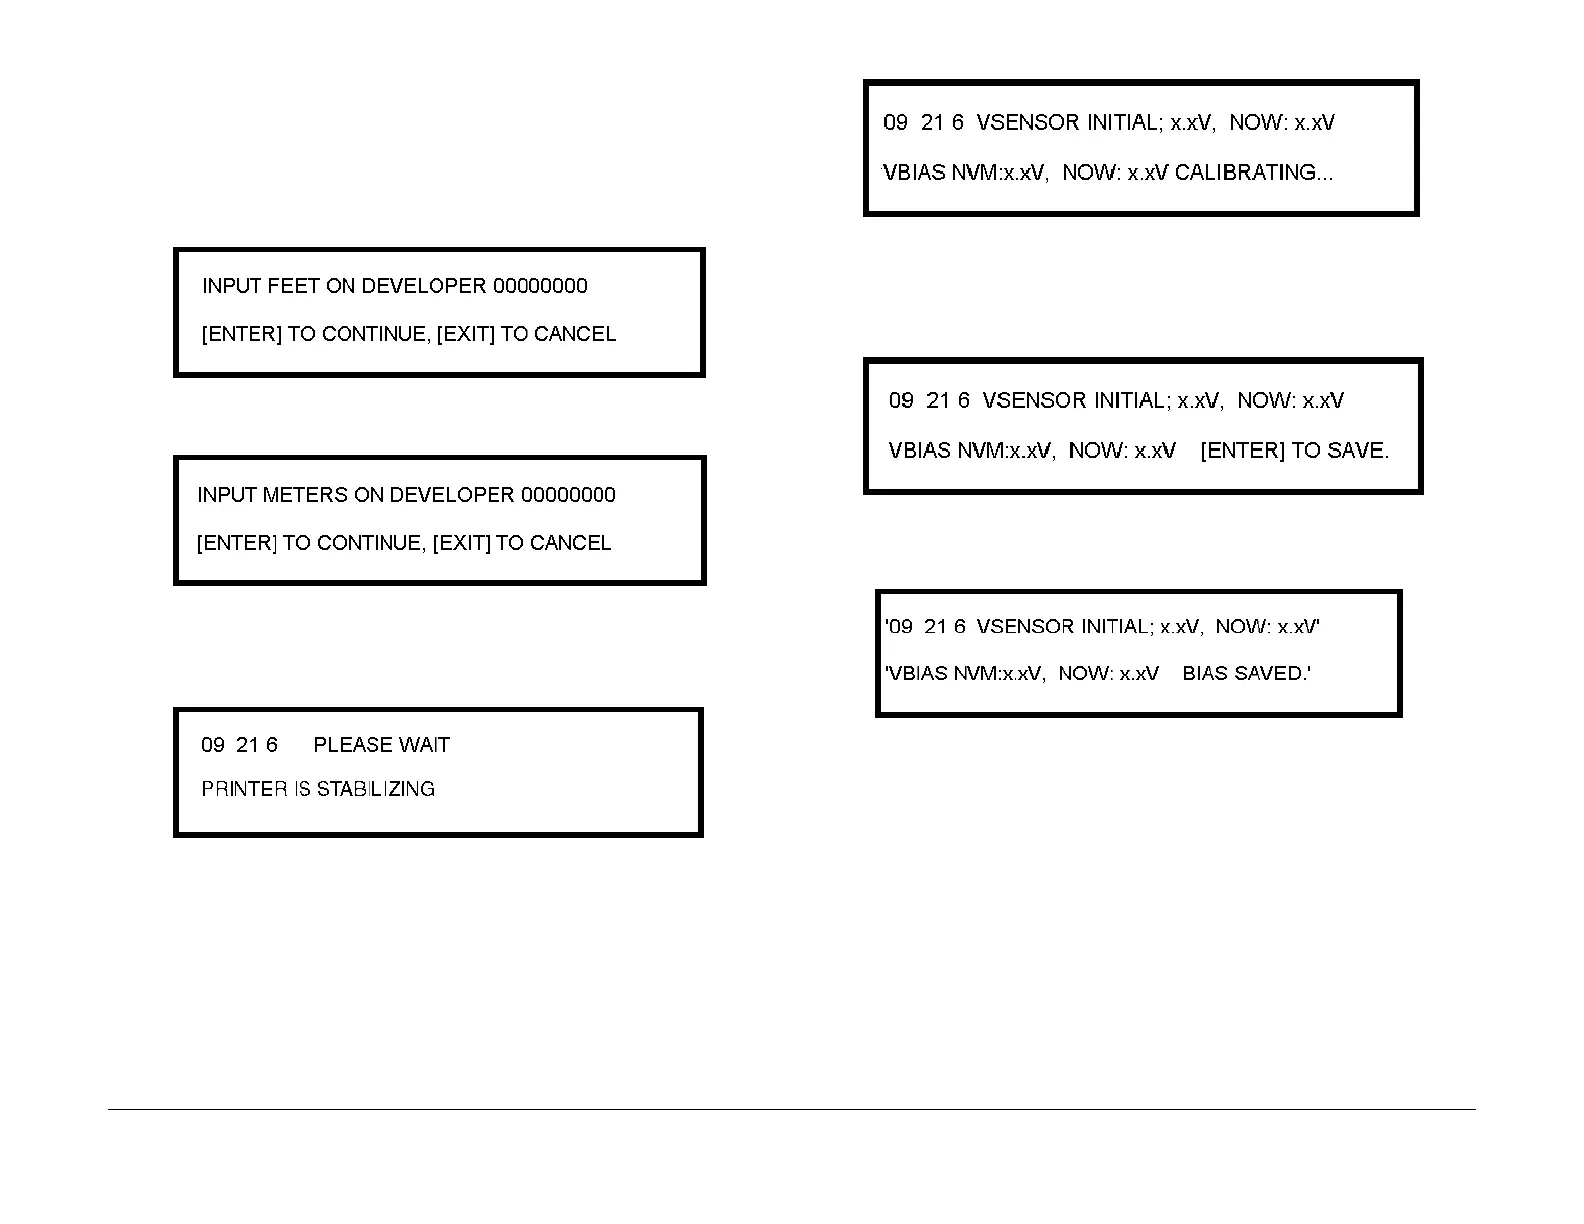
3. (Figure 3): Enter [0921-6 the number of feet or meters run on the developer is displayed.
If the developer is new, press the clear key /C on the numerical keypad to reset the count
to zero. If the developer is not new, leave the INPUT FEET as is and press Enter to con-
tinue.
NOTE: Depending on the Country Code billing type, the message shown in Figure 3 or
Figure 4 will be displayed.
Figure 3 Entering the Number of Feet
Figure 4 Entering the Number of Meters
4. Wait approximately two minutes for the Printer to stabilize. The following messages will
be displayed (Figure 5 and Figure 6).
Figure 5 Printer Stabilizing
Figure 6 Toner Sensor Calibration and Bias Adjustment
5. (Figure 7): Press the Enter button to save the calibration values. When the values are
saved, the message indicated in Figure 8 will be displayed
Figure 7 Saving the Calibration Values
Figure 8 Confirming the Calibrated Values
6. Press the Exit button to end the process.
7. Enter code [0955] and make one print of Test Pattern #5.
8. Using S.I.R. 495.01 (82P520), evaluate the darkness squares at the lower right center
and the upper left from the lead edge.
9. If the darkness square is not between 1.2 and 1.4, perform the adjustment again, starting
at Step 2..
10. Enter [0921-4] and make a record of the CONTROL POINT VOLTS and the RAW SEN-
SOR VOLTS in the Printer Log Book.
 Loading...


