October 2012
4-64
ColorQube 8570/8870 Service Manual
REP 3.13
Revised, 3rd Revision - Xerox Internal Use Only
Repairs and Adjustments
7. Open the Exit Module.
8. Open the Lower Exit Guide Assembly.
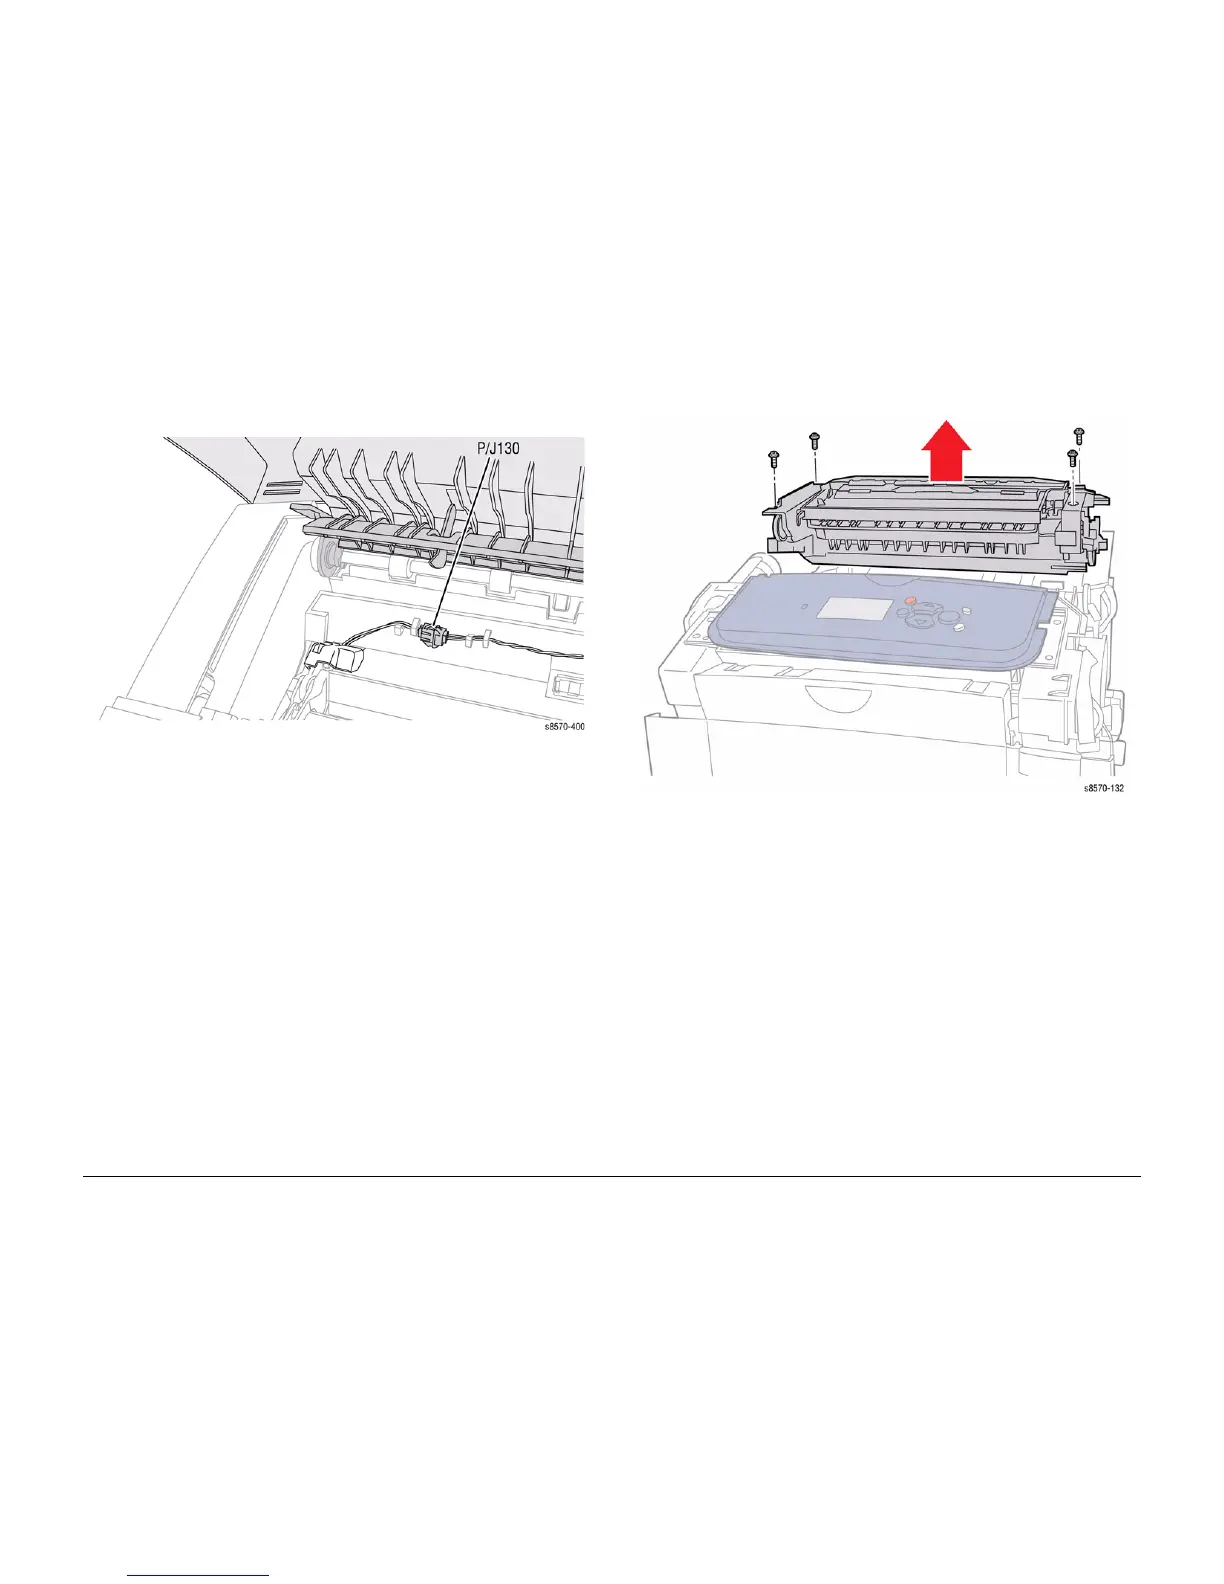
9. Disconnect the Drum Temperature Sensor wiring harness connector P/J130.
Figure 3 Disconnecting the Drum Temperature Sensor Wiring Harness Connector
10. Remove the 4 screws (metal, T-20) that secure the Exit Module.
11. Lift the Exit Module from the chassis.
Figure 4 Removing the Exit Module
Replacement
Seat the Exit Module on the chassis. Torque the 4 screws to 12 in.-lbs and perform Wiper
Blade Alignment procedure (ADJ 1.1). The printer may report errors 91,720~91,723, if the
Wiper Assembly is misaligned.
 Loading...


