Copyright © 2012 by Xerox Corporation. All rights reserved. 604E56261 Page 6
Step Check List Items to
Complete
Value or
Result
What to look for
9
Visually check the
Wiper Assembly
blade.
Is it OK?
YES
NO
Circle one
Is there any damage or separation on the Wiper Blade?
If YES, replace the Wiper Assembly.
10
Check the purge
performance of the
Purge System.
Check the Purge Pump performance.
9a.
Empty the Waste Tray.
9b.
From the printer Control Panel, select:
ColorQube 8570/ 8870: Eliminate Light Stripes - Basic and run
one cleaning cycle.
ColorQube 8700/ 8900: Machine Status button > Tools >
Troubleshooting > Fix Image Quality > Light Lines > Fix.
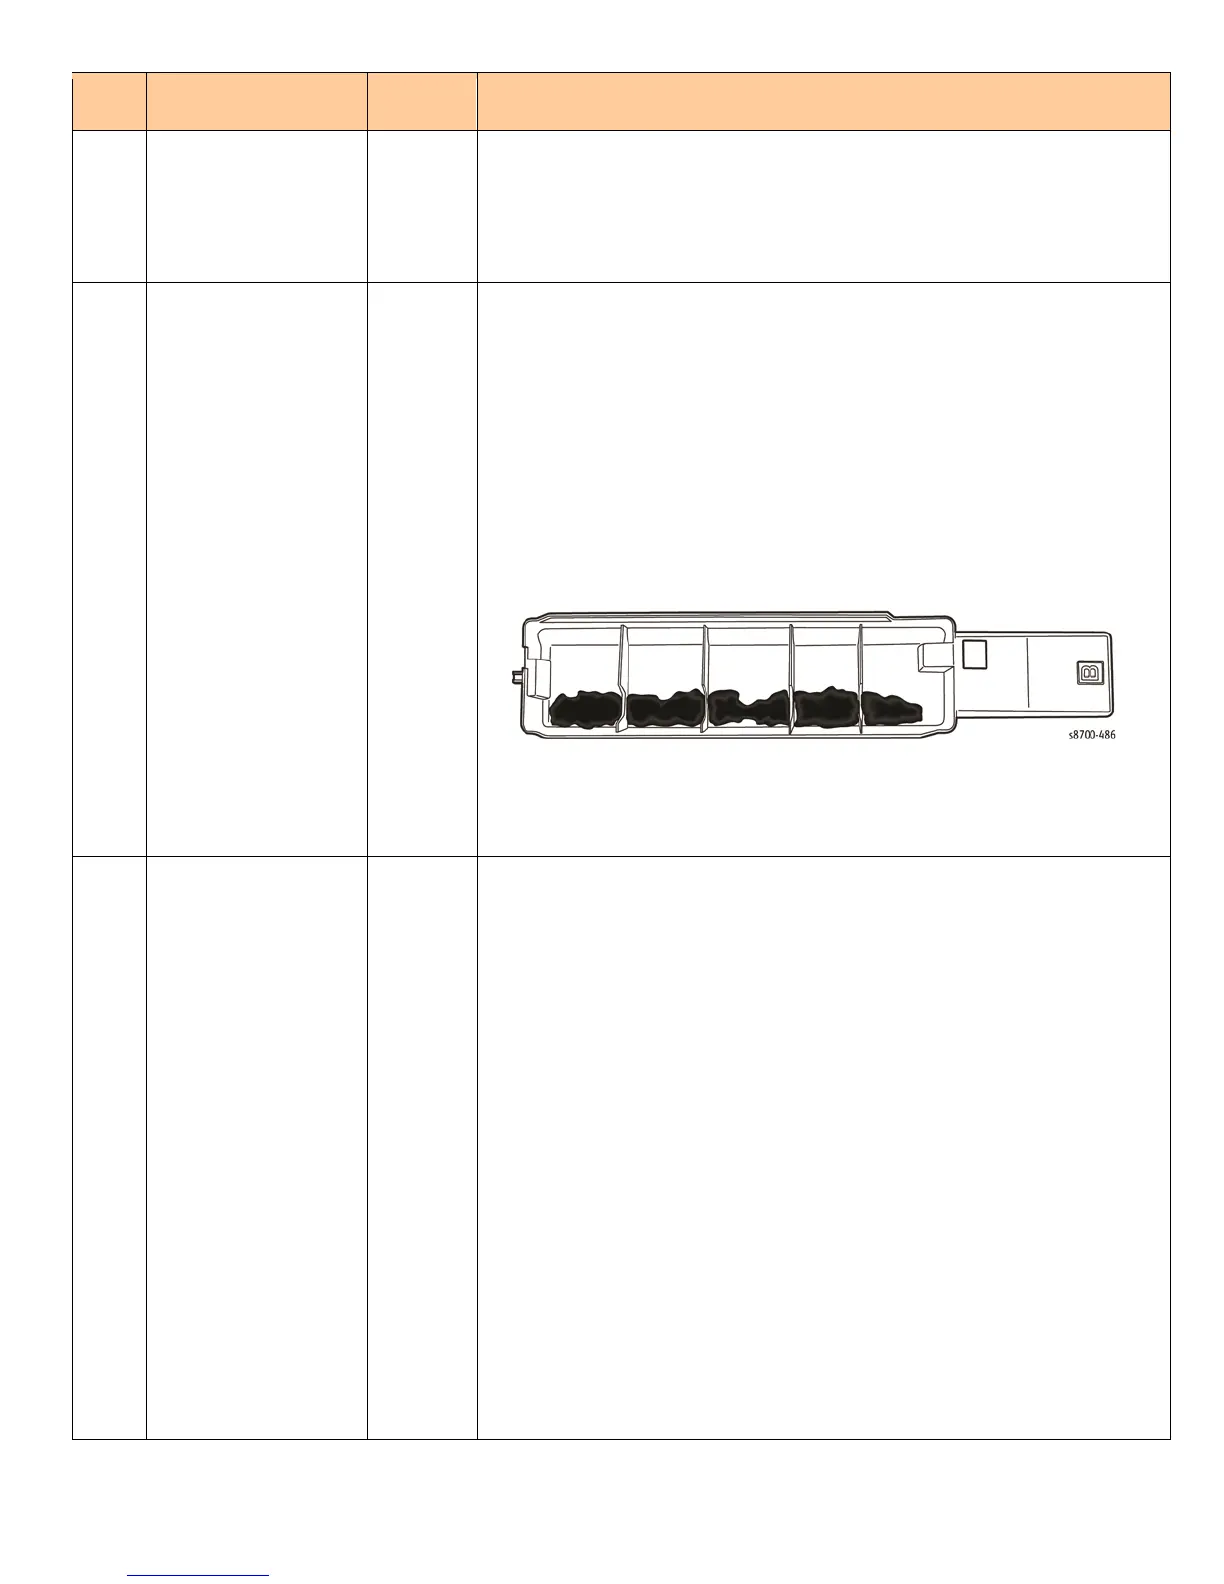
9c.
Remove the Waste Tray and examine how much ink was purged.
A single purge should resemble the illustration.
Is the purge mass noticeably less than what is pictured?
If YES, inspect the purge hoses for pinches, splits, tears, or
disconnect.
11
Print the Light
Stripes Test page.
Are there weak or
missing jet(s)?
YES
NO
Circle one
If NO go to Step 12.
If YES, do the following:
• Check the exit area of the paper path for debris that could be
scraping ink off the Drum and may mimic a weak or missing jet.
• From the Control Panel, select:
ColorQube 8570/ 8870: Troubleshooting > Print Quality
Problems > Eliminate Light Stripes > Start Basic Clean Cycle.
ColorQube 8700/ 8900: Machine Status button > Tools >
Troubleshooting > Fix Image Quality > Light Lines > Fix.
Perform the procedure up to 3 times as needed to recover a weak or
missing jet.
• From the Control Panel, select:
ColorQube 8570/ 8870: Troubleshooting > Print Quality
Problems > Eliminate Light Stripes > Advanced.
ColorQube 8700/ 8900: Machine Status button > Tools >
Troubleshooting > Fix Image Quality > Advanced > Jet Purge.
Perform the procedure up to 2 times as needed to recover a weak or
missing jet.
 Loading...


