,..,...,
REMOVING THE REAR WHEEL
1. Stand the vehicle on a level surface.
EWA
l3 1
20
AwARNING
Securely
support
the
veh
ic
le
so
that
there
is
no
danger
of
it
falling over.
TIP
-------------
Place the vehicle on a suitable stand so that t
he
rear wheel is elevated.
2. Remove:
• Rear brake ca
li
per "1"
E
CA1AC
l431
NOTICE
-----------
Do not
depress
the brake
pe
dal
wh
en
re
mov
-
ing
the brake
ca
liper.
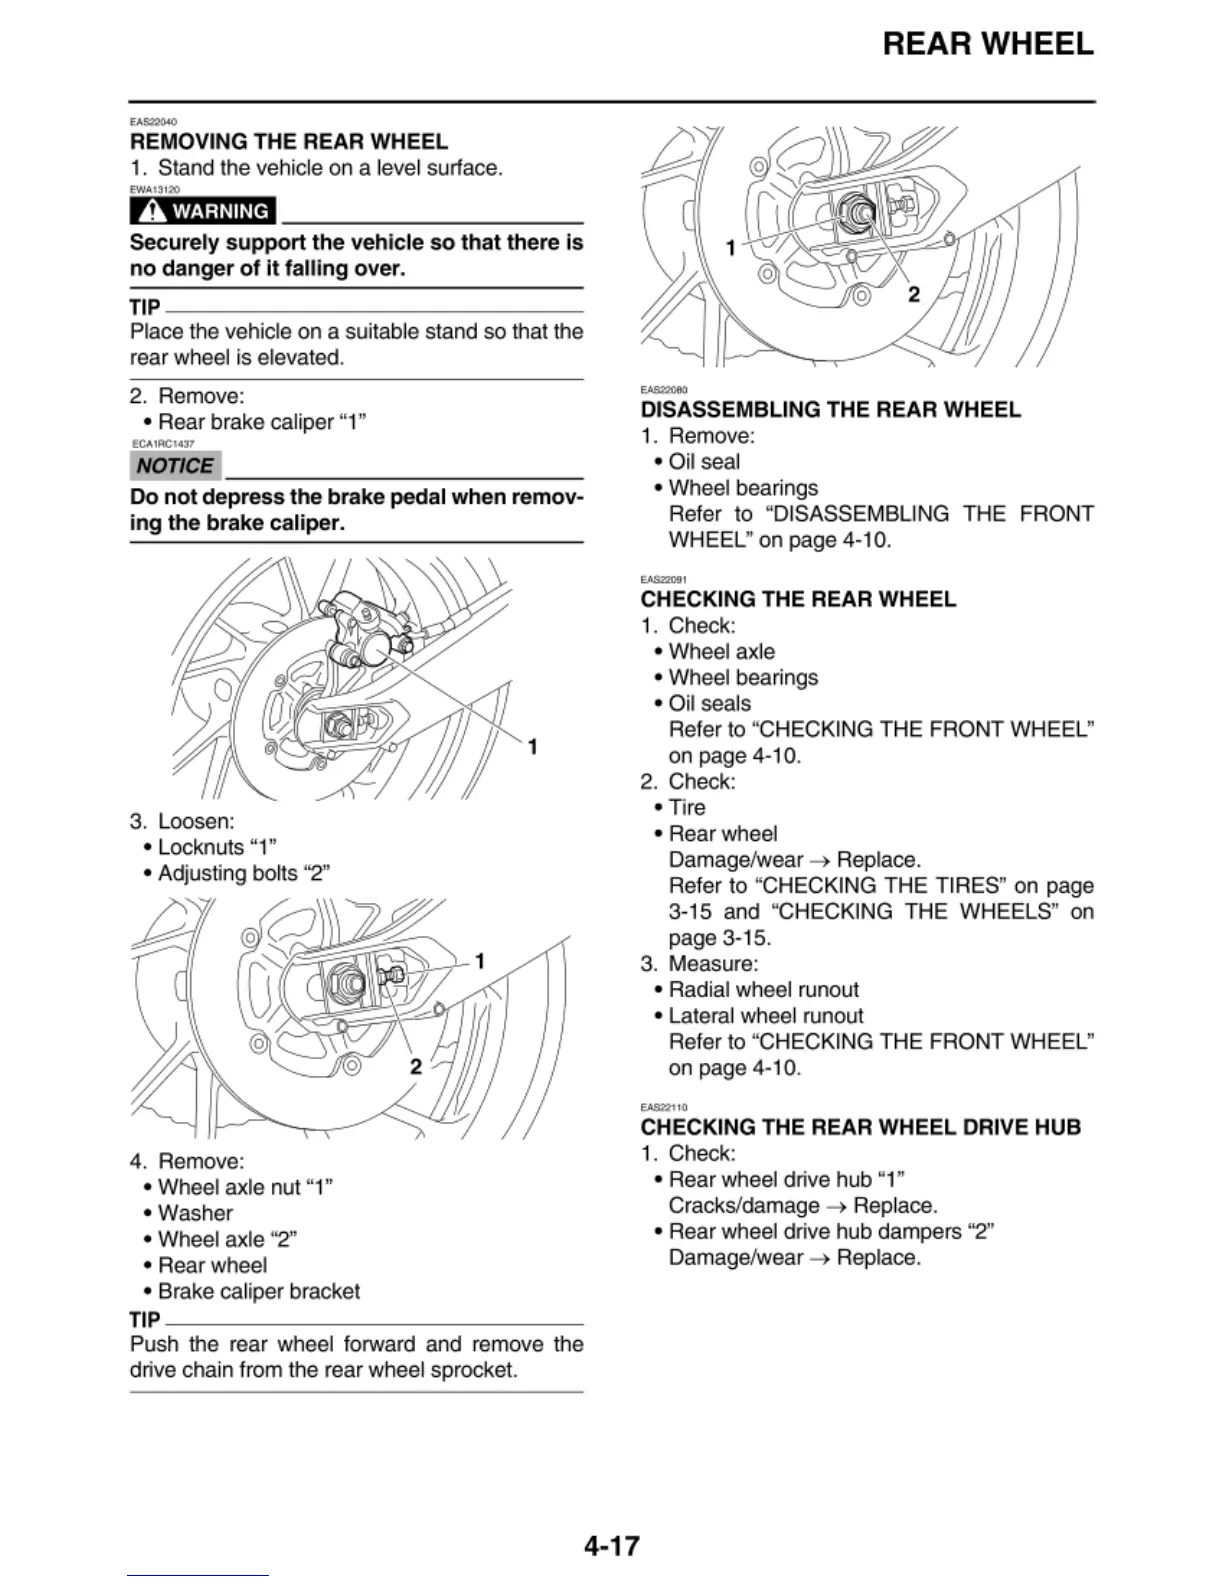
3. Loosen:
• Locknuts "1"
• Adjusting
bo
lts ''2"
4. Remove:
• Wheel axle nut "1"
• Washer
• Wheel axle
''2"
• Rear wheel
1
• Brake caliper bracket
TIP
--------------
Push t
he
rear wheel forward and remove the
drive chain
fr
om t
he
rear wheel sprocket.
REAR WHEEL
....,,...
DISASSEMBLING THE REAR WHEEL
1.
Re
move:
• Oil seal
• Wheel bearings
Re
fer to "DISASSEMBLING THE FRONT
WHEEL" on page 4-10 .
....,,.,
,
CHECKING THE REAR WHEEL
1.
Check:
• Wheel axle
• Wheel bearings
• Oil seals
Re
fer to "CHECKING THE FRONT WHEEL"
on page 4
-1
0.
2. Check:
• Ti
re
• Rear wheel
Damage/wear
~
Replace.
Re
ier to "CHECKING T
HE
TIRES" on page
3
-1
5 and "CHECKING T
HE
WHEELS" on
page 3-15.
3. Measure:
• Radial wheel
ru
nout
• Lateral wheel runout
Re
fer to "CHECKI
NG
THE FRONT WHEEL"
on page 4-10.
E.A$22110
CHECKING THE REAR WHEEL DRIVE HUB
1. Check:
• Rear wheel drive hub "1"
Cracks/damage
~
Replace.
• Rear wheel drive hub dampers
"2
"
Damage/wear
~
Replace.
4-17
 Loading...


