CONNECTING RODS AND PISTONS
Out of specification 4
Rep
lace the big end
bearings.
Oil clearance
0.
027-0
.051 mm (0.00
11
- 0.
0020
in
)
TTTTTTTTTTTTTTTTTTTTTTTTTTTTTTTT
The following procedure app
li
es to all of the
connecting rods.
£CA
13000
NOTICE
~~~~~~~~~~~~~
Do
not
interchange
the
big
end bearings and
connecting rods.
To
obtain
the
correct
crankshaft-pin-to-big-end-bearing clear-
ance and prevent engine damage,
the
big
end bearings
must
be
in
stalled
in
their
origi-
nal
positions
.
a. Clean the big end bearings. crankshaft pins.
and the inside
of
t
he
connecting rods halves.
b. Install the big e
nd
upper bea
rin
g into the con-
necting rod and the big end lower beari
ng
into
the connecting rod cap.
TIP
~~~~~~~~~~~~~~~
Align the projections "a" on the big end bearings
with t
he
notches "b" in the connecting rod and
con
ne
cting rod cap.
b a
c. Put a piece
of
Plastigauge® "1" on the crank-
shaft p
in
.
d. Assemble the connecting rod halves.
ECA
1
AC
I
SO
I
NOTICE
~~~~~~~~~~~~
Tighten the connecting
rod
bolts
using
the
plastic-reg
ion
tightening
angle method. Al-
ways
in
stall
new
bolts
.
TIP
~~~~~~~~~~~~~~-
• Clean the connecting rod bolts and lubricate
t
he
bo
lt threads and seats with molybdenum
di
su
l
fi
de
oil.
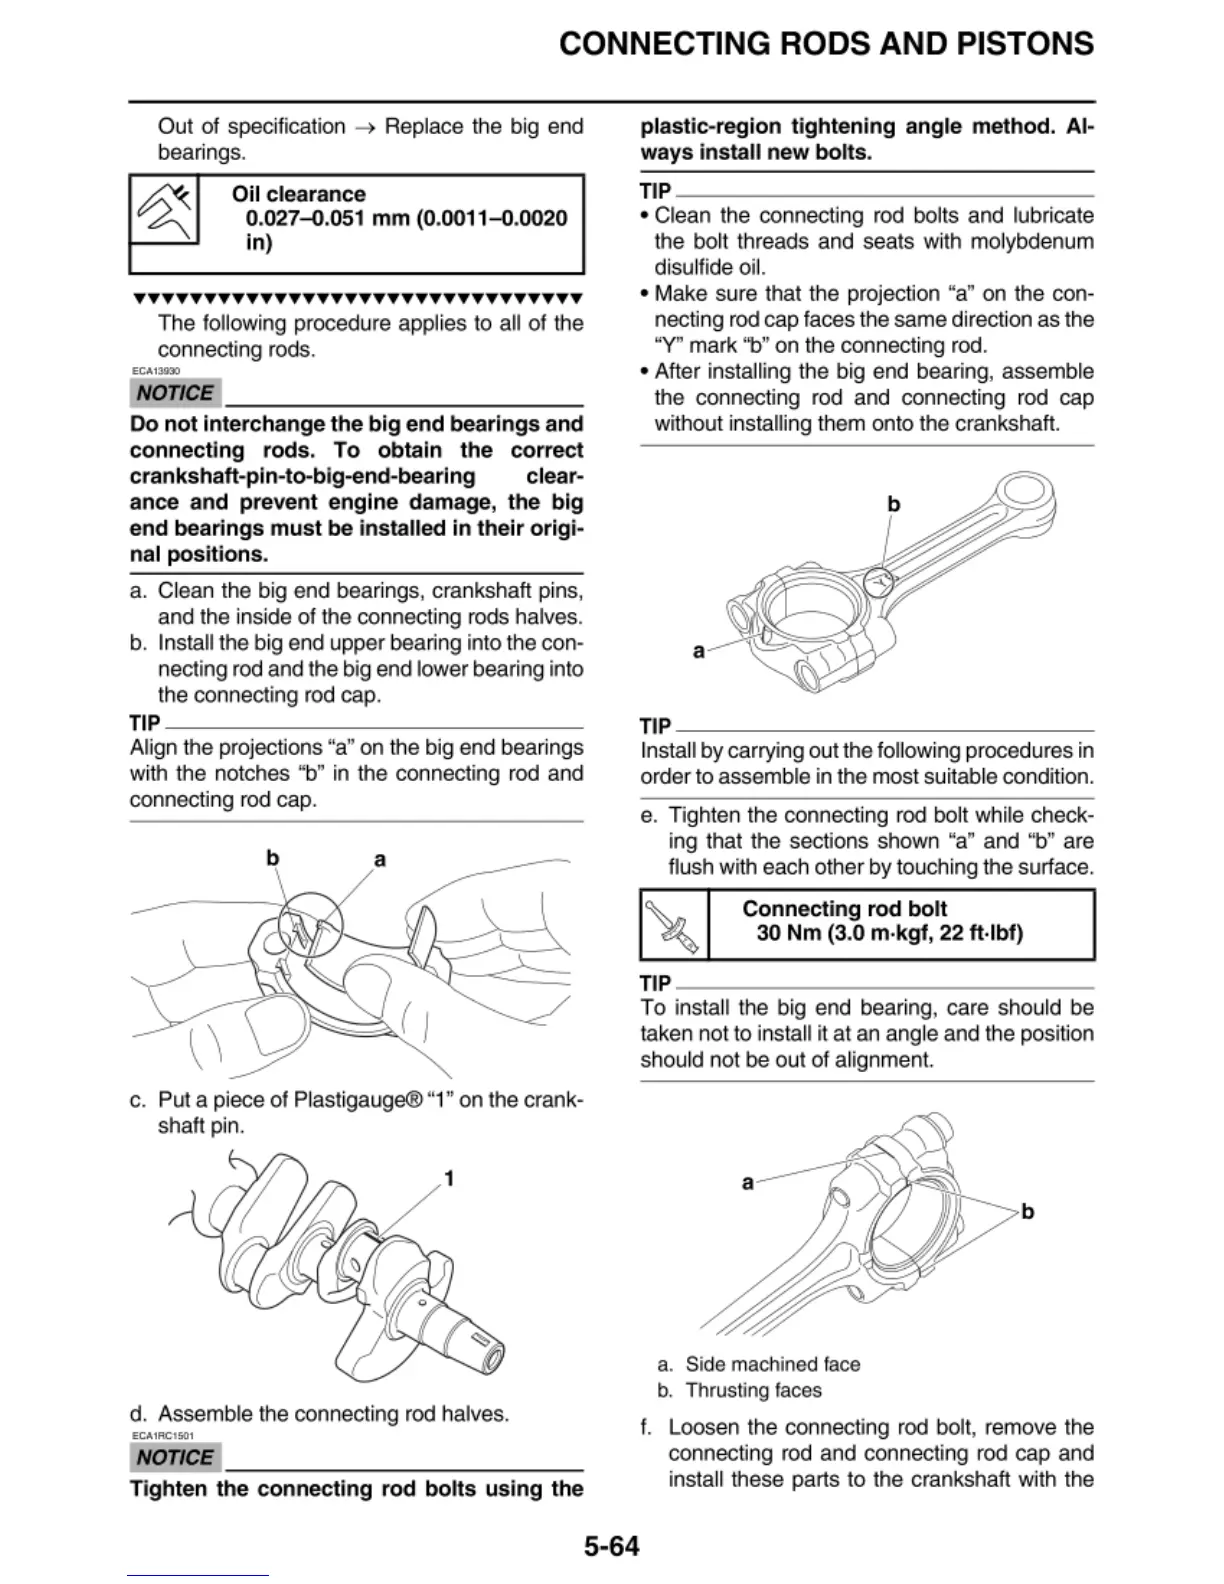
• Make sure that the projection "a" on the con-
nect
in
g rod cap faces the same direction as the
"Y" mark "b" on the connecting rod.
• After installing t
he
big end bea
rin
g, assemble
t
he
connecting rod and connecting rod cap
without
in
stalling them onto the crankshaft.
a
TIP
~~~~~~~~~~~~~~~
Install by carrying out the following procedu
re
s in
order to assemble in the most
su
itable
co
nditio
n.
e. Tighten the connecting
rod
bolt while check-
ing that the sect
io
ns
sh
own
"a" and "b" a
re
fl
ush with each
ot
her by tou
ch
ing the surface.
Connect
ing
rod
bolt
30
Nm
(3.0 m·kgf, 22 ft·
lbf
)
TIP
~~~~~~~~~~~~~~-
To install the big end bearing, care should be
taken not to
in
stall it at an angle and the position
should not be out of alignment.
b
a. Side machined face
b.
Thrusti
ng
faces
f. Loosen the connecting rod bolt, remove the
connec
tin
g rod and connecting rod cap and
insta
ll
these parts to the cran
ks
haft with the
5-64
 Loading...


