2-10
Pioneer Gold 3.00 Controller Technical Guide
SETUP GUIDE
Schedules
Set Operating Schedule
When you first power up your touchscreen, you will need
to change the operation schedule. Only Managers and
Administrators can change the Operation Schedule.
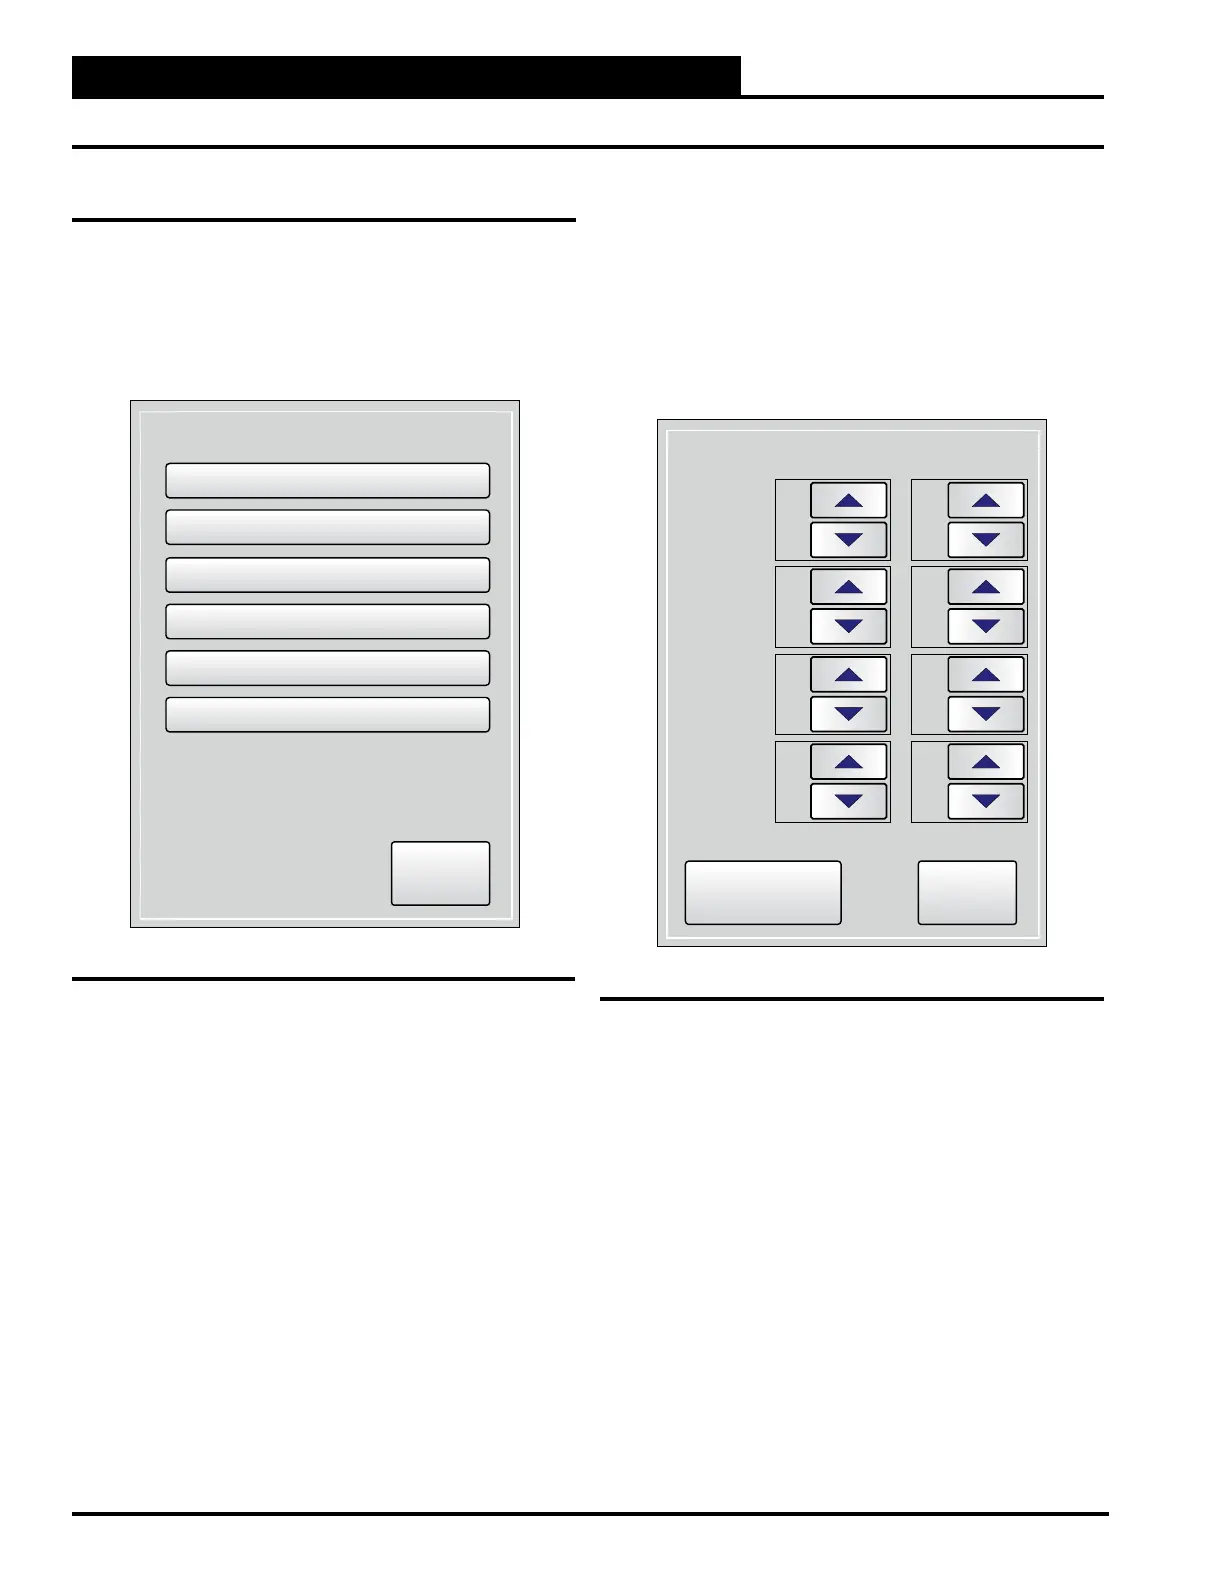
From the Settings Screen, select the <Schedule> icon. See Figure
2-9, this page.
If the unit is unoccupied, “Unoccupied” will be displayed at
the bottom of the screen. If the unit is occupied, “Occupied”
will be displayed at the bottom of the screen, and the second
line of text will show what is causing occupancy. It will display
“24/7 Occupancy” if 24/7 occupancy is selected, “Scheduled
Occupancy” if the internal schedule is causing occupancy,
“Network Occupancy” if occupancy is caused by the BAS,
or “User Occupancy” if occupancy is caused by the remote
occupancy input.
You can set separate schedules for weekdays and weekends,
set schedules for the entire week, set a 24/7 schedule, or create
a custom schedule. You can also set the holiday schedule and
holiday periods from this screen.
Weekday Schedule
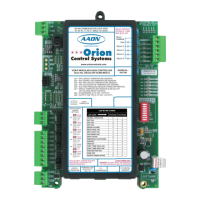
Press <Weekdays>. The Weekdays Schedule Screen will appear.
See Figure 2-10, this page
can select two events per day. Select an hour and minute start time
for Occupy 1 and an hour and minute stop time for Unoccupy 1.
Repeat this for Occupy 2 and Unoccupy 2. All times are entered
in 24-hour time format. Press <Apply Settings> and then press
<OK> to return to the Schedule Options Screen.
Figure 2-9: Schedule Options Screen
Figure 2-10: Weekdays Schedule Screen
Schedule Options
Weekdays
Weekends
7-Day
24/7
Custom
Holidays
Back
Occupied
24/7 Occupancy
Cancel
Apply Settings
00 00
00
00
Occupy 2
Unoccupy 2
00
Hours Minutes
00
00 00
Occupy 1
Unoccupy 1