Maintaining the Instrument
User Information 133
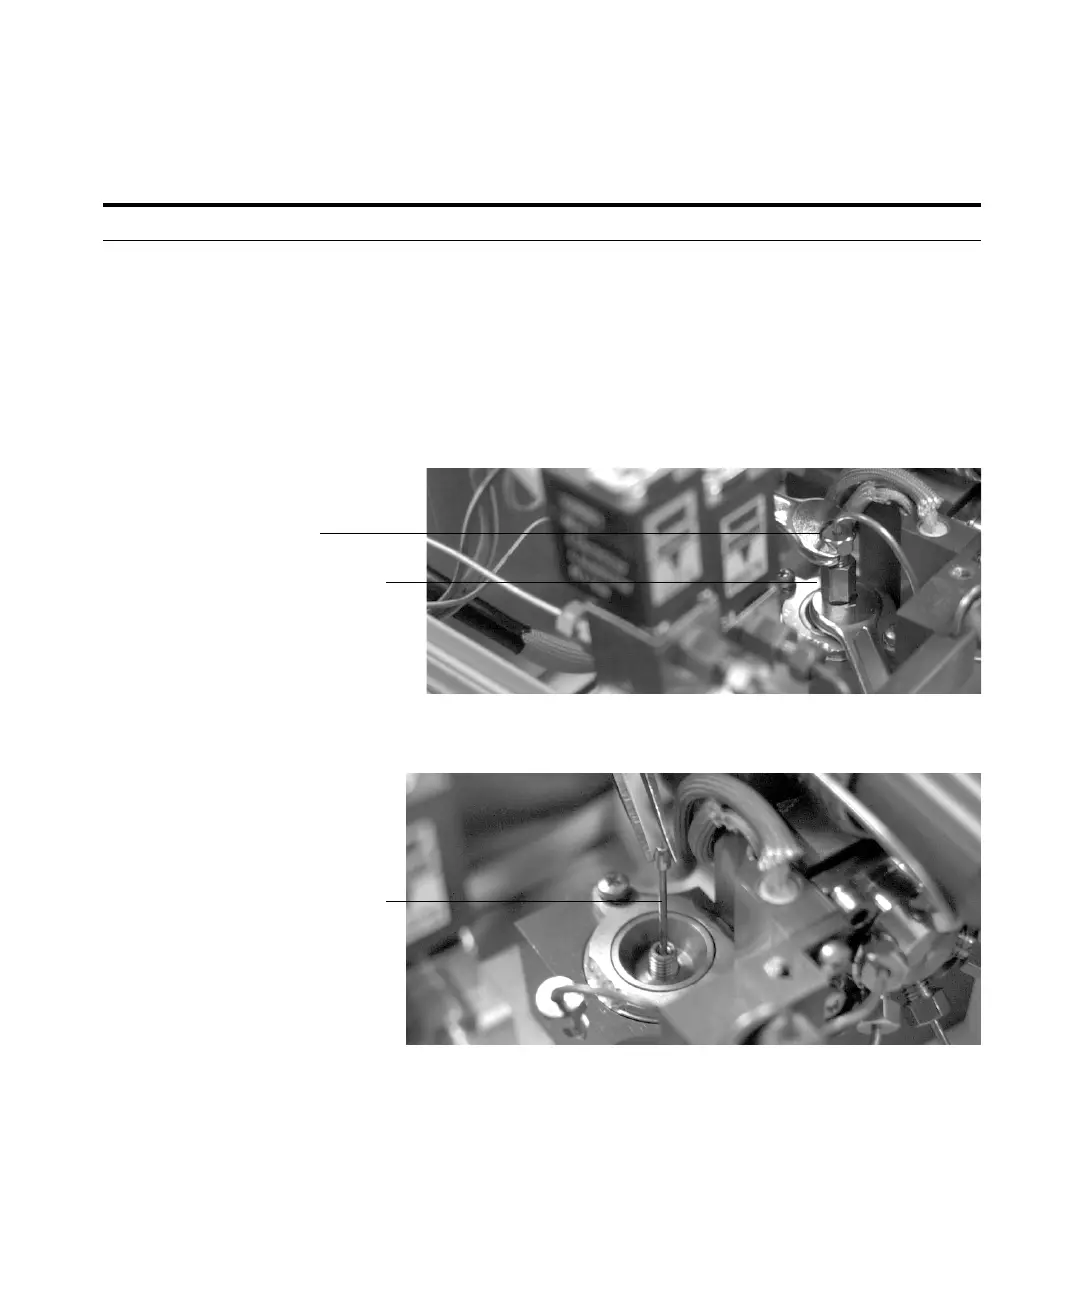
3 Disconnect the plumbing from the
sampling probe.
a Support the zero dead volume union
with a 7-mm wrench and remove the
nut with another 7-mm wrench.
b Loosen the connection to port 5 on the
6-port valve. Lift the tube off of the
sample probe and swivel out of the
way.
c Loosen and remove the zero dead
volume union. See the figure below.
Do not bend any tubing when
installing or the coating will break and
compromise inertness.
4 Remove the sampling probe. • Grab the sampling probe with
tweezers and remove it from the unit.
5 Insert a new sampling probe and
reverse the previous steps to
reassemble the Headspace
Sampler.
• Tighten each fitting and perform a
leak test before replacing the
insulation and cover.
Tabl e 11 Changing the sampling probe (continued)
Step Action Notes
Zero dead volume union
Hexagonal nut
Sampling probe
medium_standard.book Page 133 Tuesday, February 17, 2004 10:14 AM

 Loading...


