18
Navigation and Data Entry Controls
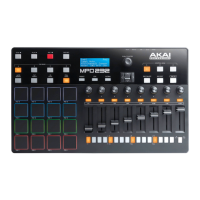
1. Display: This LCD shows all the information relevant to MPC Renaissance's current operation.
Much of this information is also shown in the software. Use the Cursor Buttons to navigate
through the display, and use the Data Dial, and -/+ buttons to adjust the currently selected
setting/parameter. Use the Mode buttons to change what page is shown, and use the Function
Buttons to change what tab is shown.
Note: You can adjust the display contrast by holding down Shift and turning the Data Dial.
2. Function Buttons: Press one of these buttons to select its corresponding tab, shown above the
button in the display.
3. Cursor Buttons: Use these buttons to navigate through the fields of menus and options shown in
the display.
4. Data Dial: Use this dial to scroll through the available menu options or adjust the parameter values
of the selected field in the Display.
5. -/+: Press these buttons to increase/decrease the value of the selected field in the display.
6. Numeric Keypad: If the selected field in the Display is a number, use these numbered buttons as a
standard numeric keypad to enter a value. Press the keypad's Enter to enter it.
7. Undo / Redo: Press this button to undo your last action. Hold down Shift and press this button to
redo the last action you undid.
Pad and Q-Link Knob Controls
8. Q-Link Knobs: Use these touch-sensitive knobs to adjust various parameters and settings. The
LEDs surrounding each knob indicate the knob's current position.
9. Q-Link Trigger: Hold this button down, then touch one of the Q-Link Knobs to make that knob's
parameter's value jump to its minimum or maximum (depending on the Trig parameter in the
software).
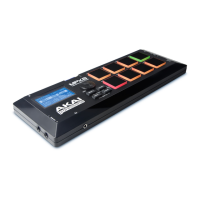
10. Pads: Use these pads to trigger drum hits or other samples in your software. The pads are velocity-
sensitive and pressure-sensitive, which makes them very responsive and intuitive to play. The pads
will light up different colors, depending on how hard you play them (ranging from yellow at a low
velocity to red at the highest velocity). To disable (or re-enable) these lights, press Pad Assign then
F6 (Velo Col).