85
Recording Automation
Tip: To make automating certain parameters easier, assign certain parameters to the Q-Link Knobs as
described in the next section rather than adjusting them in their respective modes. We also recommend
using your MPC hardware (especially the Q-Link Knobs) whenever possible.
1. Determine where the parameter you want to automate is—Main Mode, Program Mixer Mode, or
Track Mixer Mode—and click the Main Mode, Program Mixer Mode, or Track Mixer Mode tab to
enter that mode.
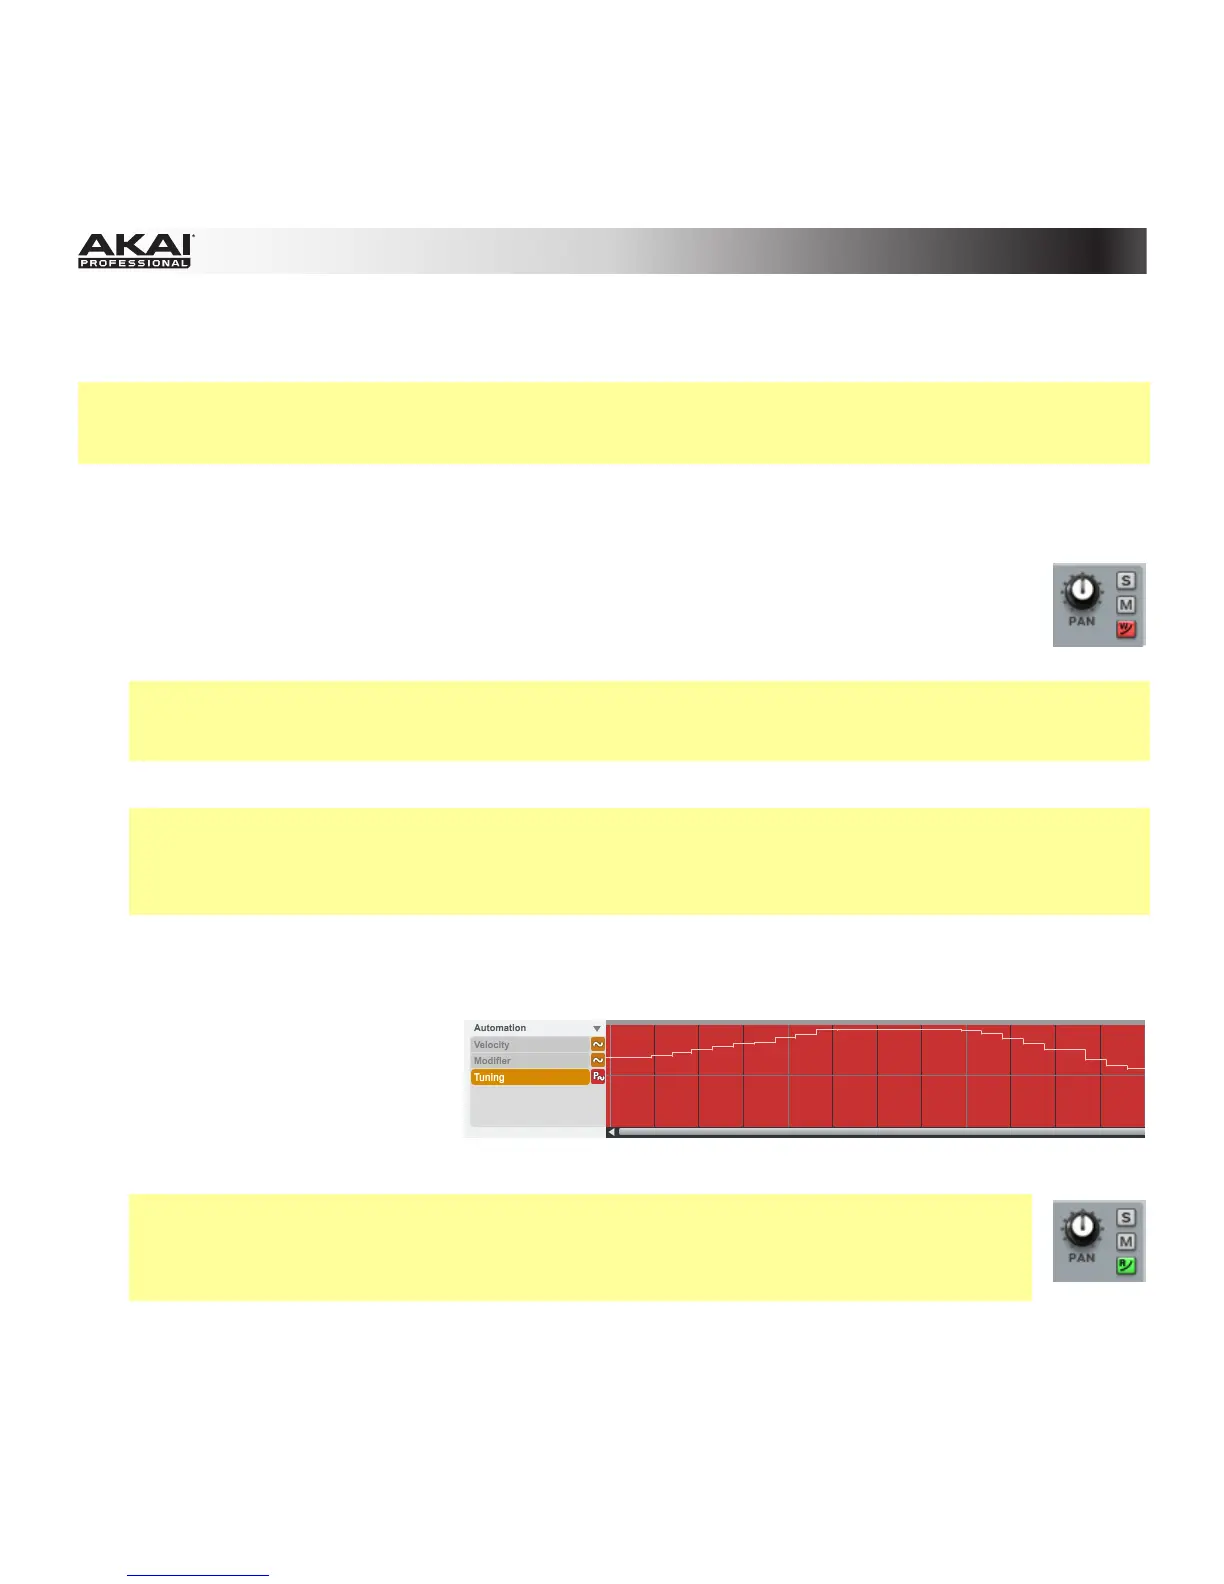
2. If the desired parameter is Program- or pad-related, click the Program's
Automation button (curve icon) until it turns red and has a W. This means the Program
is able to record (write) automation. In Main Mode and Track Mixer Mode, this button is
on the Program Channel Strip. In Program Mixer Mode, this is in the Master Section.
Program- or pad-related parameters include: Program Channel Strip controls, Pad/Keygroup
insert effects, Program insert effects, send effects, Master Semi Tune, Master Fine Tune, and all
pad parameters shown in Program Edit Mode.
If the desired parameter is Track-related, skip to the next step.
Track-related parameters include: Track Channel Strip controls, MIDI CC messages, Track
mutes, pad mutes, the 16-Level feature (on the MPC hardware), Aftertouch messages, Pitchbend
messages, Channel Pressure messages, Program Change messages, and parameters shown in the
Main Mode's Q-Link section's Param menu when set to Prg and Change is set to Note On.
3. Click the Overdub button, and then click Play to start automation recording. It is very important to
use the Overdub function; otherwise, this new recording will overwrite any data previously recorded
to that Track.
4. Move the desired control(s)
during the recording process.
The automation curve will
appear as you move the
control(s).
5. Click Stop you are finished recording.
Tip: After recording, we highly recommend clicking the Automation button on the
Program Channel strip so it turns green and has an R. This means the Program will read
automation but will not record any additional automation over it, though you can still
manually edit and enter automation.