307
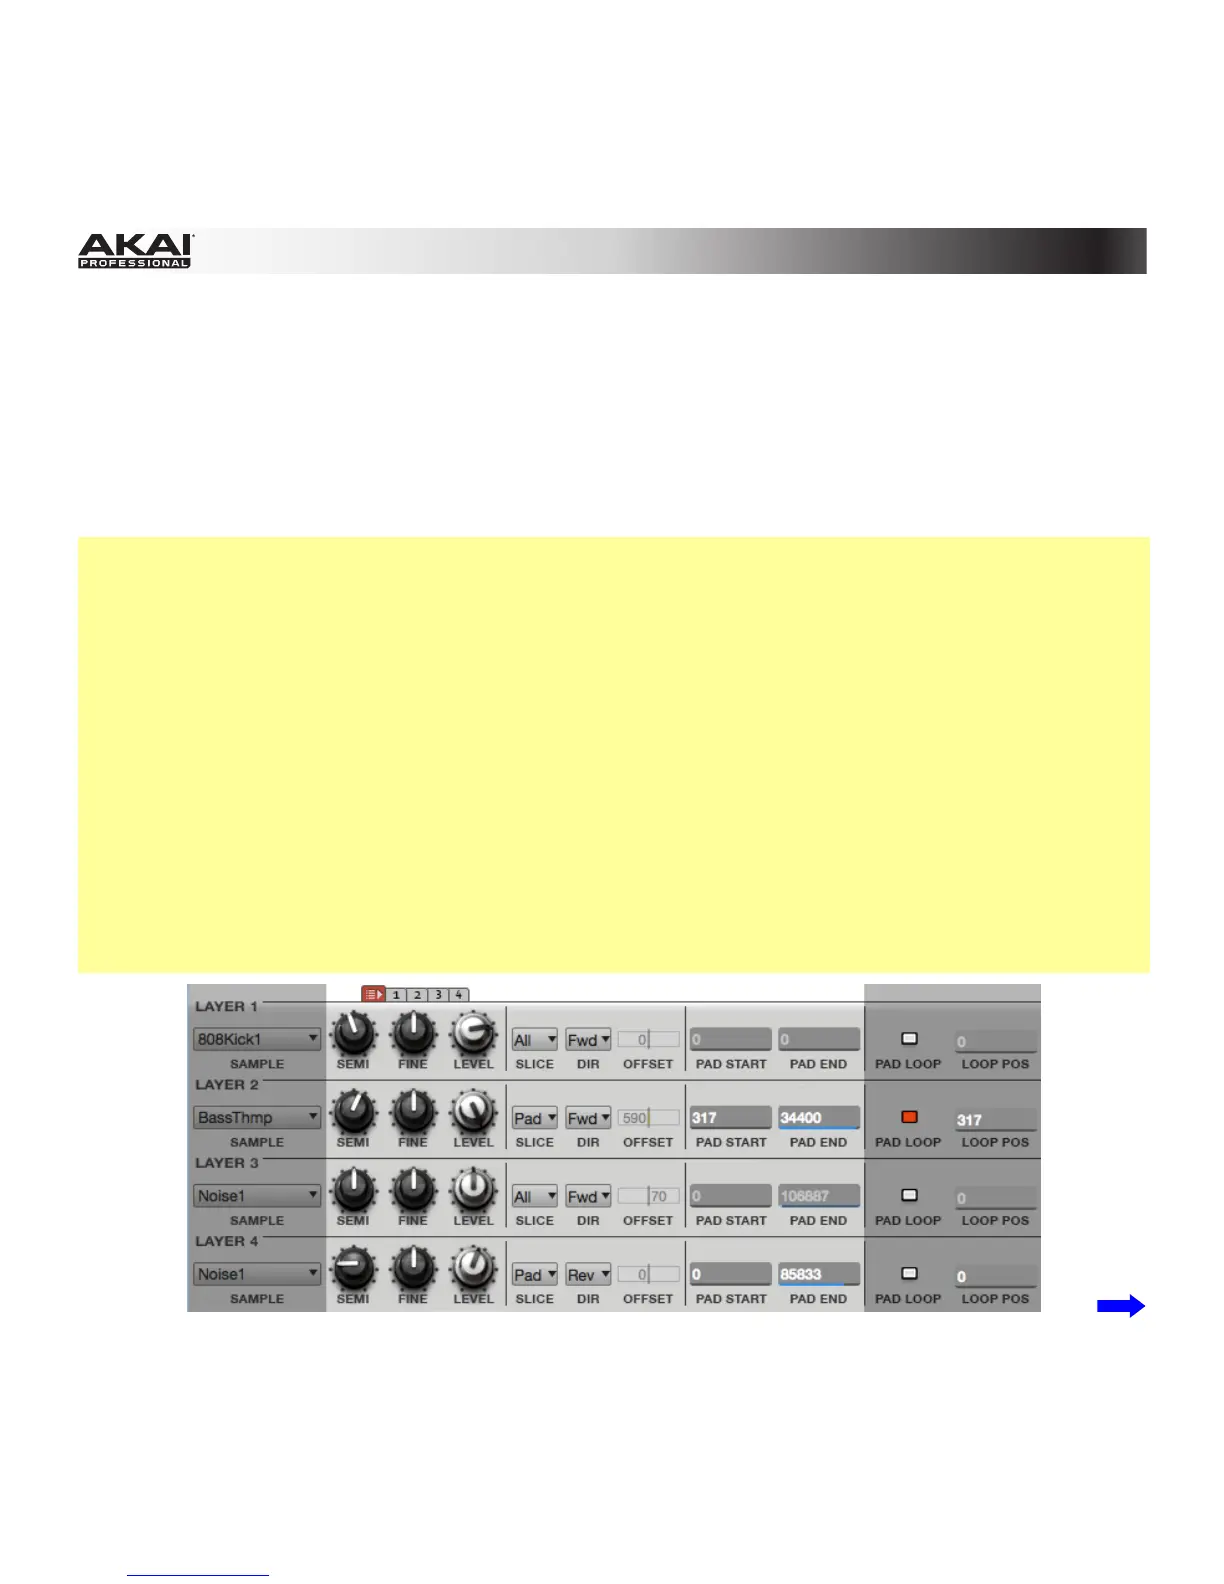
Layer Section
There are several new settings in the Layer section that affect how the sample plays when you trigger its
pad. Click the All tab (with the "list-and-arrow" icon) to show all of them simultaneously. Alternatively,
click Tab 1, 2, 3, or 4 to show a set of the new settings next to the Sample drop-down menu for each
layer. Tab 1 contains the original Semi, Fine, and Level knobs while Tabs 2–4 contain the new settings'
controls.
Important: Please note that these new controls do not change the sample itself; all changes are non-
destructive. This is due to how MPC 1.8 handles sample editing and playback:
When working in Sample Edit Mode and using Chop Mode to divide a sample into slices for your pads,
you can convert a slice using Non-Destructive Slice or Pad Parameters.
A Non-Destructive Slice will let its pad to refer to that slice when you press it; the original sample
remains intact and each slice marker is like a "bookmark" for a pad. In Program Edit Mode, you'll see
that the pad/layer to which it's assigned has its Slice drop-down menu set to the corresponding slice
number in the original sample. Playing that pad will cause it to refer to that slice marker like a
"bookmark" instead of creating an entirely new sample of that slice. This means that you no longer have
to clutter your Project with a new sample for every slice (though you can still use this earlier method, if
you prefer).
A slice converted using Pad Parameters is very similar to a non-destructive slice described above. The
difference is that in Program Edit Mode, the pads/layers they're assigned to have their Slice drop-down
menus set to Pad (instead of the slice number), and the Pad Start and Pad End points will correspond
to the slice markers in the original sample.