38
Let's continue to set up the Keygroup Program:
1. Click the Program Edit tab to enter Program Edit Mode.
Hardware: Press the Prog Edit button to enter Program Edit Mode.
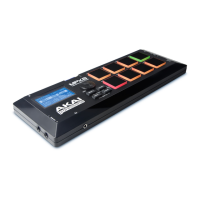
2. In the Layer section, click the Layer 1 drop-down menu and
select the bass sample you just loaded (you'll see your drum
samples in this list, as well). Because you're working with a
Keygroup Program instead of a Drum Program, this sample is
now playable across all pads.
Tip: On your MPC hardware, press the Pad Bank D button to switch to Pad Bank D and press Pad
13. You should hear the bass sample played back with its original pitch. You can use the other
pads to play your sample chromatically.
Let's add a second layer and set the Layers' velocity ranges so our bass sounds different when played
at a higher velocity (as a real bass would):
1. Go back to the File Browser and select a different bass sample that sounds similar but a little bit
brighter.
2. Double-click a sample to add it to the Project.
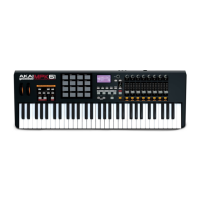
3. Back in the Layer section, click the Layer 2 drop-down menu and select the new bass sample.
Press a pad—both samples will sound at once. Maybe this new sound is interesting as it is, but
let's make some quick edits to get as close as we can to a real-life bass sound.
4. Set Layer 1's Velocity slider to
cover the velocity range from 0 to
80, and set Layer 2's Velocity slider
to cover the range from 81 to 127.
Now when you press a pad, the lower
velocities will trigger the Layer 1 sample
only, while higher velocities will trigger
the Layer 2 sample only.