Digital Video Recorder
7
Chapter 3 ─ Configuration
NOTE: Your DVR should be completely installed before proceeding. Refer to Chapter 2 ─
Installation.
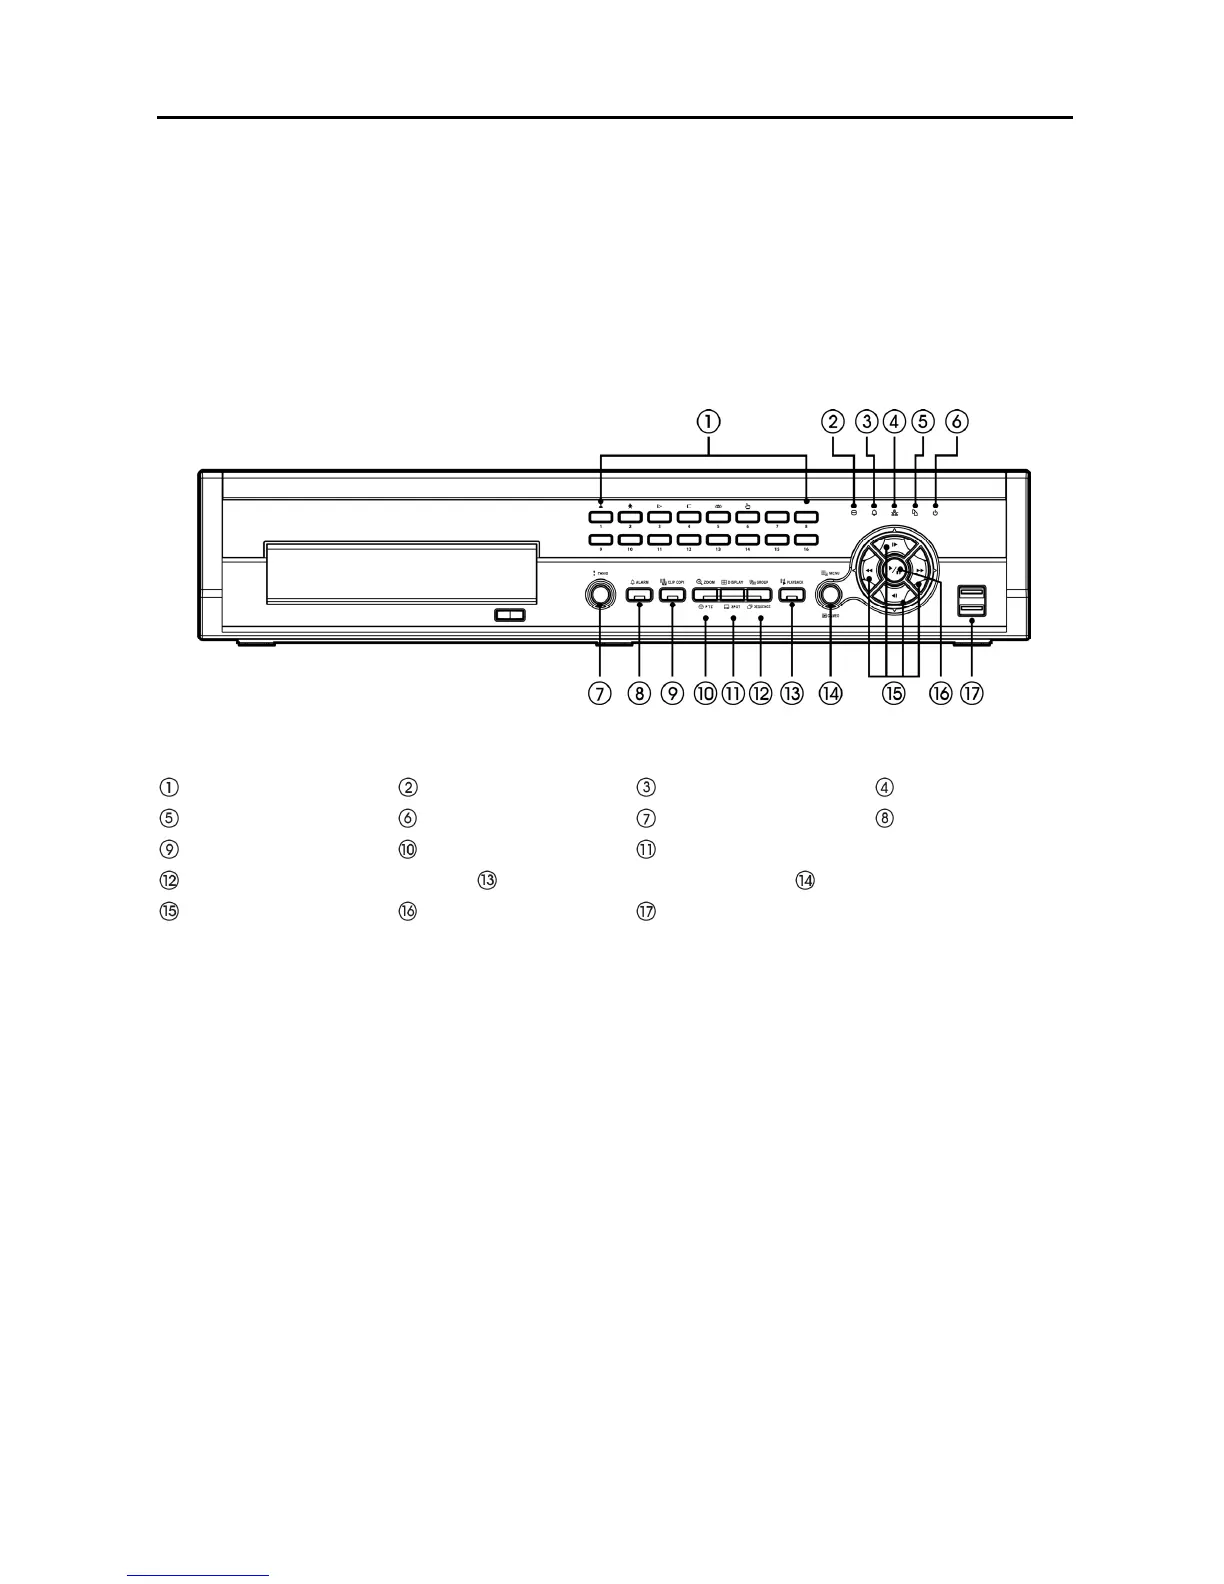
Front Panel Controls
Figure 3 ─ 16-Channel DVR front panel.
Camera Buttons
HDD LED
Alarm Out LED
Network LED
Clip Copy LED
Power LED
Panic Button
Alarm Button
Clip Copy Button
Zoom/PTZ Button
Display/SPOT Button
Group/Sequence Button Playback Mode Button Menu/Cameo Button
Arrow Buttons Play/Pause Button USB Connectors
The front panel looks and operates much like a VCR combined with a multiplexer. Many of the buttons
have multiple functions. The following describes each button and control. Take a few minutes to review
the descriptions. You will use these to initially set up your DVR and for daily operations.
NOTE: You can also use a USB mouse (not supplied) to navigate through the screens and menus
much like you would on a computer.
Camera Buttons (1 to 16)
Pressing the individual camera buttons will cause the selected camera to display full screen. Buttons 1 to
9 are also used to enter passwords.
In the PTZ mode, pressing the button 1 zooms in the screen and the button 2 zooms out the screen,
pressing the button 3 focuses near and button 4 focuses far, and pressing the button 5 moves to the preset
and button 6 saves the preset.