User’s Manual
18
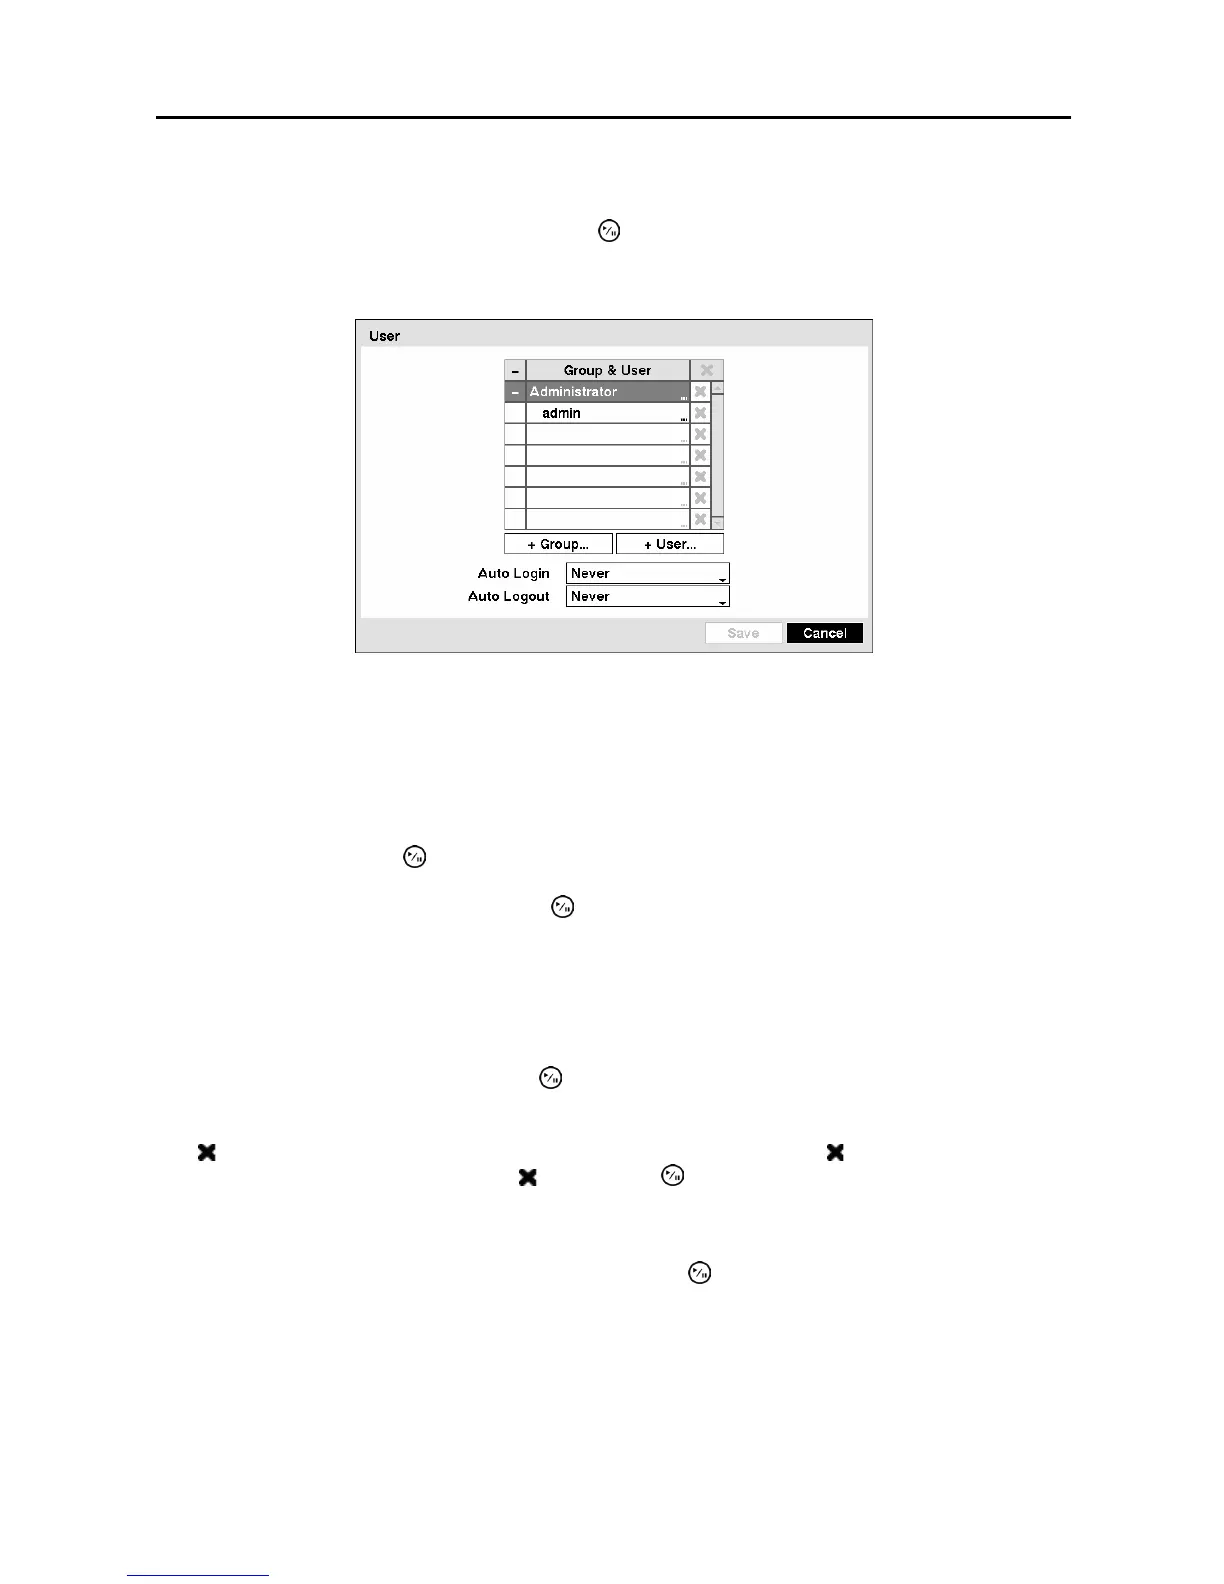
User Setup Screen
Highlight User in the System menu and press the
button. The User setup screen displays the
authorized groups and users. You can add and delete groups and users. When adding a group, you can
assign authority levels to the group.
Figure 19 ─ User setup screen.
The +/- column is used to collapse and expand user groups. If there is a + or – in this column, it indicates
the item is a Group Name. If there is a – in front of the Group Name, it indicates that the group has been
“expanded” and all of the User Names within that group are displayed below the Group Name. If there is
a + in front of the Group Name, it indicates that the group has been “collapsed” and all of the User Names
within that group are hidden. To collapse or expand a group, highlight the +/- column in front of the
desired group and press the
button.
Highlighting a Group Name and pressing the
button allows you to change the authority levels assigned
to the group.
CAUTION: Write down the new password and save it in a secure place. If the password
is forgotten, the unit must be reset using the Factory Reset Button and all data settings
will be lost.
Highlighting a User Name and pressing the button allows you to add or change the password assigned
to that user. You can also change the group to which the user is assigned.
The column can be used to delete a User Name or an entire Group. If the is grayed out, that Group
or User cannot be deleted. Highlight the
and press the button. You will be asked to confirm that
you want to delete the User or Group. To delete the User currently logged into the DVR on a local system
or a PC running RAS, log the user out of the system first and then delete the user.
To add a Group, highlight the + Group… box and press the button. A virtual keyboard appears
allowing you to enter the Group name.