3-134
Confidential
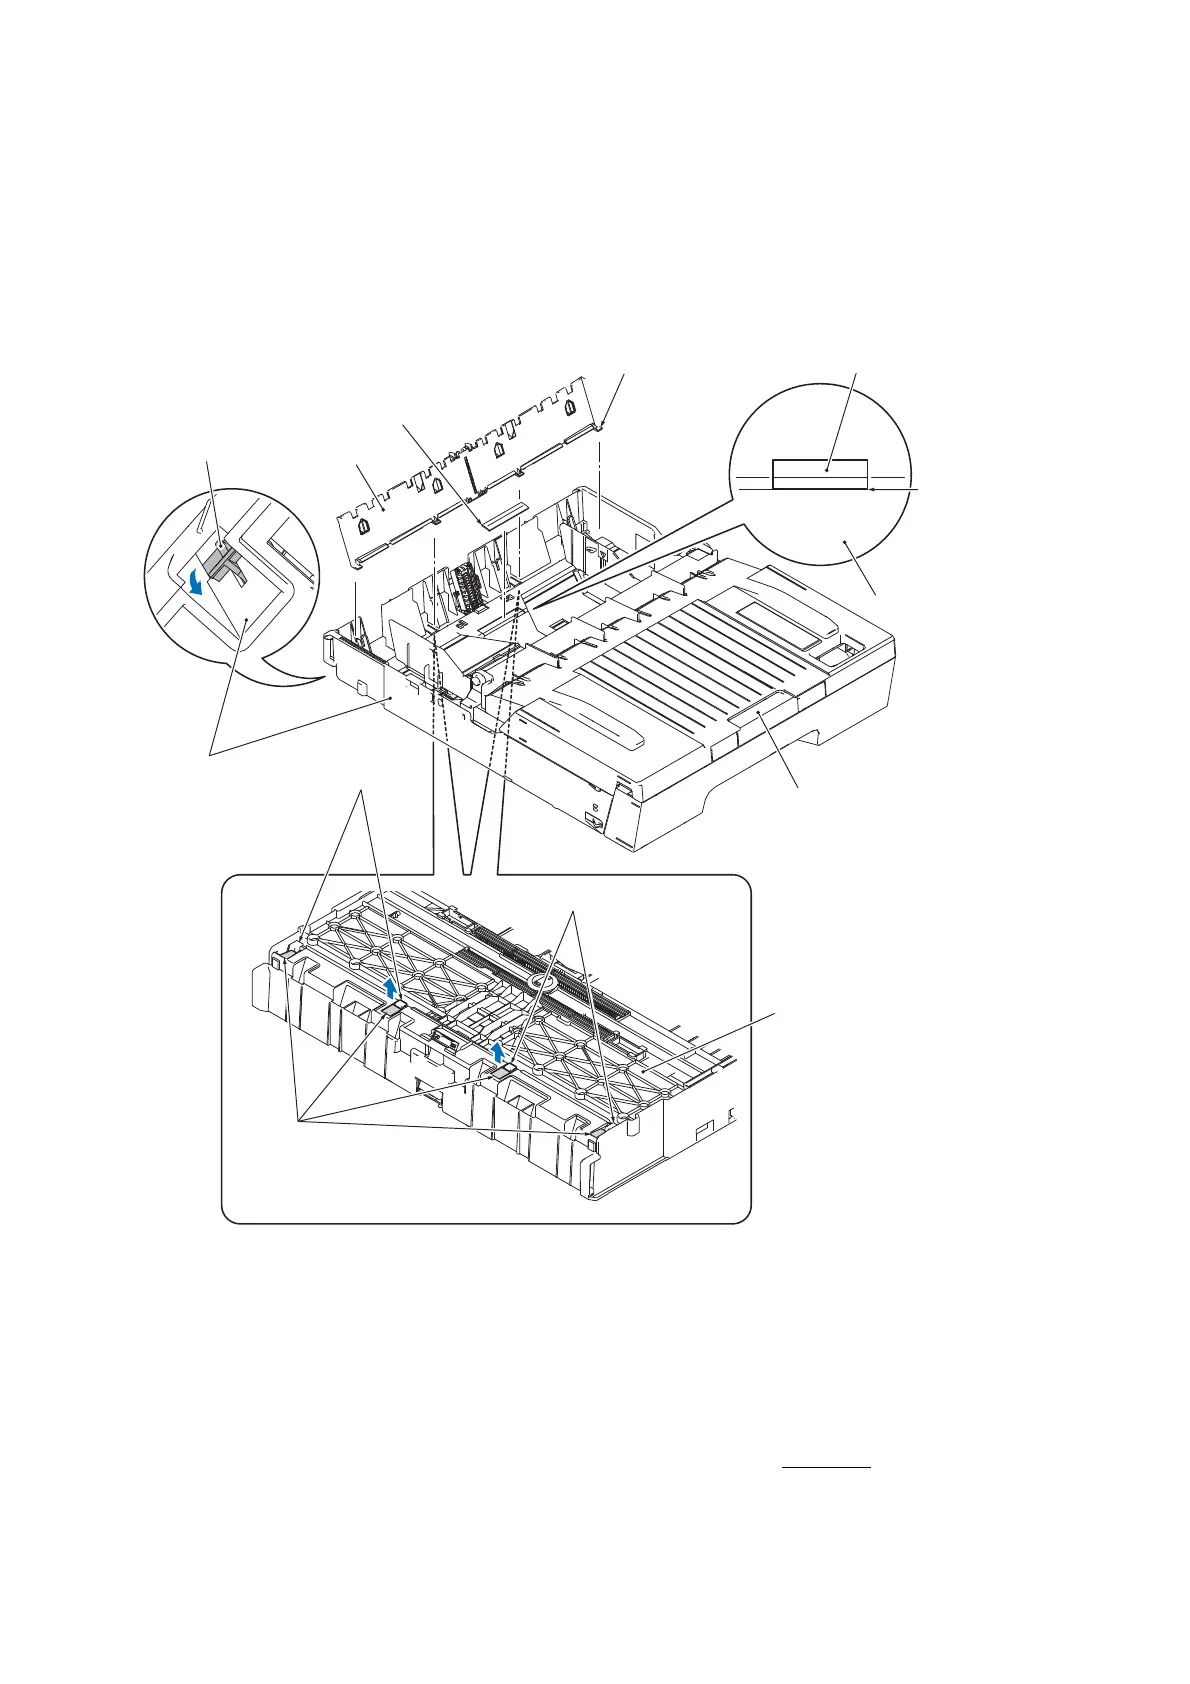
3.9.19 Paper Tray #1
(1) Pull the four lock arms on the rear of the paper tray #1 outwards and release the four latches
of the bank ASSY. Then pull the bank ASSY up and out of the paper tray.
(2) If the base pad needs to be replaced, peel it off the bottom of the paper tray #1.
Note: Once removed, the base pad will become unusable and a new pad will have to be put
back in.
Assembling Notes:
• When mounting the bank ASSY, first insert the four pawls into the openings in the paper tray
#1 and then press the inside of the bank ASSY to the rear so that the latches snap into place.
• When attaching a new base pad to the paper tray #1, align the front edge
of the pad with that
of the depressed section on the paper tray and center the pad widthways as shown above.
Align the edge
of the base pad
with the front edge
of the depressed
section on paper
tray #1.
(3_106)
Base pad
Base pad
Bank ASSY
Latches on the
back of the bank
ASSY
Pawls
Paper tray #1
Paper tray #1
Paper tray #1
Lock arms
Pawls
Pawls
Output paper tray cover

 Loading...