4-7
Confidential
[ 4 ] Adjust the inclination of the head/carriage unit
Before starting the operation below, be sure to set recording paper in the paper tray for
printing check patterns.
(1) Move the head/carriage unit to the adjustment position in the maintenance mode (Function
code 63), referring to Chapter 5, Section 5.1.4.19.
(2) Open the scanner cover (scanner unit).
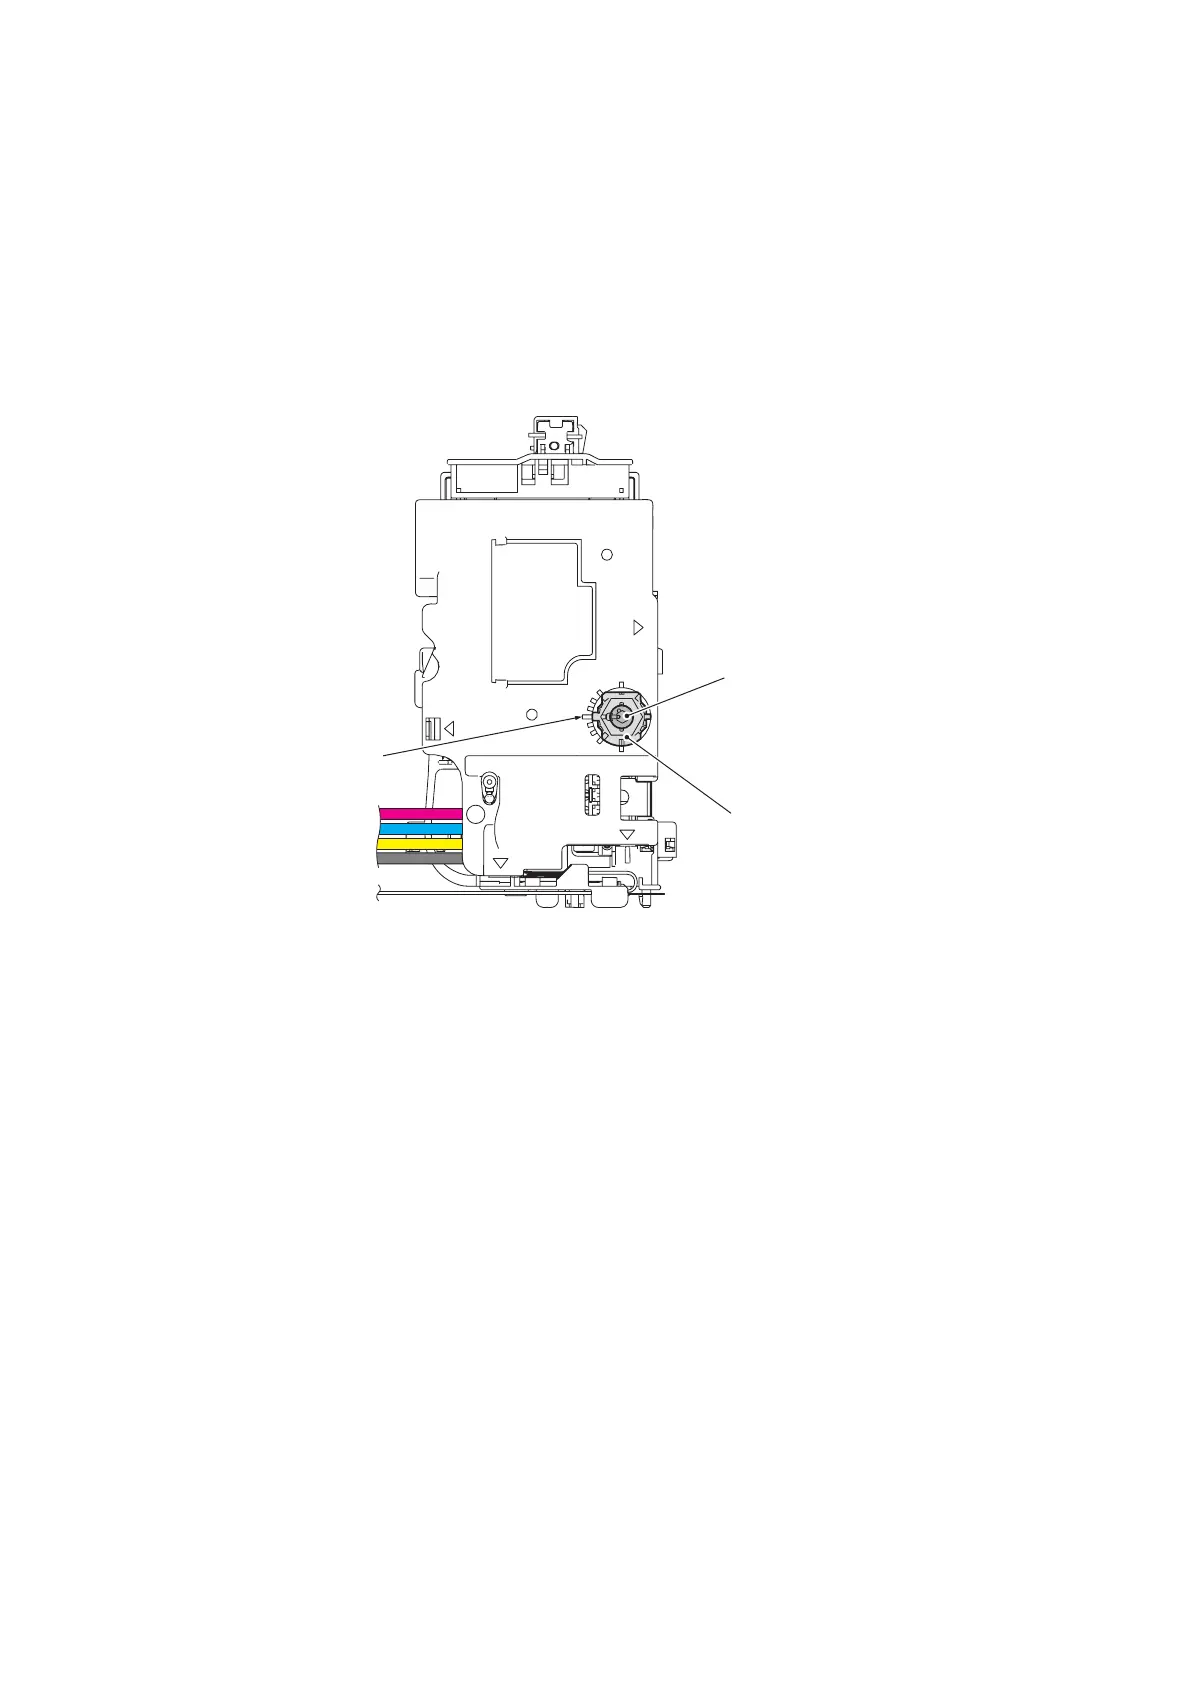
(3) Turn both the external and internal knobs of the inclination adjuster to the center position
with a spanner and a hexagonal wrench as shown below.
(4) Close the scanner cover (scanner unit).
(5) Drag and drop the "incline.prn" onto the Brother Maintenance USB Printer driver icon in
the Filedrgs window.
The machine displays the "RECEIVING DATA" on the LCD and prints out the head
inclination test pattern "CR-INCLINE EXIT adjust check" (see page 4-9 for a sample
printout).
Tip: The head inclination test pattern can also be printed with Function code 61 (refer to
Chapter 5, Section 5.1.4.18). After printing with a memory card, be sure to remove the card
before proceeding to the following step.
(6) On the test pattern, check the upper single row of blocks and select the block that is the
least uneven print.
(head_position_2)
External knob
of the inclination adjuste
Internal knob
of the inclination adjuster
Center position

 Loading...