2007 Buell Lightning: Chassis 2-85
HOME
ASSEMBLY/INSTALLATION
Exhaust Header
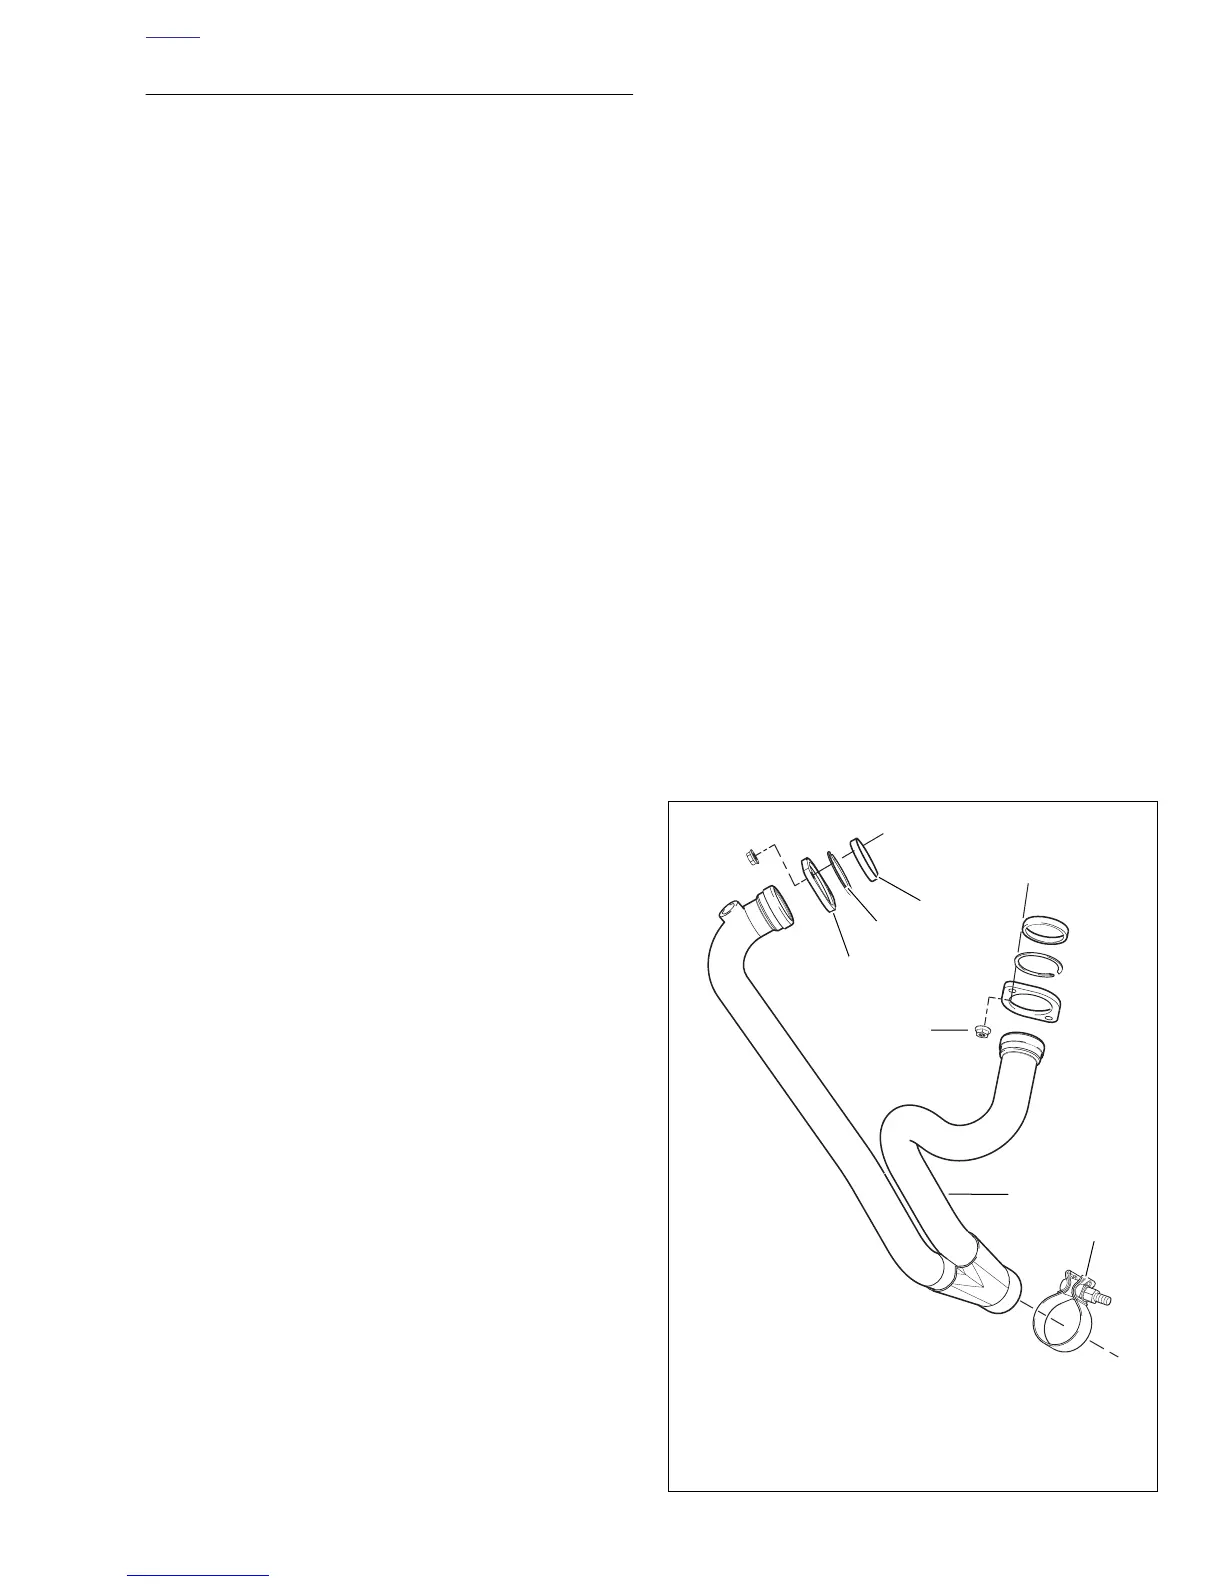
1. See Figure 2-115. Install exhaust ring (4), retaining ring
(5) and new port gasket (6).
2. Install exhaust header (2). Tighten mounting fasteners
(3) to 72-96 in-lbs (8-11 Nm).
NOTE
Tighten header nuts gradually, alternating between studs to
insure that exhaust rings are flush with engine.
3. Install oxygen sensor. See 4.33 OXYGEN SENSOR.
4. Rotate engine up. See 3.3 ENGINE ROTATION FOR
SERVICE.
Rear Muffler Bracket
1. See Figure 2-114. Slide rear muffler bracket (10) over oil
line.
2. Apply LOCTITE 271 (red) to rear muffler bracket fasten-
ers (11), install and tighten to 32-36 ft-lbs (43-49 Nm).
3. Install oil line to swingarm. See 3.9 OIL HOSE ROUTING
AND OIL RESERVOIR and 3.10 OIL LINE FITTINGS.
4. Fill swingarm/oil tank with 2.5 quarts (3.3 liters) oil. See
Draining Oil in 1.5 ENGINE LUBRICATION SYSTEM.
5. Install muffler.
Front Muffler Mount
1. See Figure 2-114. Install front muffler mount bushings
(8).
2. Install new strap on front muffler mount (6).
3. Install front fastener (7) loosely. Do not tighten.
4. Install muffler.
Muffler and Straps
NOTES
Torca muffler clamps have eliminated the need for silicone or
graphite tape during assembly. To ensure sealing integrity of
muffler clamps and prevent the possibility of leakage, Buell
recommends that muffler clamp assemblies be discarded and
replaced each time they are removed.
1. Install muffler and new Torca clamp onto header.
NOTE
If necessary, use a fiber hammer to fit muffler on header.
2. Install interactive exhaust cable to muffler.
3. See Figure 2-114. Loosely install new front and rear
muffler straps (2, 4).
NOTES
● Never re-use front muffler strap. Always replace front
muffler strap with a new strap when removed from sys-
tem.
● It is important that the front muffler mount is tightened
last in order to ensure proper alignment of the exhaust
system.
● When rear muffler straps have been installed, it is impor-
tant that strap fasteners do not contact idler pulley
bracket.
● On the front muffler mount fastener, torque is applied to
the head and not to the nut.
4. Tighten front strap fastener and alternately tighten rear
muffler strap fasteners evenly till fasteners are tightened
to:
a. Front: Tighten around the muffler until snug.
b. Rear: 48-60 in-lbs (5-7 Nm).
c. Front muffler mount: 16-18 ft-lbs (21.7-24.4 Nm).
d. Front: 108-120 in-lbs (12-14 Nm). Back off fastener
two full turns and then retighten to 108-120 in-lbs
(12-14 Nm).
5. See Figure 2-115. Tighten the Torca clamp (1) to 28-
30 ft-lbs (38-40.6 Nm).
6. Tighten the front muffler mount to 16-18 ft-lbs (20.3-24.4
Nm).
7. Install idler pulley. See 6.6 DRIVE BELT SYSTEM.
8. Install front sprocket cover. See 2.34 SPROCKET
COVER.
9. Install chin fairing. See 2.37 CHIN FAIRING.
10. Adjust interactive exhaust cable. See 1.16 INTERAC-
TIVE EXHAUST CABLE.
Figure 2-115. Exhaust Header
b0973a2x
1
1. Torca clamp
2. Header
3. Header mount fastener
4. Exhaust ring
5. Exhaust retaining ring
6. Exhaust port gasket
2
4
5
6
3
 Loading...


