44 Chapter 4 Scanner Interface Overview
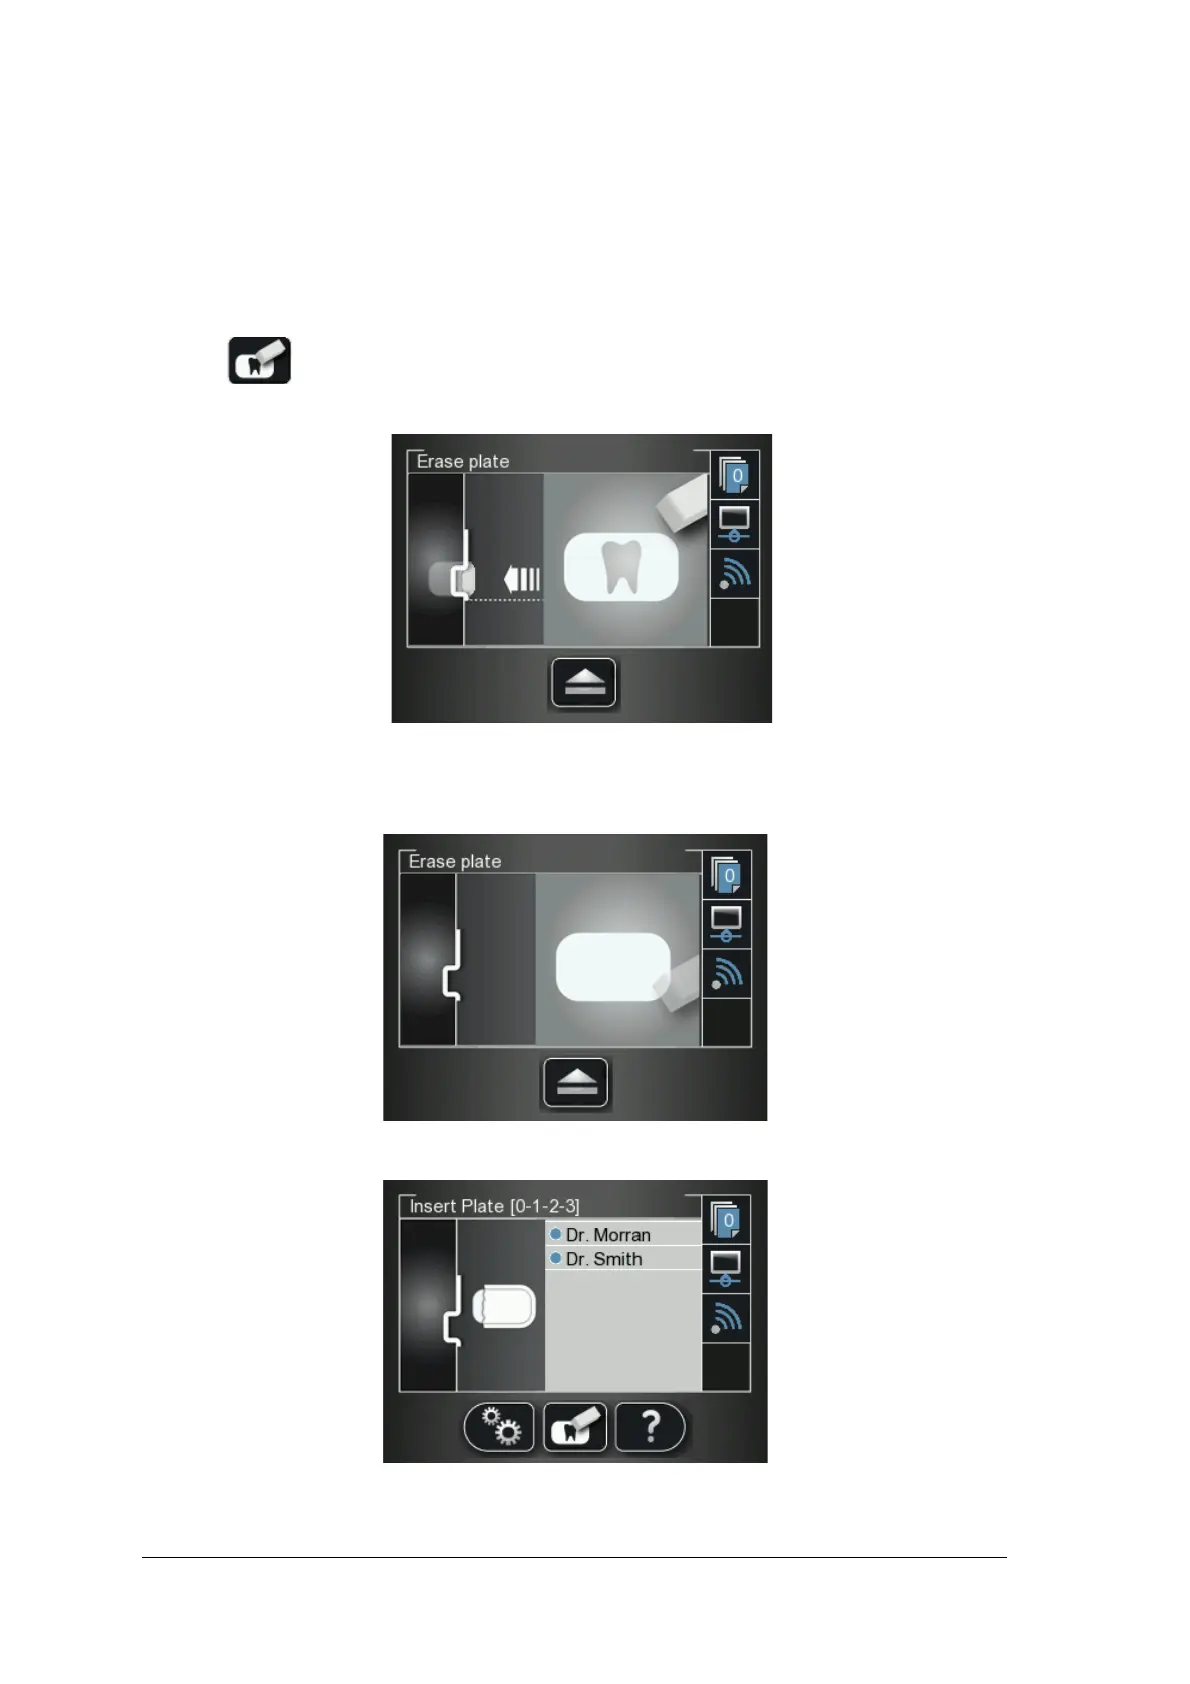
Erasing the Imaging Plates
The imaging plates are automatically erased and ejected after they are scanned. If the imaging plate is
exposed to light for an extended period of time (one week or more) or to strong light for even a short amount
of time, the plate will need to be manually erased before use.
To erase the imaging plate manually, follow these steps:
1 Press the scanner’s middle function button
2 The LCD displays the Erase plate screen:
3 Insert the imaging plate into the scanner’s insertion slot without the hygienic sheath (for information on
how to insert the imaging plate, See “Inserting the Imaging Plate” on page 53).
The Erase plate screen is displayed.
The erased imaging plate is ejected to the tray and the scanner reverts to the Insert Plate screen.
4 Collect the imaging plate while taking care to maintain hygienic protocol and minimal exposure to light.