60 Chapter 5 Acquiring Images
Storing the Images
Image management (storage and retrieval) is performed through the Imaging Software. See your Dental
Imaging Software documentation.
Clearing Scanner Memory
When the CS 7600 image Acquisition interface is open at the designated workstation, the scanned imaging
plate image is automatically routed to the correct exam acquisition.
If the CS 7600 image Acquisition interface is closed, the scanned imaging plate image is stored in the
scanner’s memory. The scanner’s storage capacity is 25 images.
To clear the scanner’s memory, See “Clearing Scanner Memory” on page 37.
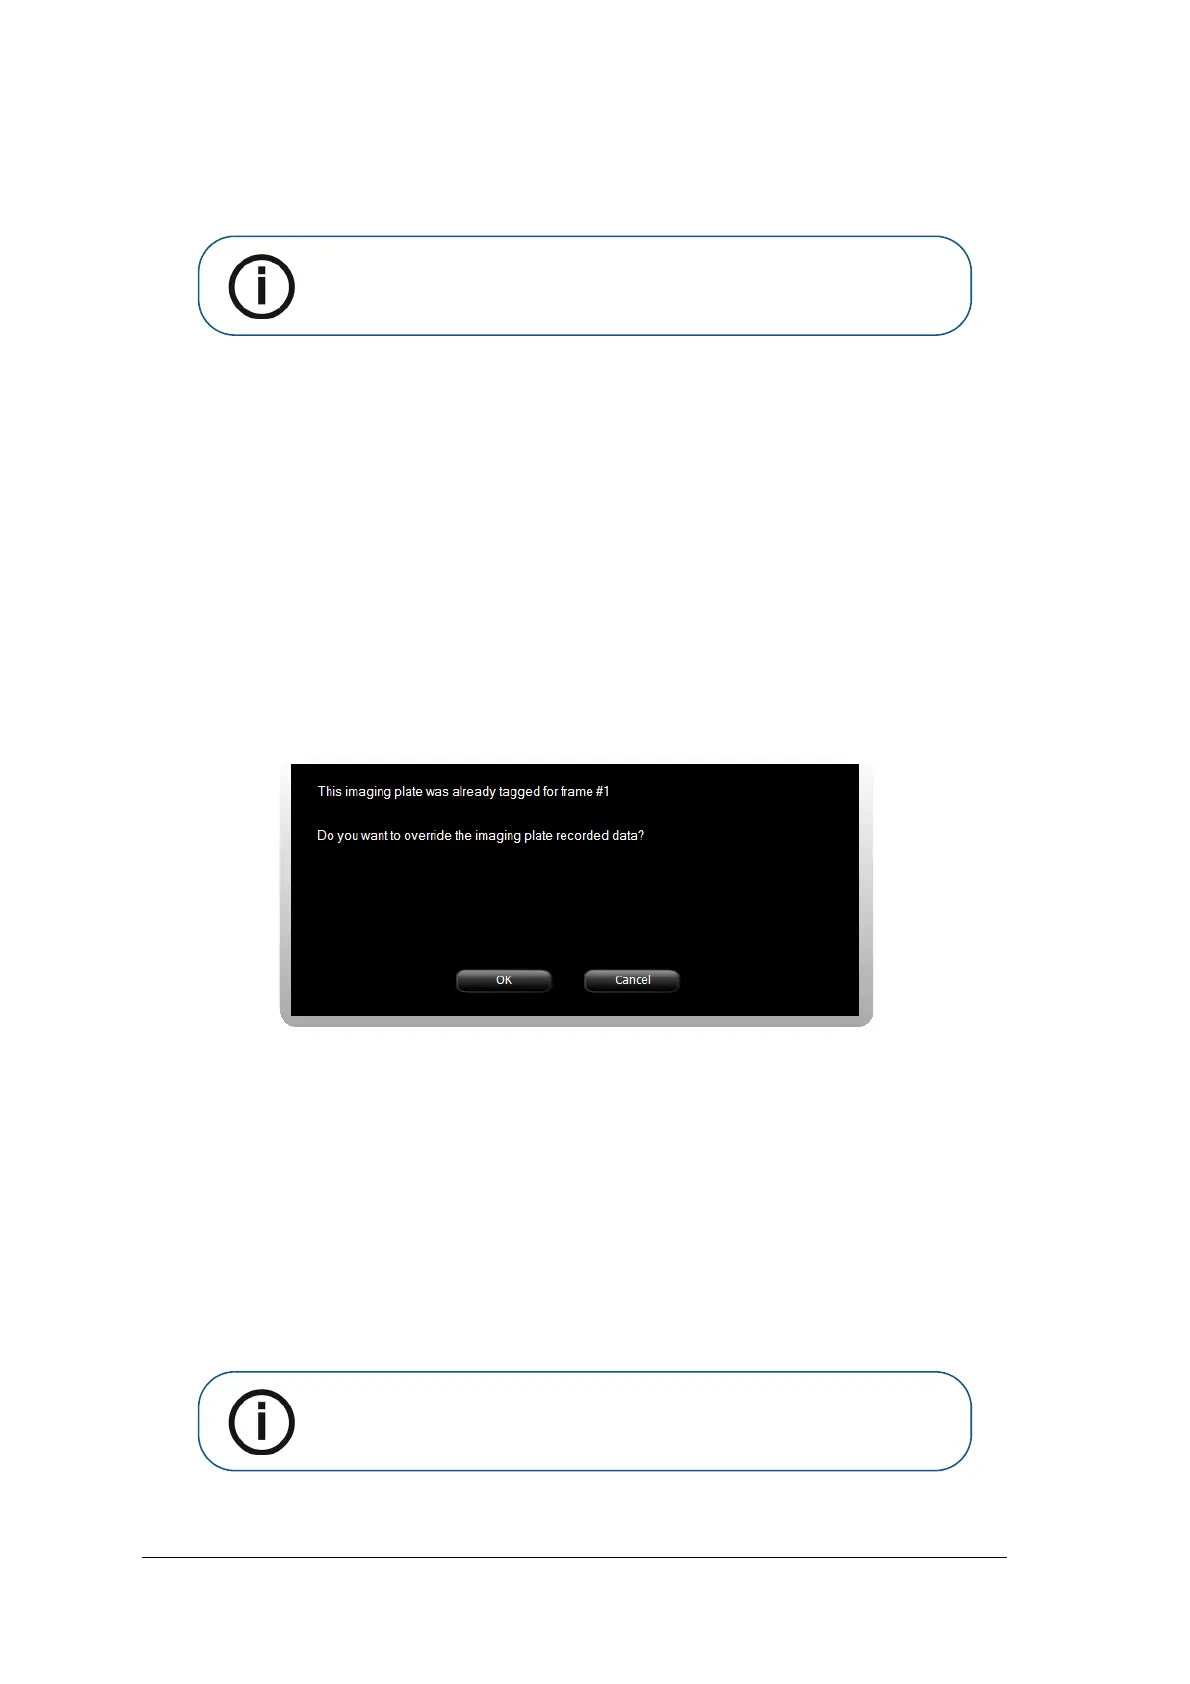
Re-tagging imaging plates
To tag an imaging plate that was already recorded with exam acquisition information (re-tagging), follow
these steps:
1 Place the imaging plate upon the Scan & Go device. The following prompt is displayed.
2 Click OK to re-tag this imaging plate.
The imaging plate is tagged with the current exam acquisition and the current active frame information.
If you do not want to re-tag the imaging plate, either remove the imaging plate from the Scan & Go
surface or click Cancel in the overwrite prompt. The current tagged data as displayed in this prompt
remains unchanged.
3 Wait until the exam acquisition information tagging is completed as indicated by an audible beep,
successive short flashes of the blue LED and a change of color in the frame border and
number.
Erasing the Imaging Plates
The imaging plates are automatically erased and ejected after their information is scanned. Exposure to light
and so forth, requires erasing manually the imaging plates before use. To erase the imaging plate manually,
See “Erasing the Imaging Plates” on page 44.
Note: For information on more image Acquisition interface related
procedures, See “Working with the Image Acquisition Interface” on page 22
Note: Erasing the imaging plate manually does not erase the recorded exam
acquisition information.