58 Chapter 5 Acquiring Images
Retrieving a Fallen Imaging Plate
To retrieve a fallen imaging plate, follow these steps:
1 Turn off the scanner and disconnect the scanner from the mains power source.
2 Disconnect the scanner from the network.
3 Unscrew the crosshead screw which is holding the rear service cover.
4 Open the rear service cover, and put it to one side.
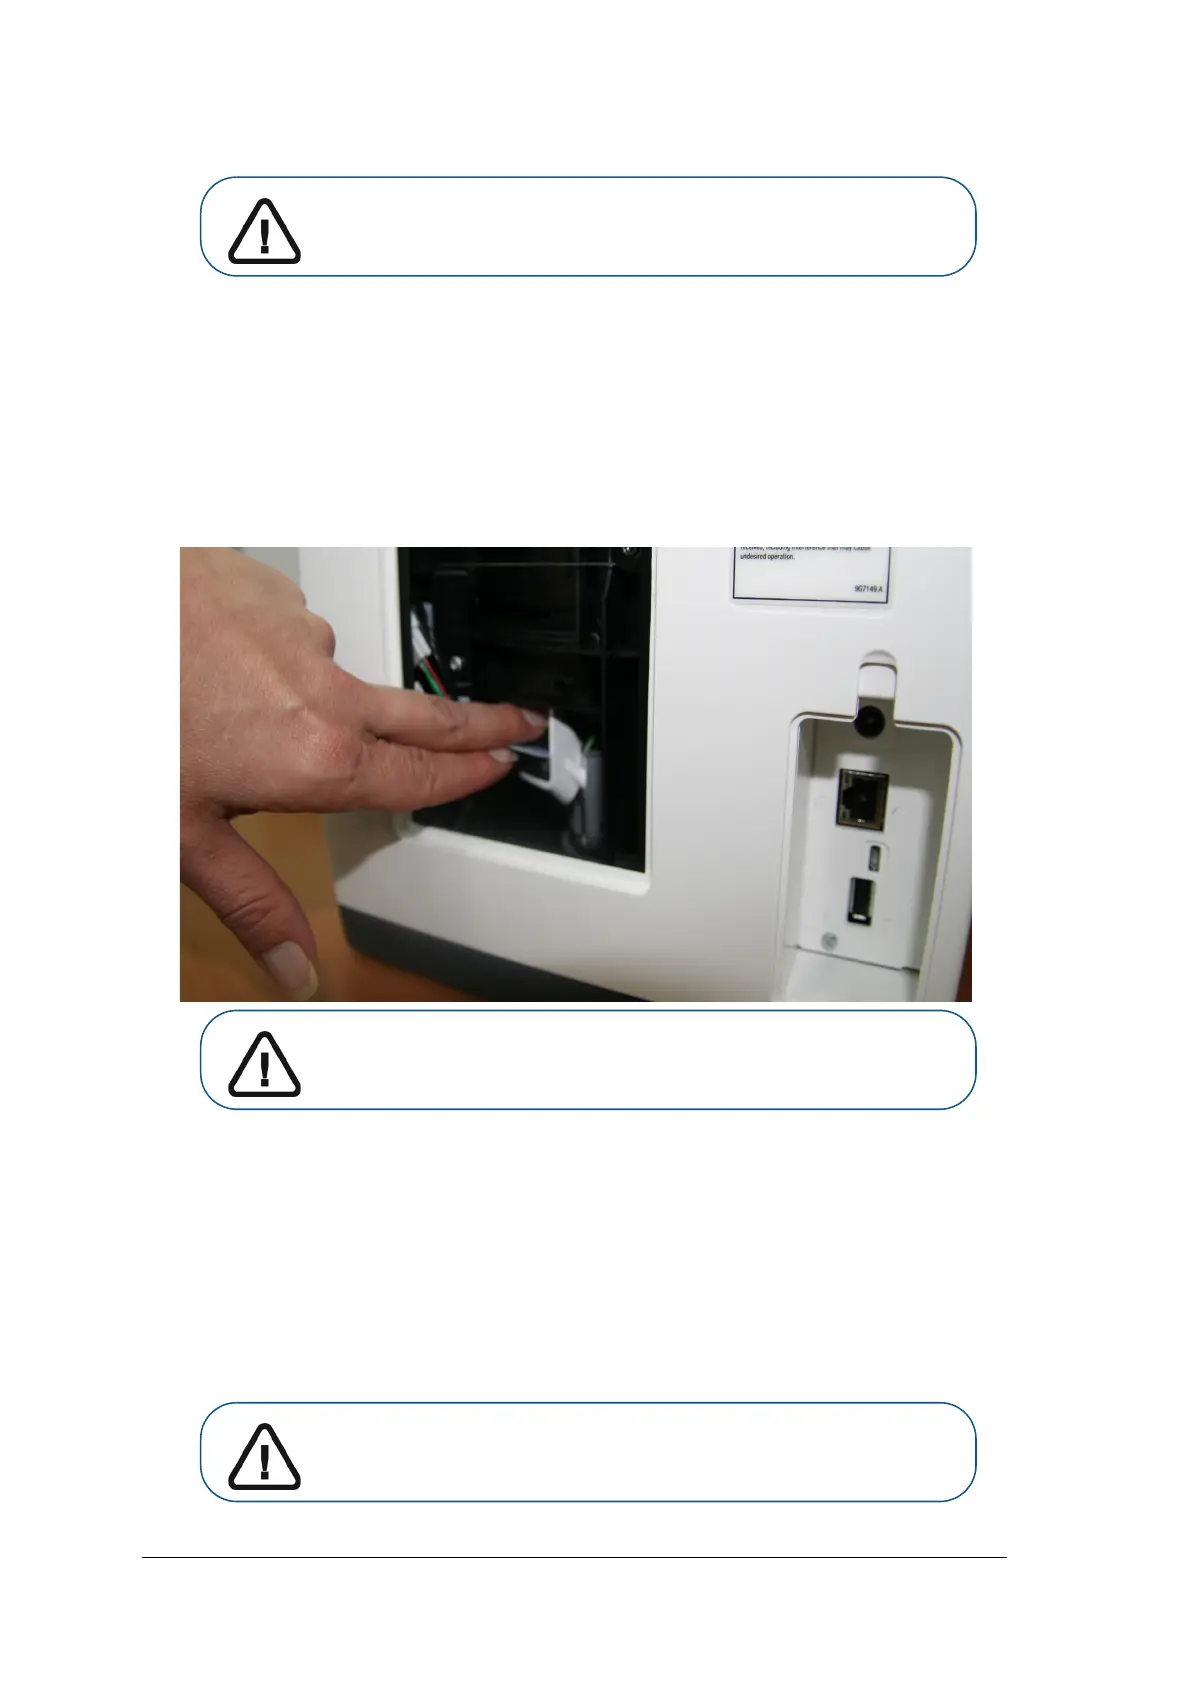
5 Gently insert your hand and remove the fallen plate, as shown in picture below.
.
6 After the imaging plate has been removed, replace the rear service cover and reinstall the crosshead
screw firmly so that there is no possibility of light penetration.
7 Connect the scanner to the mains power supply.
8 Reconnect the scanner to the network.
9 Replace the cover over the network and power sockets.
10 Turn on the scanner.
11 Wait for the Insert Plate message.
The scanner is ready for use.
Important: Do not insert any tools into the scanner. If any tool is inserted
into the scanner all warranties are null and void.
Important: If the plate is not in the location shown in the above picture, do
not continue to look for the plate. Please call service.
Important: In case Error 41 appears, check that the rear service cover is
closed properly.