27-13
Cisco ASA 5500 Series Configuration Guide using ASDM
OL-20339-01
Chapter 27 Configuring Network Object NAT
Configuring Network Object NAT
Be sure to also configure a service on the Advanced NAT Settings dialog box (see Step 7). (You
cannot specify an interface in transparent mode).
• Click the browse button , and choose an existing address from the Browse Translated Addr dialog
box. You can also create a new named object from the Browse Translated Addr dialog box and use
this object as the mapped address.
Figure 27-19 Browse Dialog Box
See the “Guidelines and Limitations” section on page 27-2 for information about disallowed mapped IP
addresses.
Typically, you configure the same number of mapped addresses as real addresses for a one-to-one
mapping. You can, however, have a mismatched number of addresses. For more information, see the
“Static NAT” section on page 26-3.
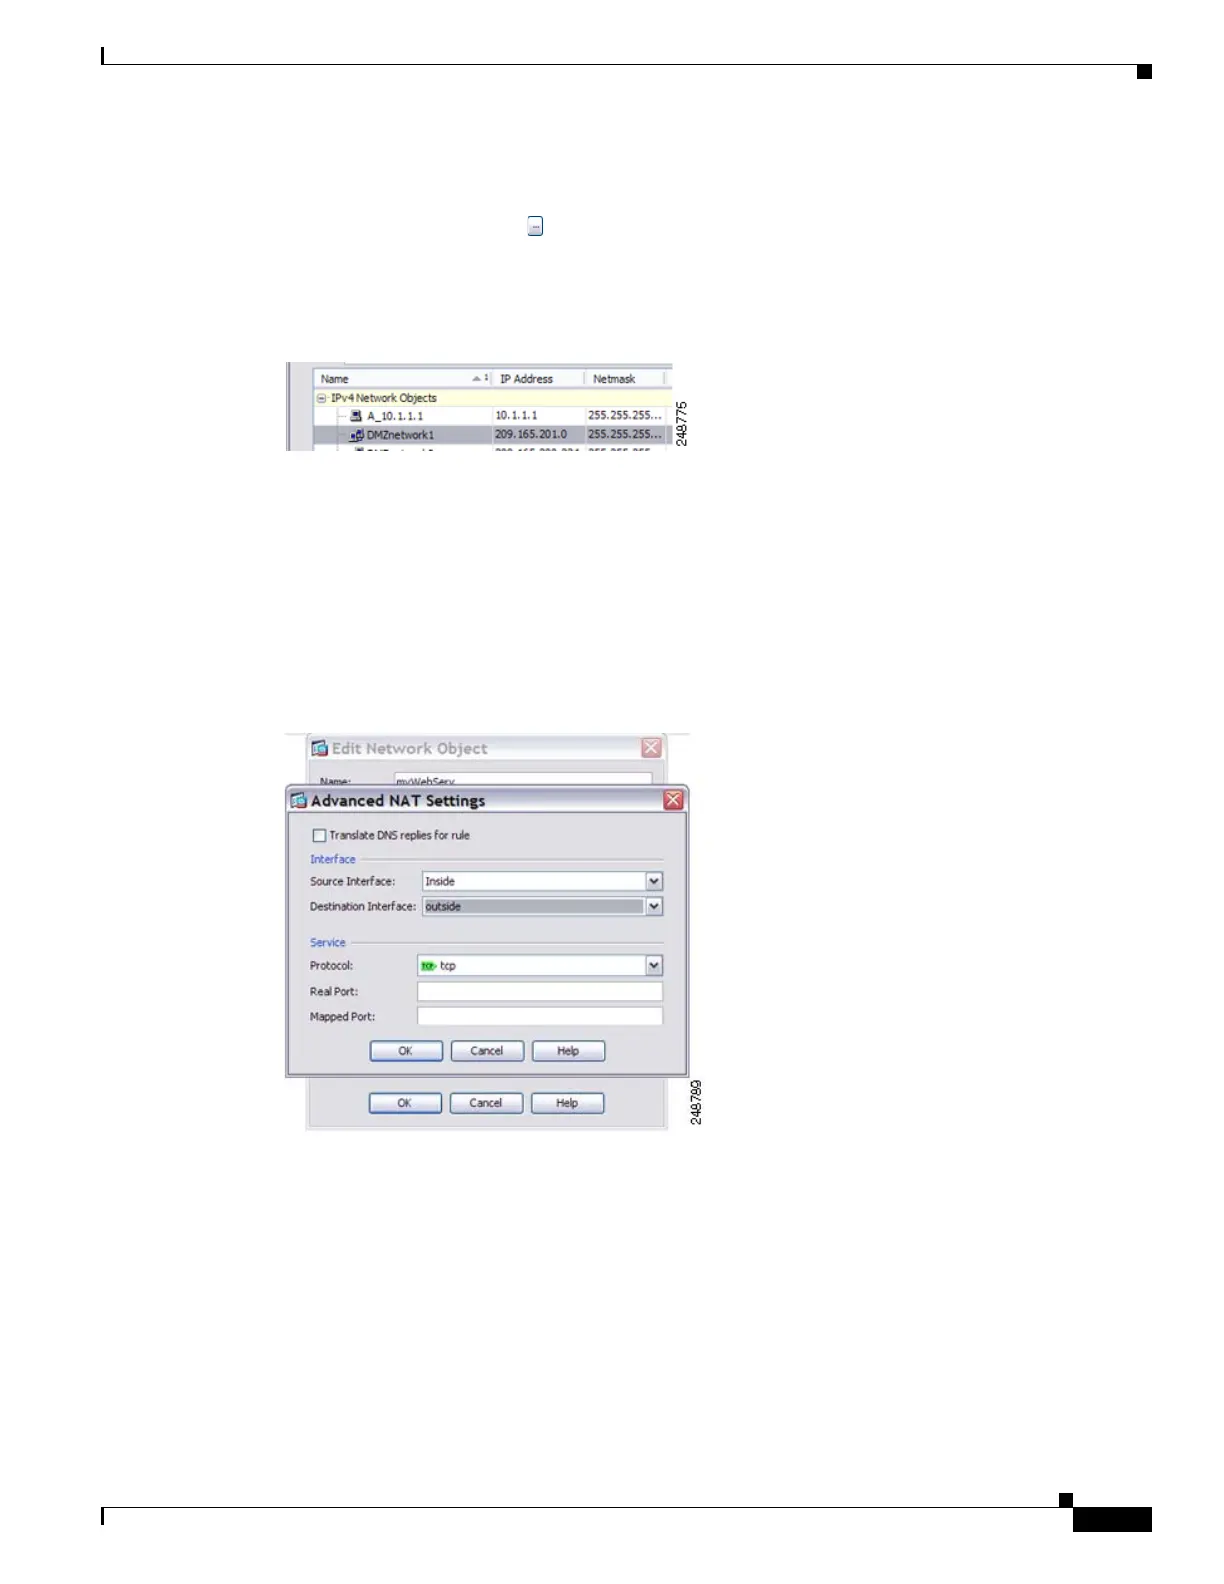
Step 7 (Optional) Click Advanced, and configure the following options in the Advanced NAT Settings dialog
box. When you are finished, click OK.
Figure 27-20 Configuring Advanced NAT Settings
•
To translate the IP address in DNS replies, check the Translate DNS replies for rule check box.
Be sure DNS inspection is enabled (it is enabled by default). See the “DNS and NAT” section on
page 26-21 for more information. This option is not available if you also translate TCP or UDP ports
(static NAT with port translation).
• To specify the real and/or mapped interfaces where this NAT rule should apply, under Interface,
choose the source and destination interfaces.
By default, the rule applies to all interfaces.
• To configure static NAT with port translation, under Service, choose the protocol type from the
Protocol drop-down list (tcp or udp), and then type values for the Original Port and Translated Port.

 Loading...


