Confi guri ng the N AS for Activ e Dire ct or y Aut henti c ation
Joining the NAS to Your Domain
Cisco Small Business NSS 322, NSS 324, and NSS 326 Smart Storage Administration Guide 170
4
STEP 5
In the Server field, enter the hostname or IP address of the NTP server.
Make sure the time difference between the NAS and the domain controller is less
than five minutes. If time differenc e is grea ter than five minute s , Kerb eros
Authentication fails and you cannot join the domain. To avoid this possibility, we
recommend you use the domain controller as the NTP server.
STEP 6
To save your settings, click
Apply
.
Configuring DNS Settings
To configure DNS settings for your NAS, follow these steps.
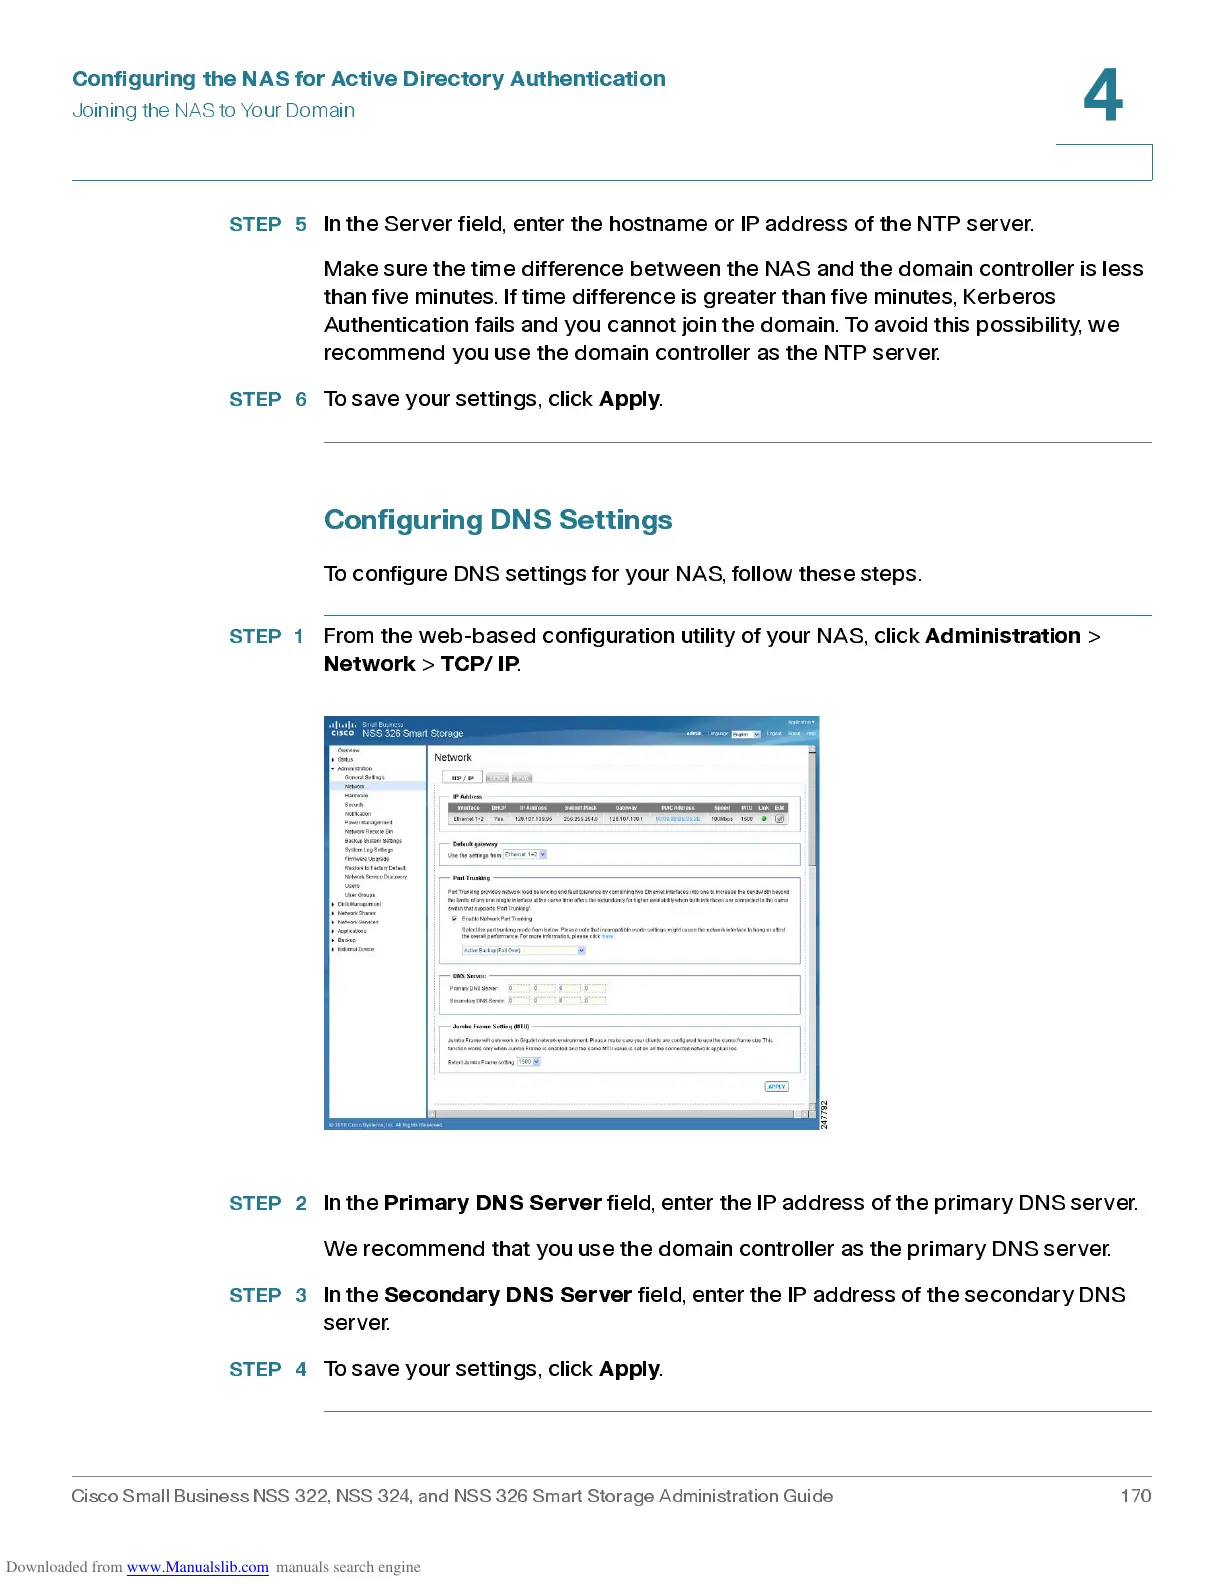
STEP 1
From the web-based configuration utility of your NAS, click
Administration
>
Network
>
TCP/ IP
.
STEP 2
In the
Primary DNS S erv er
field, enter the IP address of the primary DNS server.
We recommend that you use the domain controller as the primary DNS server.
STEP 3
In the
Se c ond ary DNS S erver
field, enter the IP address of the secondary DNS
server.
STEP 4
To save your settings, click
Apply
.