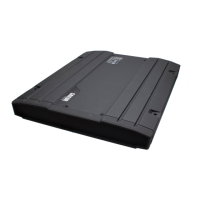
Installation of the GMU
99-145912-A Chapter 3: Installation 3-25
3.5 Installation of the GMU
The following sections describe the installation and how to ground the
GMU.
3.5.1 To install the GMU
To install the GMU, do as follows:
1. Slide the GMU into a 1U space in a 19” rack, preferably directly
below or above the ACU.
2. Mount the screws in each side through the holes in the front and
fasten the screws to the rack. Make sure that the unit is mounted
securely according to the requirements for your 19” rack.
For information about the power cable see Power and startup on
page 5-1.
3.5.2 To ground the GMU
1. Make sure that the grounding requirements are met. See the
appendix Ground and RF protection on page B-1 for details about
grounding.
3.5.3 Provisioning key and terminal type
You need the Terminal Provisioning Key (TPK) and the Terminal Type
(for example TNT-MAR-SCM-1000300) to activate the GMU during
commissioning with Inmarsat or other GX service providers. The TPK is
printed on the box label and the type label of the GMU. The TPK is
unique for each Core Module (GMU). The terminal type describes the
terminal and the manufacturer.
Figure 3-23: Ground stud, GMU
Figure 3-24: Provisioning key and terminal type (example)
Thrane & Thrane A/S, Denmark
Model: TT–7023A
Prod.:YYYY/WW
Rev.: X.XX
P/N 407023A-T19
SAILOR GX Modem Unit
Terminal Type: TNT-MAR-SCM-1000300
S/N: xxxxxxxxxx
Provisioning Key: CQACJAIFGYQ54===
Compass Safe Distance: 0.4m

 Loading...