USING THE WIZARD
USING THE WIZARD
ENVOY™ TRANSCEIVER GETTING STARTED GUIDE 21
Setting the types of connections between modules
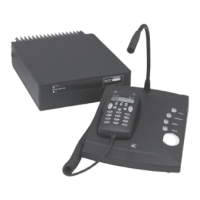
NOTE: This step in the wizard is shown if your control point is a
desk console, or a Mk 2 handset connected via an Envoy
SmartLink.
The types of cables used to connect the modules in your system affect
whether or not the control point can power down and power up the RFU.
NOTE: For detailed connection diagrams, please see the
Reference Manual.
To set the types of connections:
1 Do one of the following:
• If at least one connection between the control point and
the RFU uses an Ethernet cable, press (Yes), then
continue from
Adding a channel on page 21.
• If all connections between the control point and the RFU
use Codan control cables, press (No), then continue
from Adding a channel on page 21.
Adding a channel
NOTE: This step in the wizard is shown if you are permitted to
add channels.
To add a channel:
1 Press (Yes) to add a channel, if required.
1 Enter the name that you want to use for the channel.
1 Press to move to the Tx entry.
1 Enter the transmit frequency that you want to use for this channel
(in kHz, with up to three decimal points or 1 Hz resolution).
1 Press to move to the Rx entry.
The Rx entry is automatically filled with the transmit frequency.